Physical Exam
Lab Summary
Learn about physical examination and surface anatomy. This introductory lab teaches the language of medicine, the three main planes that divide the body, physical examination and the palpable features of the skeleton.
Lab Objectives
- Learn the language of medicine.
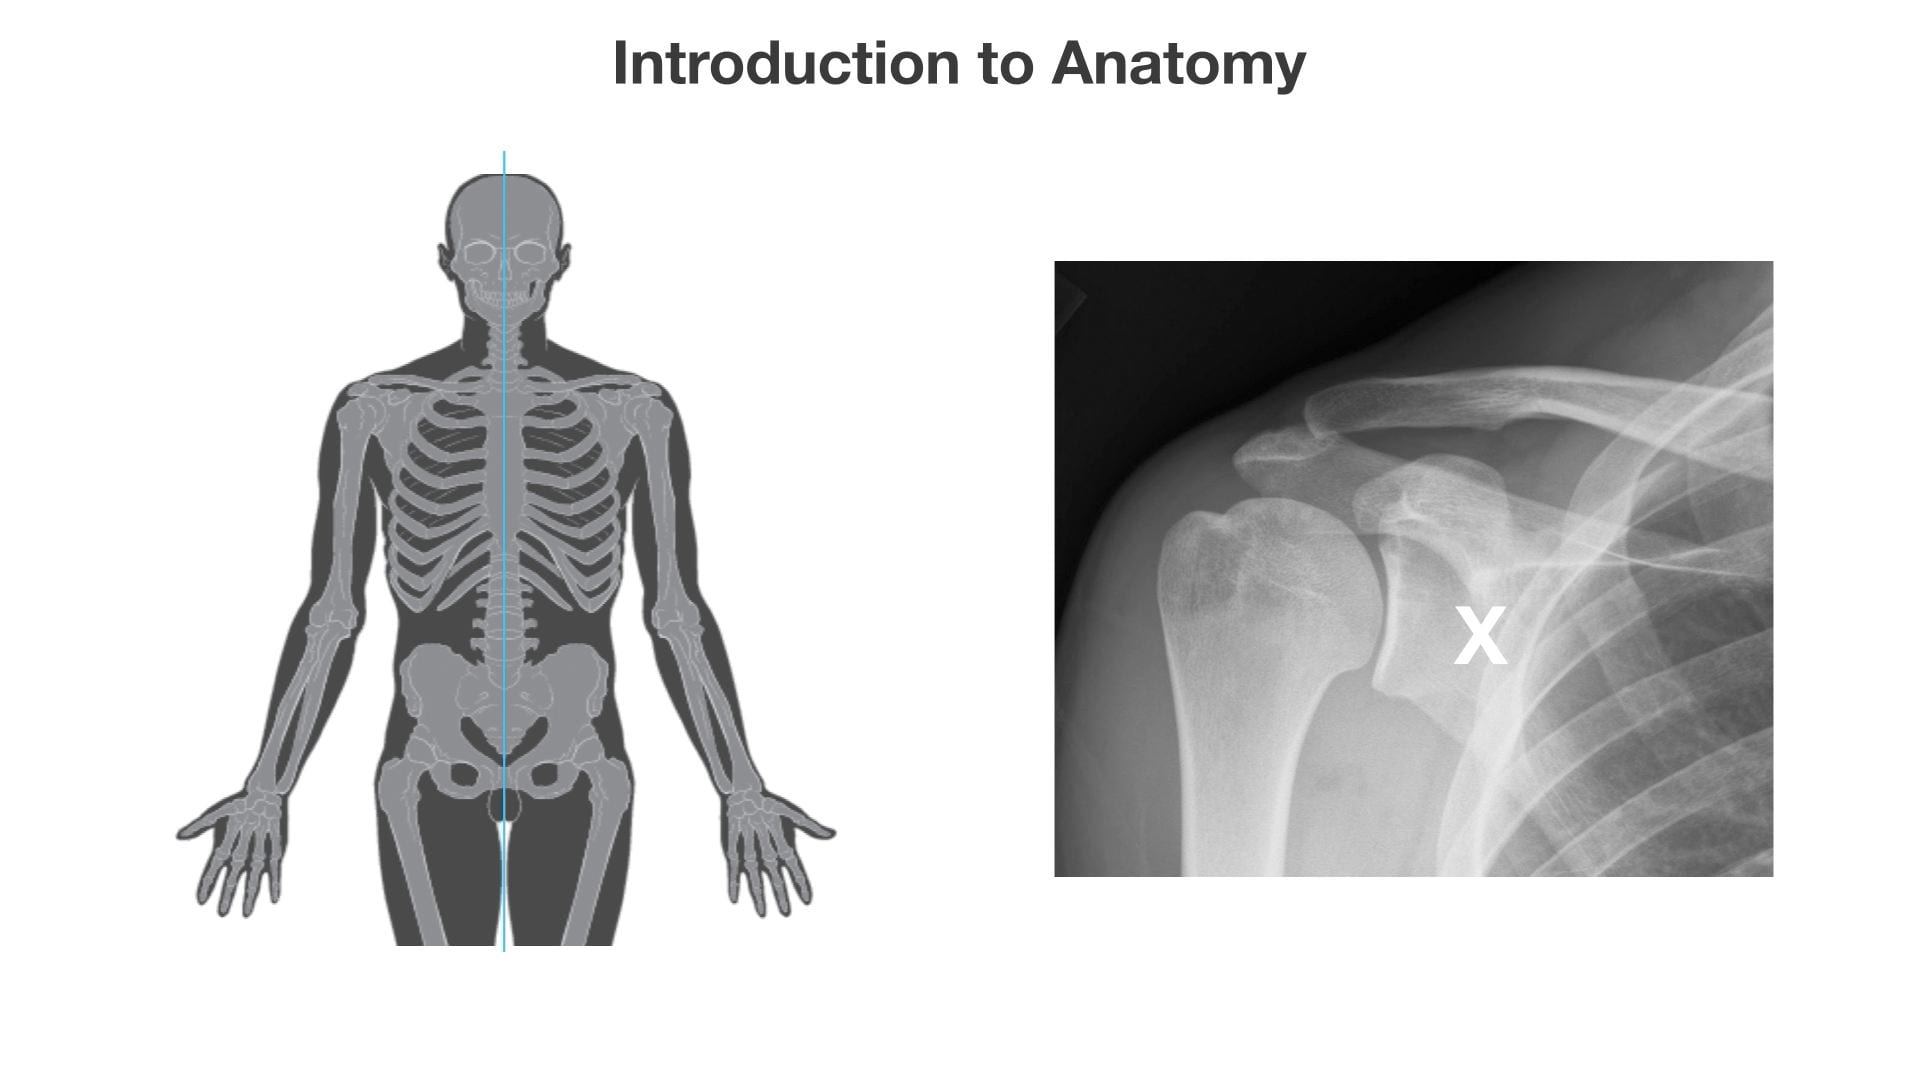
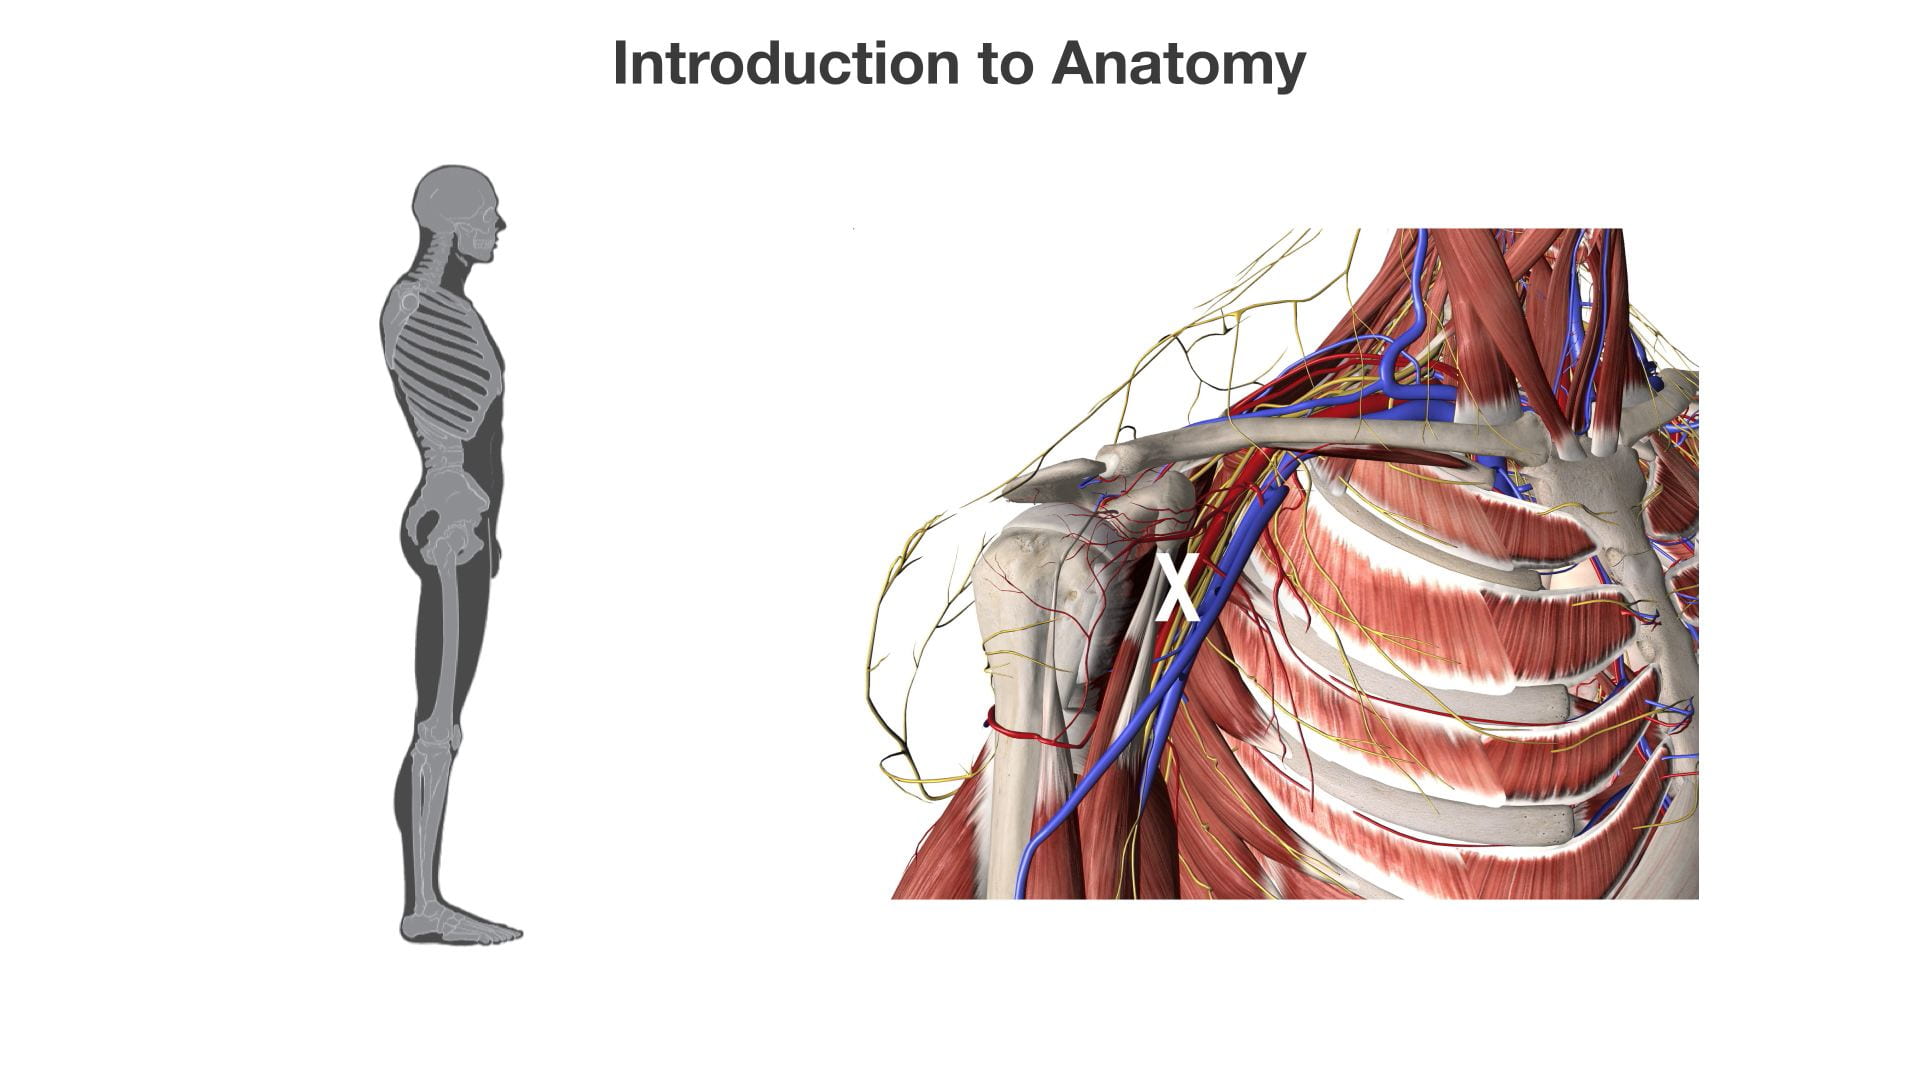
- Reason in three dimensions.
- Name the three main planes that divide the body.
- Use the anatomy of the body wall to guide physical examination.
- Use palpable features of the skeleton as landmarks to find other structures.
- Identify features of the vascular system that are palpable or can be auscultated. Relate auscultation points to palpable, skeletal features.
Lecture List
Drawing Surface Anatomy, Abdominal Surface Anatomy, Chest Surface Anatomy, Neck Surface Anatomy
Introduction to Anatomy
Introduction to Anatomy Gallery
Surface Anatomy
Printout Download
Throughout this lab you will be guided through physical examination and directed to label a donor body.
If a donor is unavailable, follow along by locating anatomy on yourself or a partner. Download this printout and label as instructed.

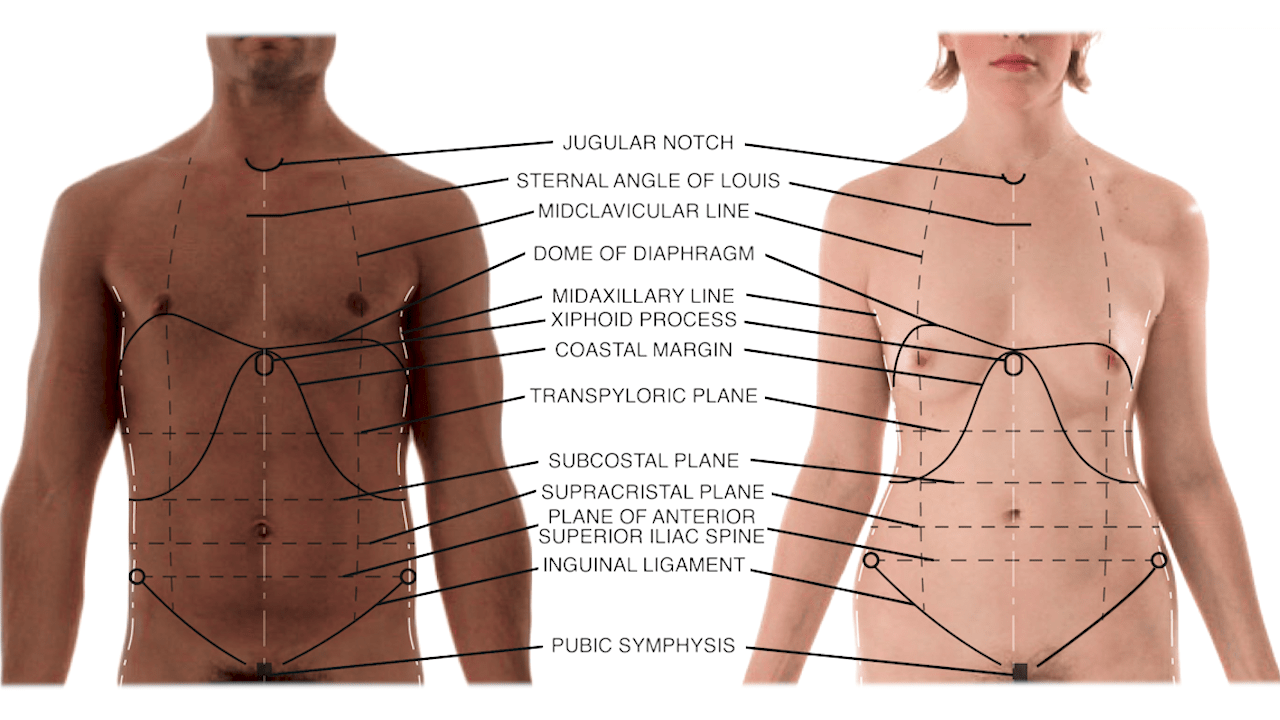
Suprasternal Notch
Insert your finger into the notch at the upper end of the sternum on yourself and on your donor.
Question 1: Which bones lie lateral and inferior to your finger?
Manubrium of sternum and clavicles.
Question 2: What vertebral level corresponds to the notch? Why is it lower than T1?
T2 to T3. The ribs angle inferiorly as they pass around the chest wall.
Draw a “U” over the position of the suprasternal notch.

Sternal Angle of Louis
From the notch, slide your fingers down the manubrium (~5cm) until it encounters a transverse ridge. This is the sternal angle of Louis, where the manubrium of the sternum meets the body of the sternum.
Question 3: Which rib articulates here?
2nd rib.
Question 4: What vertebral level corresponds to the sternal angle? Why?
T5 to T6 because of the inferior course of the ribs.
Draw a line the width of the sternum at the sternal angle of Louis.

Xiphoid Process
Slide your finger to the inferior extent of the sternum, and palpate the xiphoid process. The xiphoid process often points inward and may be difficult to palpate. Do this on yourself and your donor.
Draw an ellipse around the xiphoid process.
The costal margin is the inferior border of the rib cage.
Question 5: The costal cartilages of which ribs contribute to the inferior border of the rib cage? Look at a skeleton.
7th to 10th ribs.
Draw a line along the costal margin from the xiphoid to the midaxillary line.

Axial Planes
Transpyloric Planes
Draw a line halfway between xiphoid process and umbilicus.
The pylorus is at the junction between the stomach and the duodenum (the first segment of the intestines) and is at the L1 vertebral level.
Planes Related to the Iliac Crests
Palpate iliac crests from anterior spine as far posteriorly as you can. Mark iliac crest with a solid line. Draw a dashed line between the most superior aspects of iliac crest. This is the plane of iliac crests (supracristal plane).
This plane crosses the L4/L5 disc posteriorly.
Spinal taps and epidural anesthesia procedures are ordinarily performed in the midline at this level posteriorly.
Locate this plane on a skeleton.
Transumbilical Plane
Draw a dashed line at the level of the umbilicus. This is the transumbilical plane.
Together with the midline, the transumbilical plane divides the abdomen into quadrants.
Inguinal Ligament
Draw a dashed line between anterior superior iliac spines. This line crosses the vertebral column slightly below L5.
Sagittal Planes
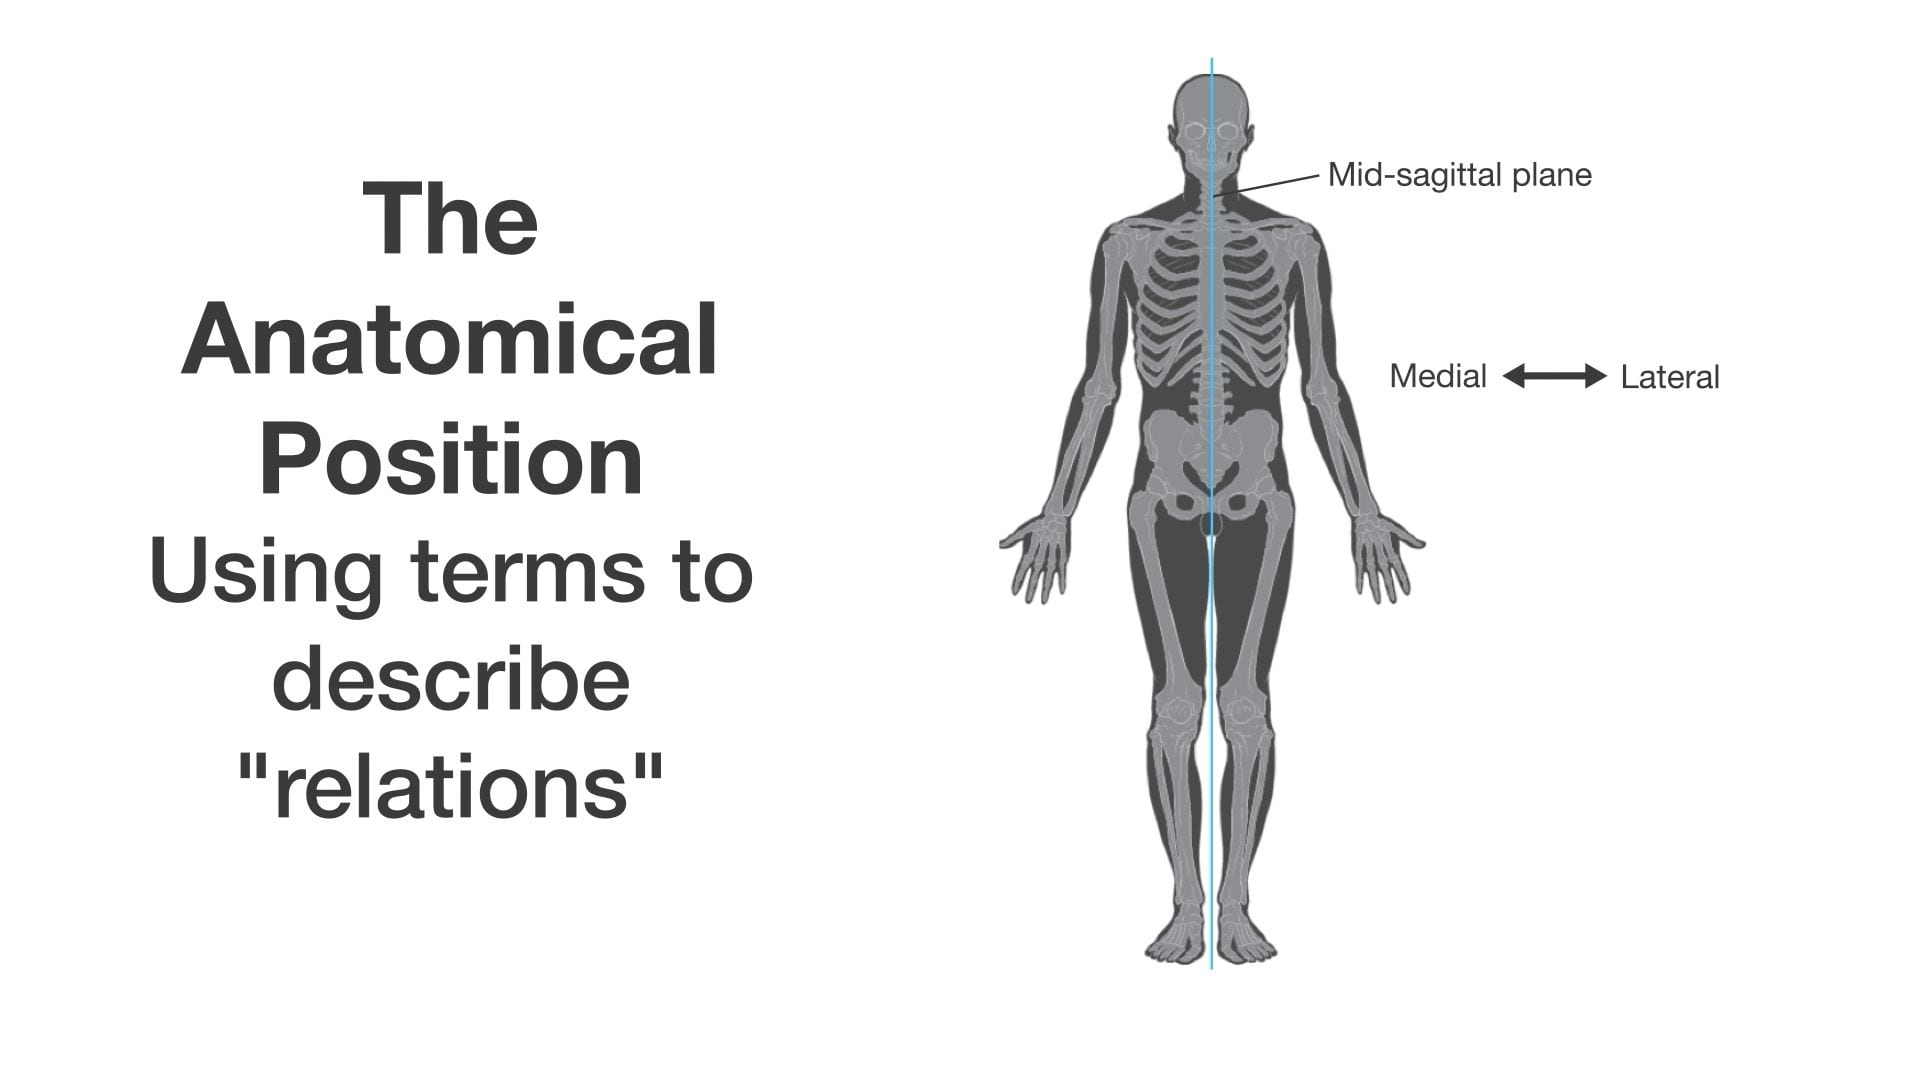
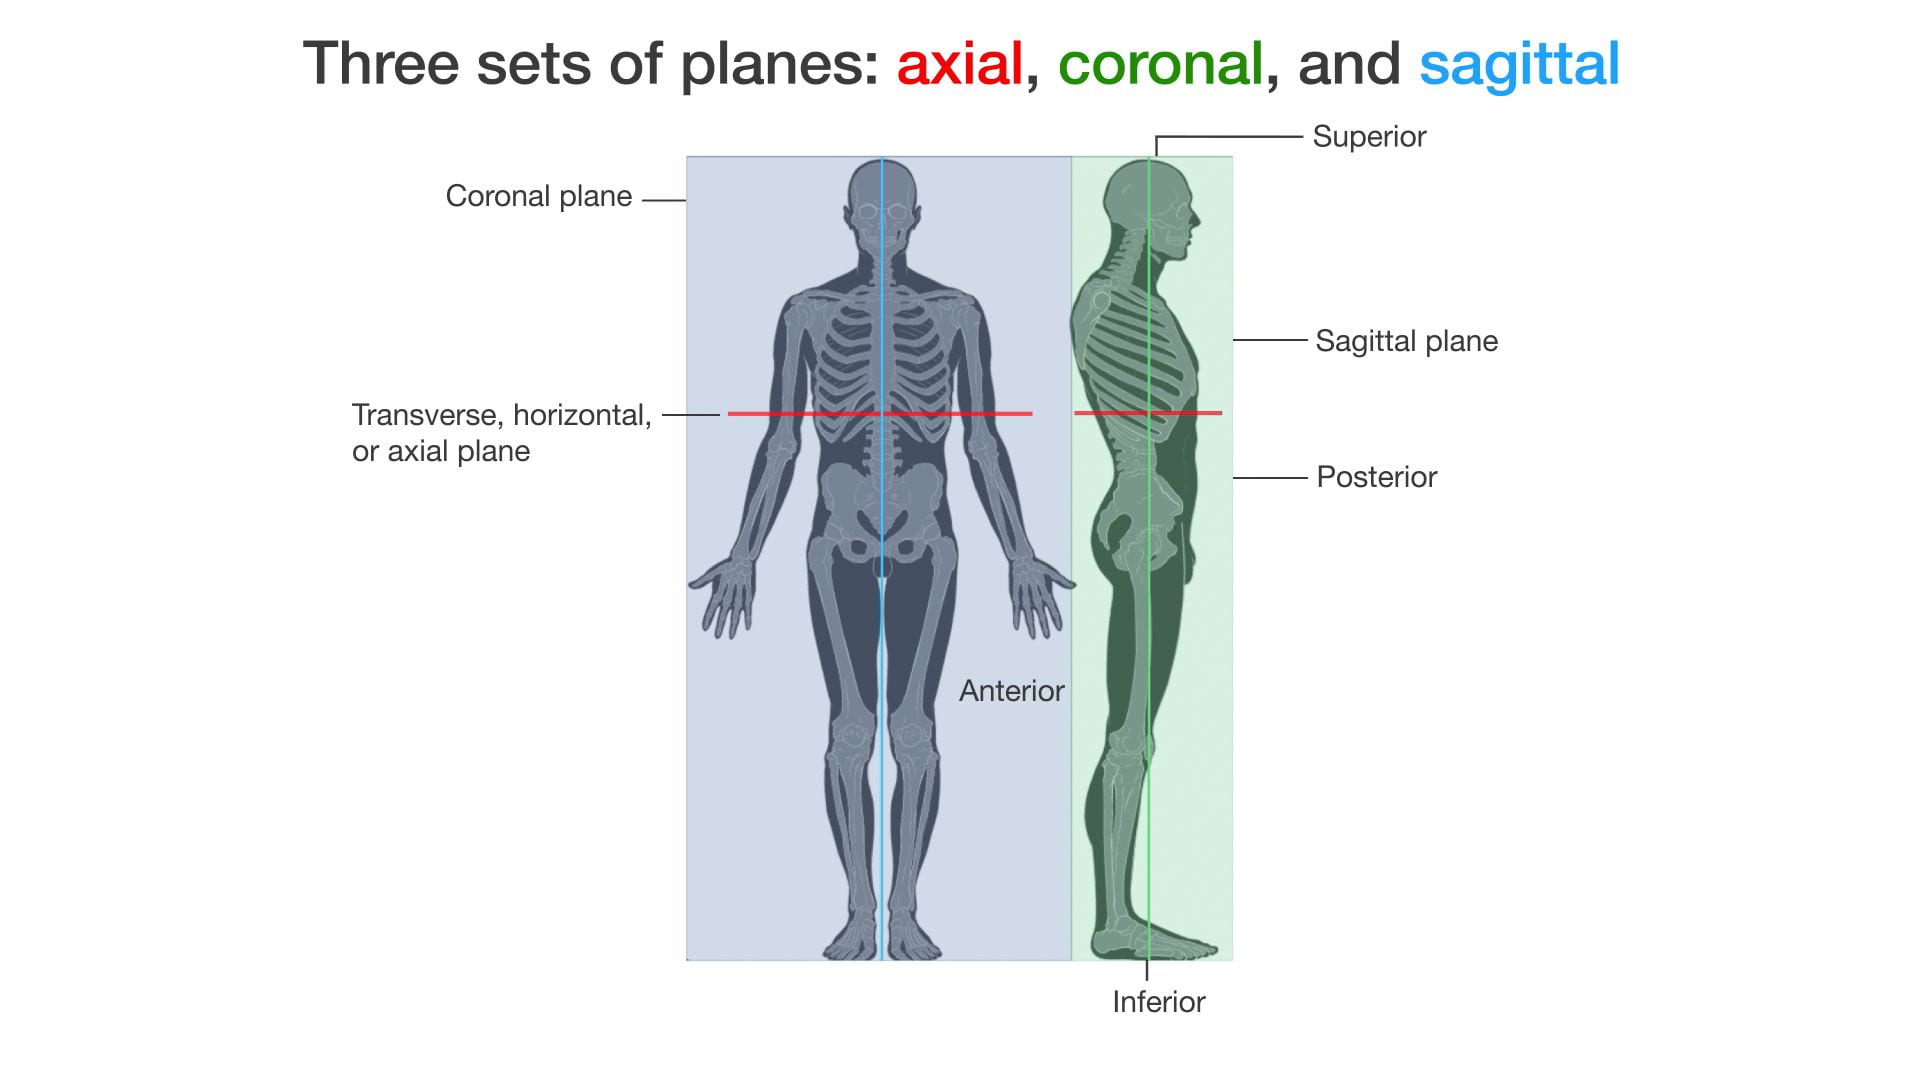
The midsagittal plane divides the body into left and right halves. The terms right and left always refers to the patient’s (or your donor’s) right or left. (This is easy to forget when you are looking at an imaging study or indicating a position on your donor.) Draw the midsagittal plane.
Parasagittal planes parallel the midsagittal plane. Draw a dashed line inferiorly from the mid point of each clavicle to the middle of the inguinal ligament. This is the midclavicular line. It will cross close to the nipples.
Question 6: The nipples overlie which rib or intercostal space?
Locate the sternal angle and the second rib. Count the ribs inferiorly to the level of the nipple. Note nipple position varies considerably between different individuals.
For most people, this is the 5th intercostal space.

Coronal (Frontal) Planes
Draw the midaxillary line.
Diaphragm
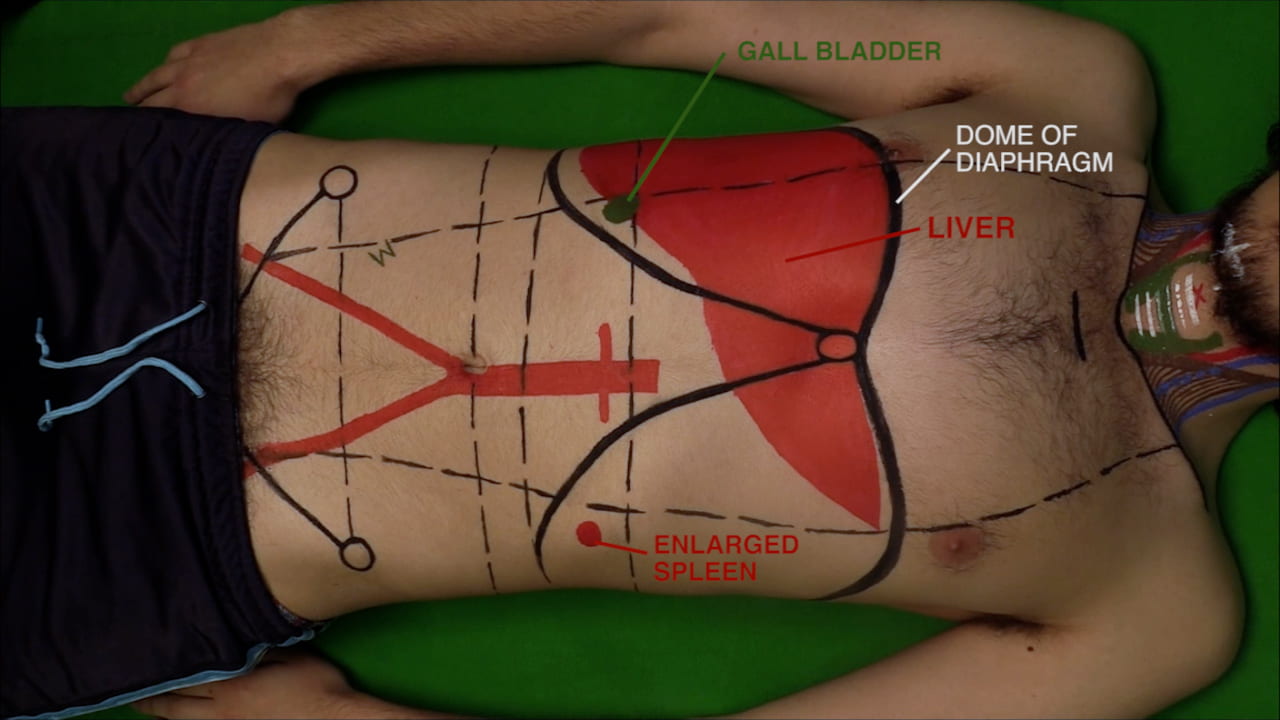
The diaphragm separates the trunk into thorax and abdomen. The diaphragm has two peaks. The right peak is generally superior to the left.
Question 7: Why is the right side generally higher?
The liver lies inferior to the right hemidiaphragm.
Draw the superior aspect of the diaphragm.
The two domes meet at the xiphisternal junction and peak at the midclavicular line.
On the right side it peaks just below the nipple. On the left it peaks 2-3 cm below the nipple.
The diaphragm meets the costal margin at the midaxillary line.
Abdomen Surface Anatomy
Liver
On the right side, paint in red the space between the diaphragm and costal margin. On the left side, draw a line from the peak of the left dome of the diaphragm to the intersection of the costal margin and the right midclavicular line.
An enlarged liver could be palpable inferior to the costal margin.

Abdominal Aorta
Draw the abdominal aorta to the left of midline from just superior to the transpyloric plane to just inferior to the umbilicus.
In a thin individual who is completely relaxed, the pulsating abdominal aorta may be palpated.
Aortic Bifurcation
Draw the common iliac arteries. At L4 the aorta bifurcates to form the common iliac arteries.
After giving off the internal iliac arteries, these vessels continue as the external iliac arteries. The external iliac arteries continue to the midpoint of the inguinal ligament and become the femoral arteries.
Using red paint, draw these vessels. Include the femoral arteries for 2-3 cm along the thigh.
The femoral artery in this region is a pulse point and location for vascular access.
Renal Arteries
Locate the transpyloric plane. This is the approximate location of the renal arteries. Draw a short segment of the left and right renal arteries.
Bruits can be heard along the course of the aorta, renal arteries and the iliac branches.
Question 8: What is a bruit?
Noise produced by turbulent flow through a stenotic vessel.

McBurney’s Point
Write an “M” 1/3rd the distance from the right anterior superior iliac spine to the umbilicus.
The appendix lies beneath this point in most individuals.
Question 9: The junction of which two segments of the gastrointestinal tract is also found here?
Ileum (small intestine) and ascending colon (large intestine).

Chest Surface Anatomy
Heart
Outline the heart.
The apex of the heart lies in the 5th or 6th intercostal space just medial to the left midclavicular line. Draw the left margin of the heart from this point to the left sternal border at the 3rd rib.
Draw the inferior border from the apex to 1 cm beyond the right margin of the sternum.
From this point draw a line superiorly parallel to the right margin of the sternum to the 3rd rib.
Connect the ends of the superior border.
The heart should be about the size of an individual’s fist.

Arch of the Aorta
Draw the arch of the aorta beginning at the superior border of the heart between the midline and the right margin of the sternum.
Curve it right to the border of the sternum. Then curve it left at the level of the manubrium.
End the aorta just to the left of the manubrium without drawing the descending aorta.

Bifurcation of the Trachea
The trachea bifurcates at the sternal angle.
Draw the trachea in the midline from the neck to the bifurcation at the sternal angle.
The right mainstem bronchus is more vertical and branches into 3 lobar bronchi. The left mainstem bronchus branches into 2 lobar bronchi.
Draw the mainstem bronchi.

Cardiac Valves and Auscultation Points
Draw an oblique line from the upper left border of the heart to the lower right border. Draw 4 circles along this line and label them from superior to inferior: pulmonary (P), aortic (A), mitral (M) and tricuspid (T).
This marks the location of the valves, but not their auscultation points.
Use the symbol of a speaker to indicate the auscultation points:
- Aortic valve – 2nd intercostal space, right sternal border (between 2nd and 3rd rib)
- Pulmonary valve – 2nd intercostal space, left sternal border
- Tricuspid valve – 4th intercostal space, left sternal border
- Mitral valve – 5th intercostal space, left midclavicular line, apex of the heart
Auscultation points are determined by the direction of flow from the valve.
Erb’s point (E) – 3rd intercostal space, left sternal border. S1 and S2 equal.

Pleural Cavity
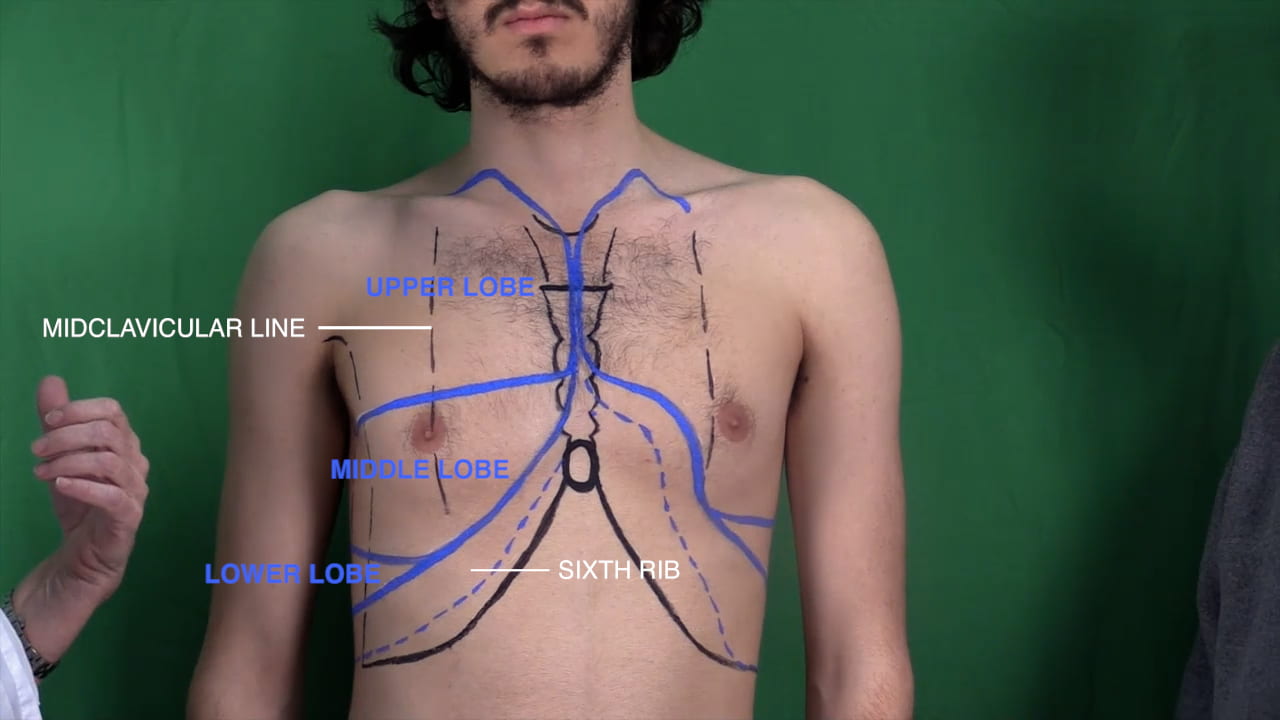
Use a dashed line to indicate the position of the pleural reflections (where pleura bends from body wall onto mediastinum and diaphragm).
Start at the sternoclavicular joint and extend the line along the borders of the sternum.
On the right, continue the line inferiorly to the 6th rib and then to the right to the 8th rib at the midclavicular line. Continue to the 10th rib at the midaxillary line.
On the left, extend the line inferiorly to the 4th rib. Continue the line obliquely to the midpoint of the inferior margin of the cardiac silhouette. Extend the line obliquely to the 10th rib at the midaxillary line.
Superiorly, curve the line above the medial 3rd of the clavicles.

Lungs
Use a solid line to outline the lungs anteriorly.
Draw the apex of the lungs above the medial 3rd of the clavicles.
Medially, follow the lines of pleural reflection.
Draw the inferior borders of the lungs two rib levels above the pleural reflections.
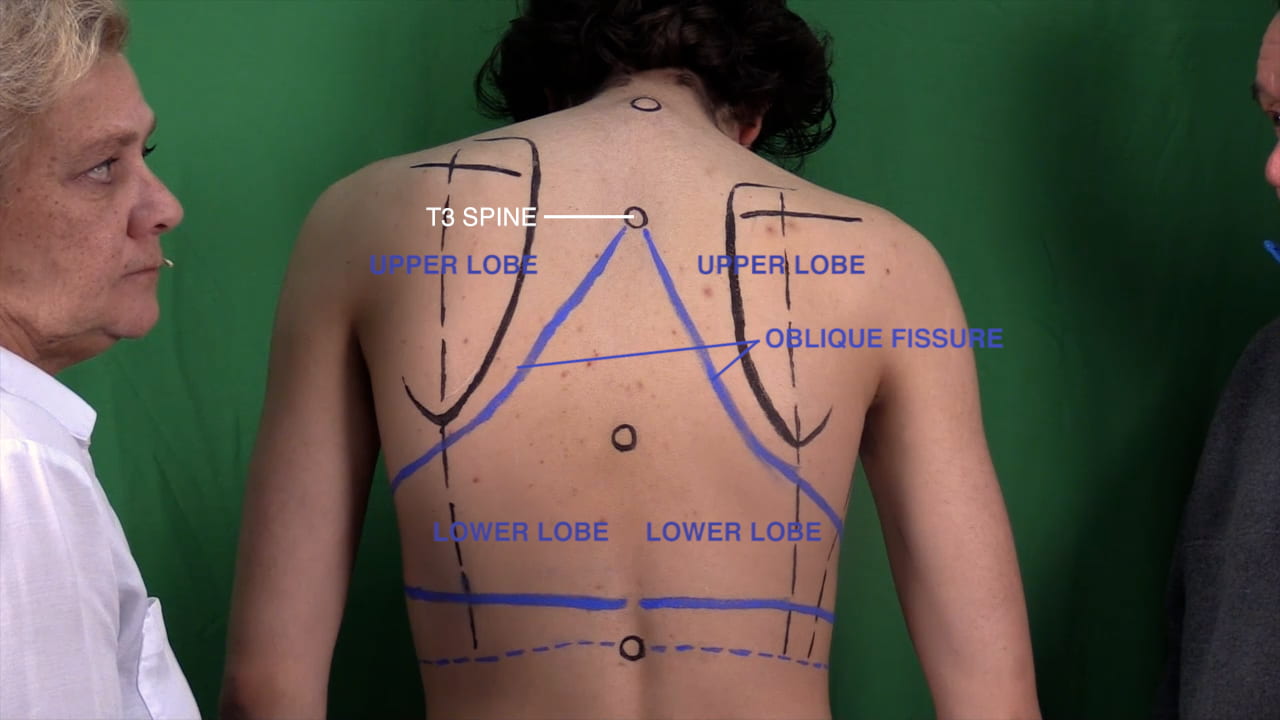
Figure 4.7b shows the lobes of the lungs posteriorly.
Question 10: Why are the lines of pleural reflection inferior to the position of the lungs?
The lungs expand into this space in full respiration.
Neck Surface Anatomy
Pleural Cavity
The hyoid bone is at the junction of the neck and the skin below the floor of the mouth.
Draw a black line to indicate its position.
Palpate your hyoid bone and swallow.
Question 11: What function is served by the hyoid being pulled superiorly during swallowing?
The larynx is pulled anteriorly and superiorly to prevent food from entering the airway.

Upper Airway
Inferior to the thyroid cartilage, palpate the cricoid cartilage and the rings of the trachea. Mark with horizontal lines.
Question 12: What is the therapeutic significance of cricothyroid membrane?
The site for emergency airway placement.
Thyroid Gland
The thyroid gland lies on both sides of the trachea. The two sides are joined by an isthmus that crosses superficial to the trachea just below the cricoid cartilage. The thyroid can be difficult to palpate because of its deep location.
Draw the approximate the location of the lobes and isthmus of the thyroid gland.

Carotid Artery and Internal Jugular Vein
Draw the carotid artery from the clavicle to the thyroid cartilage lateral to the thyroid cartilage and medial to the sternocleidomastoid muscle. Draw the bifurcation above the thyroid cartilage.
On yourself, palpate the carotid artery.
Draw the internal jugular vein lateral to carotid artery.
The carotid artery, internal jugular vein and vagus nerve are contained in the carotid sheath.
The external jugular vein is superficial to the sternocleidomastoid.


