Abdomen Opening
Lab Summary
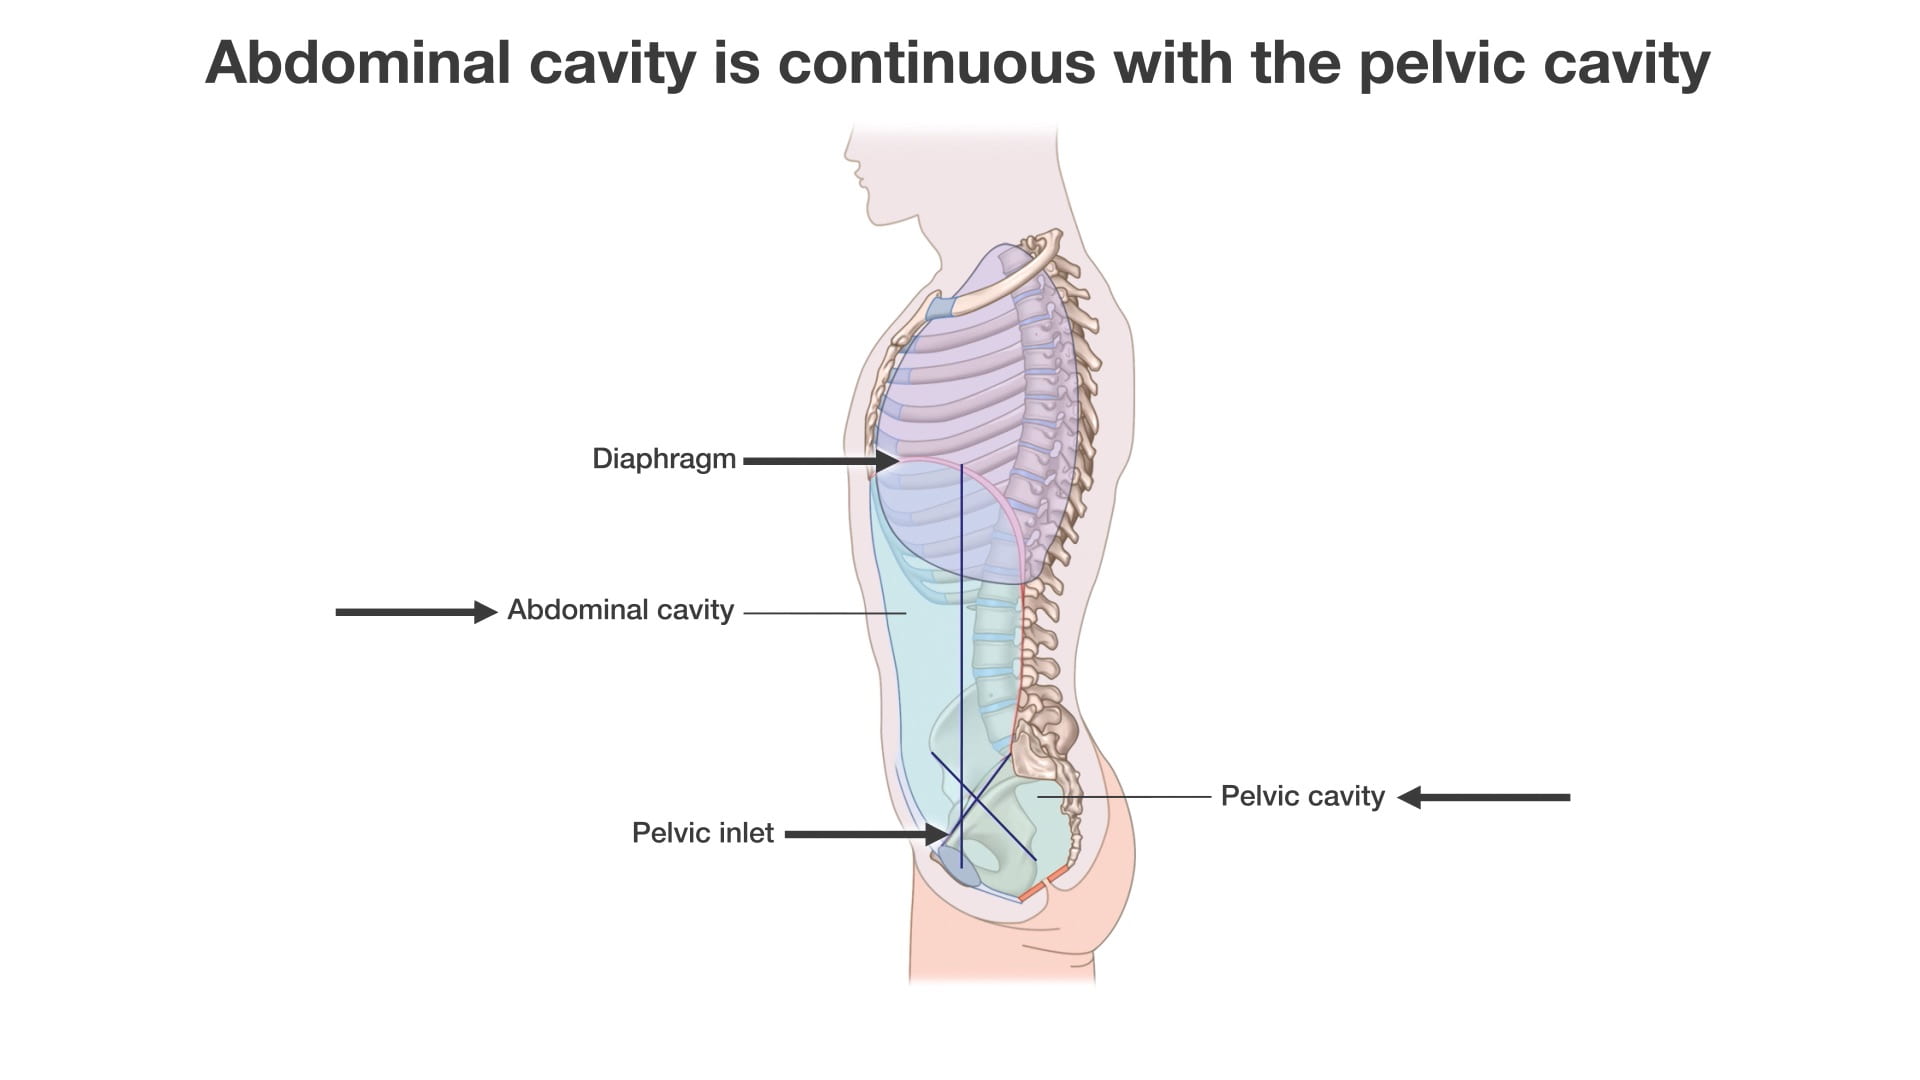
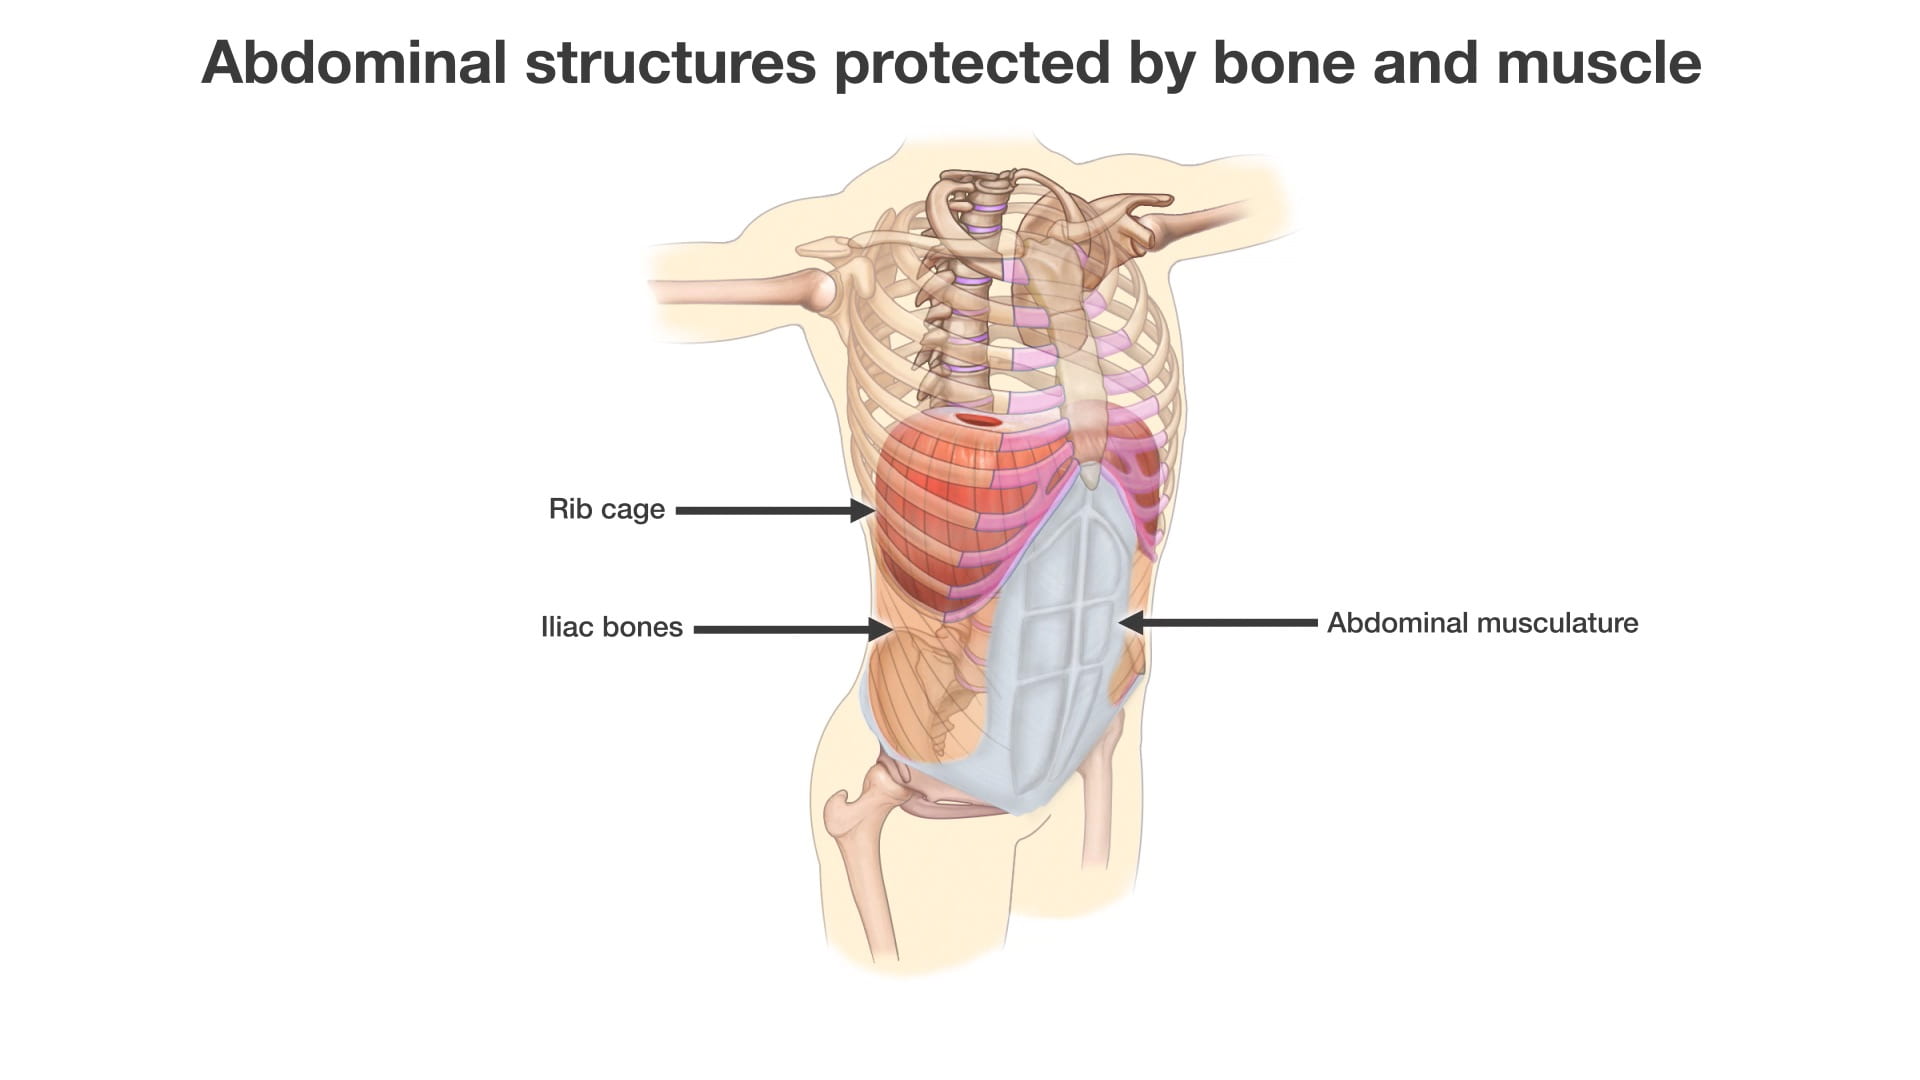
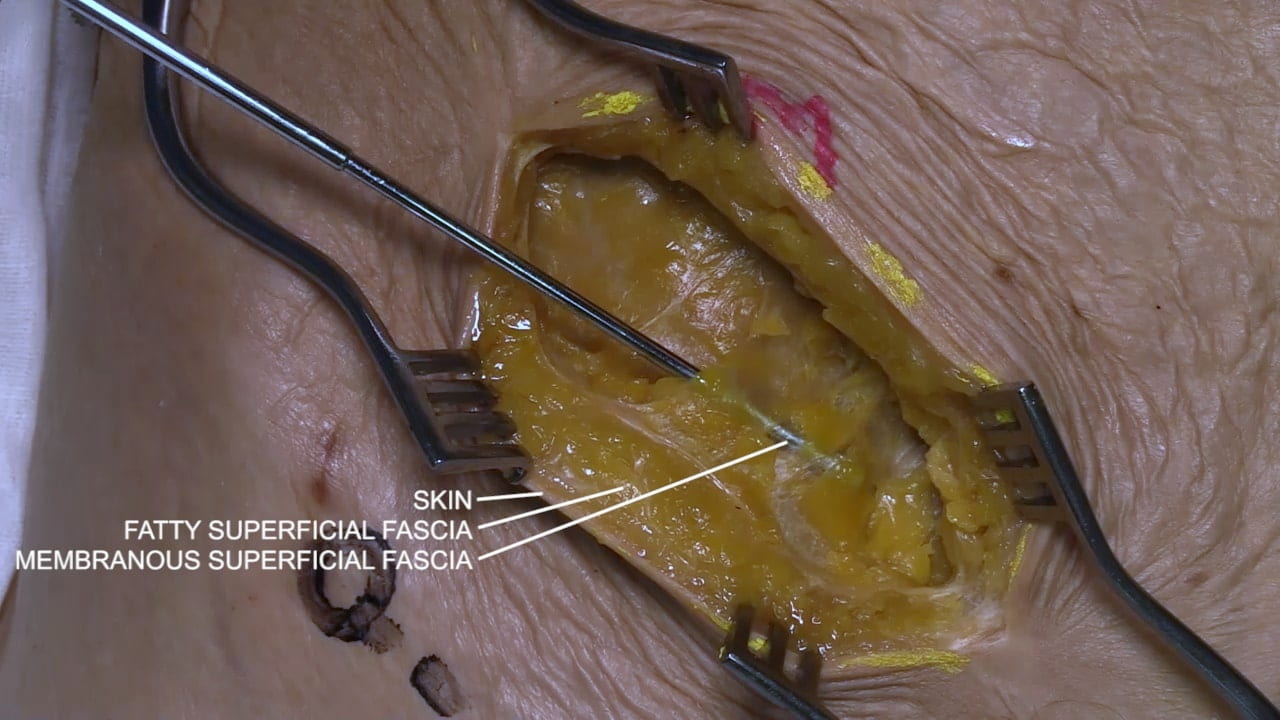
The structure of the abdominal wall and the peritoneal cavity along with its contents are taught. A video of McBurney’s incision emphasizes the structure of the abdominal wall. The abdominal wall is further emphasized through a layer by layer dissection. The peritoneal contents are presented in an overview including critical four quadrant structures and the course of the digestive tract.
Lab Objectives
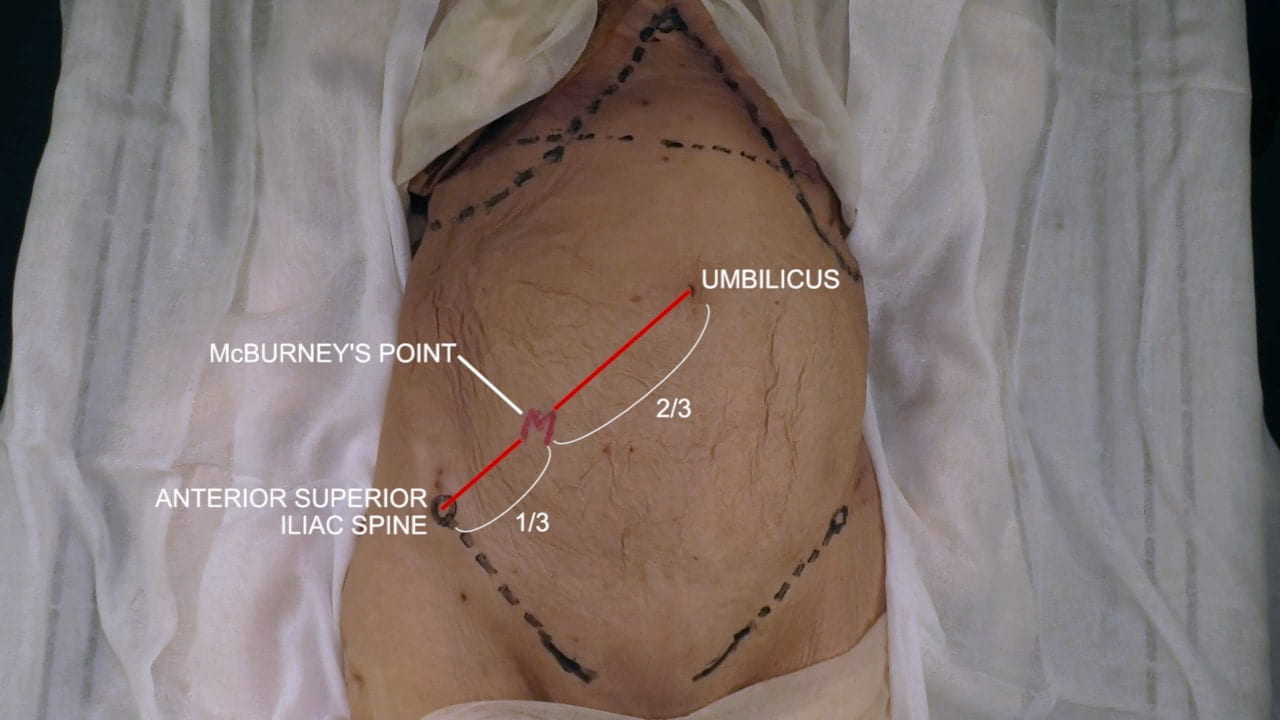
- Explain the significance of McBurney’s Point.
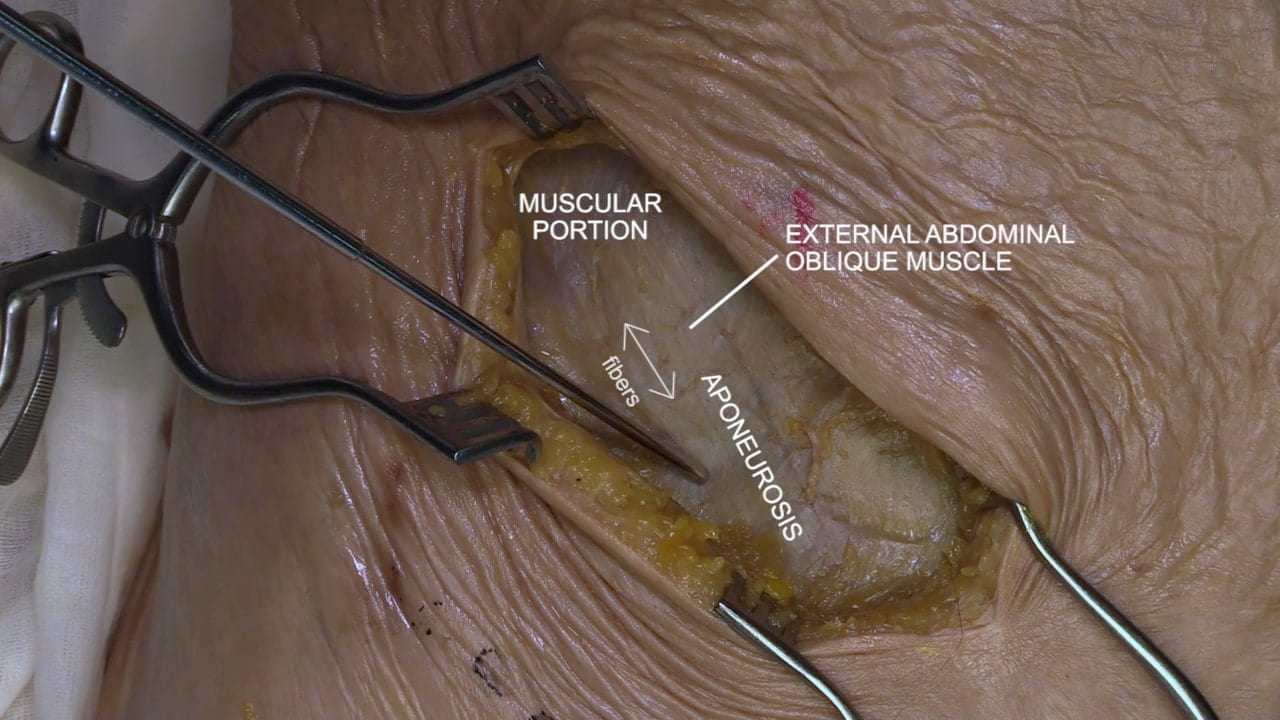
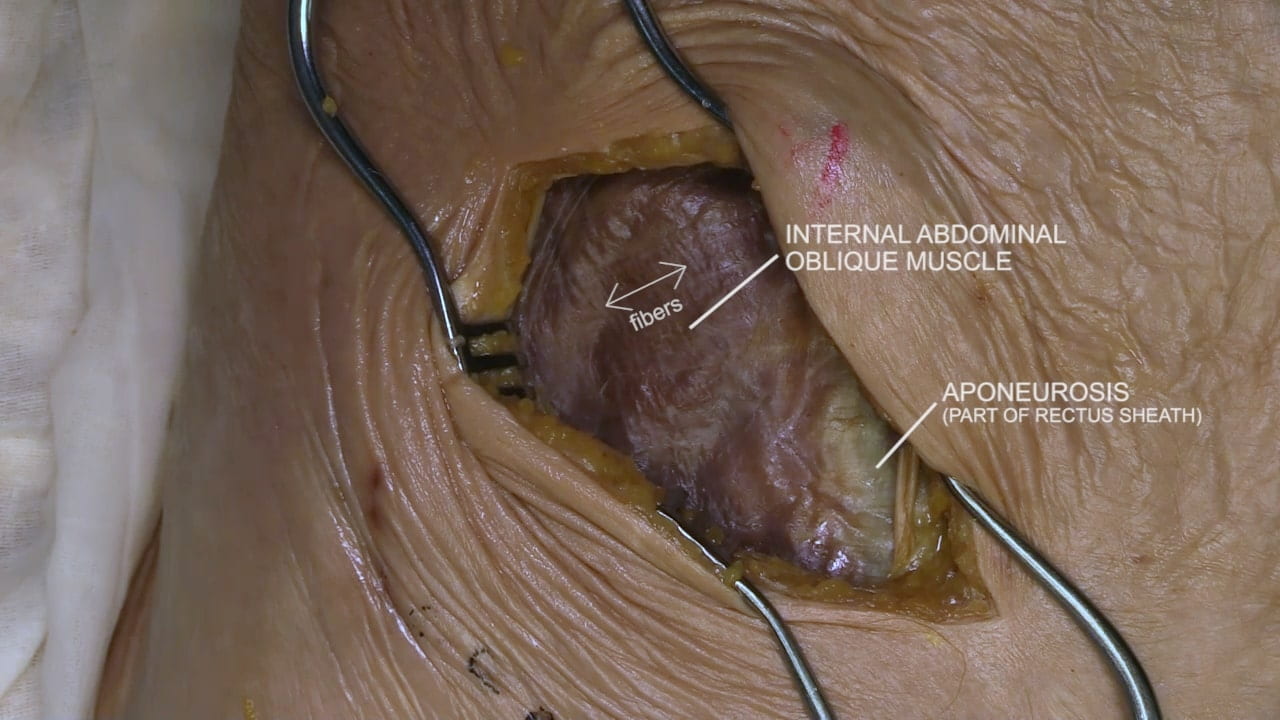
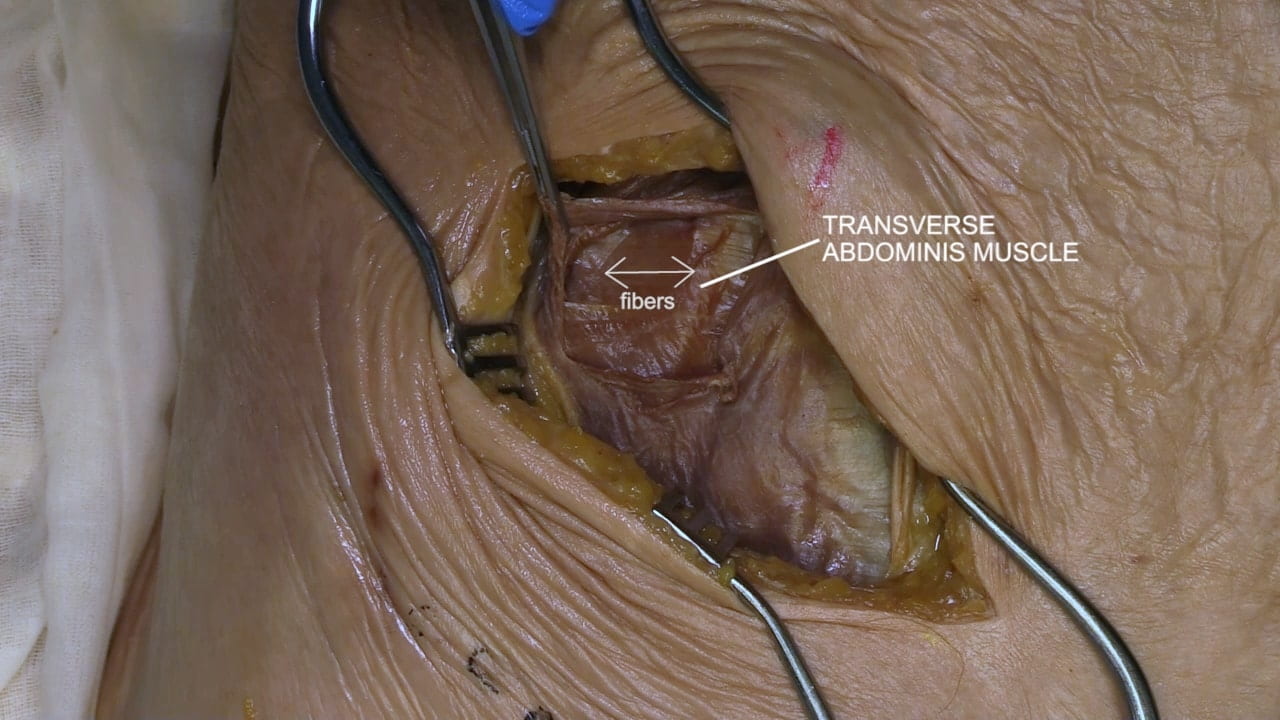
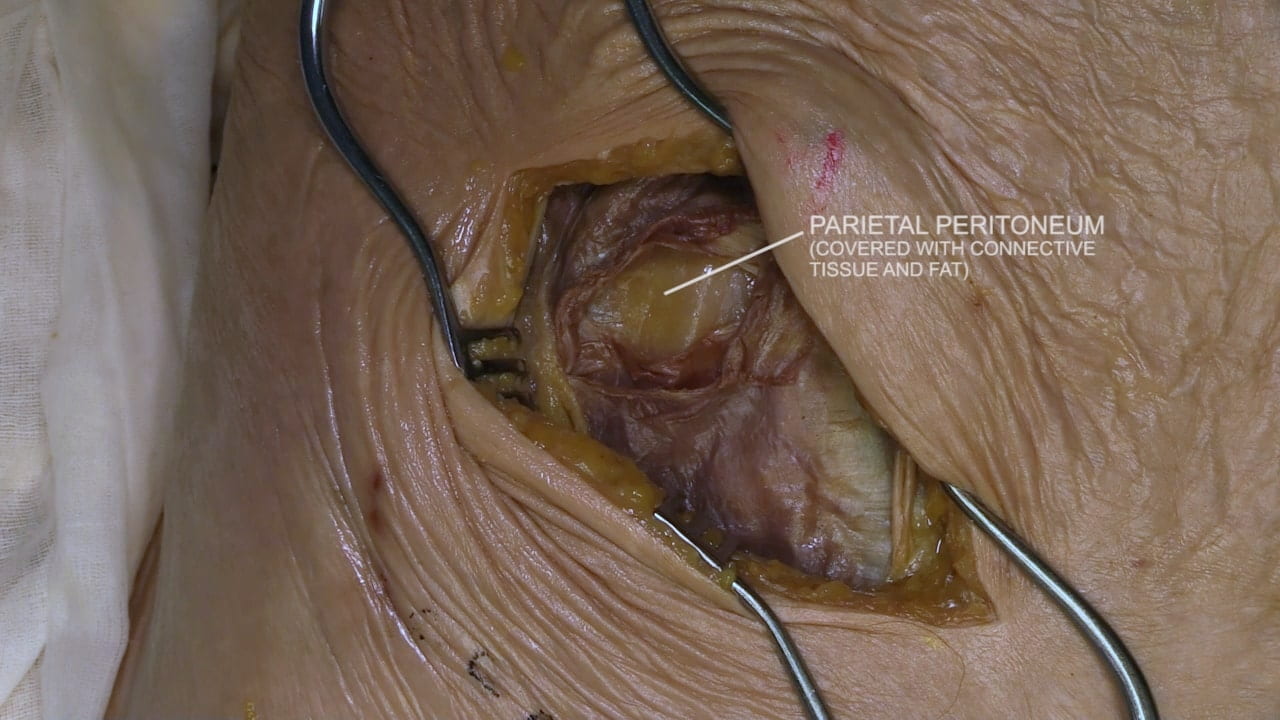
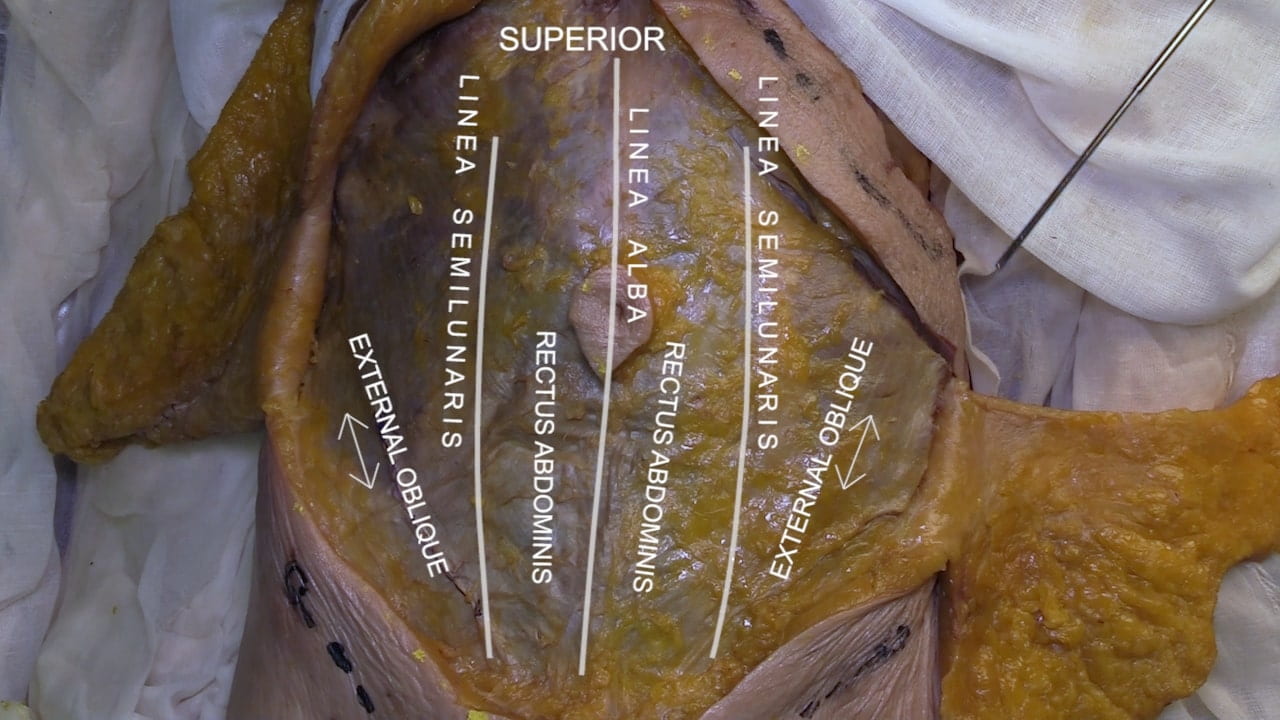
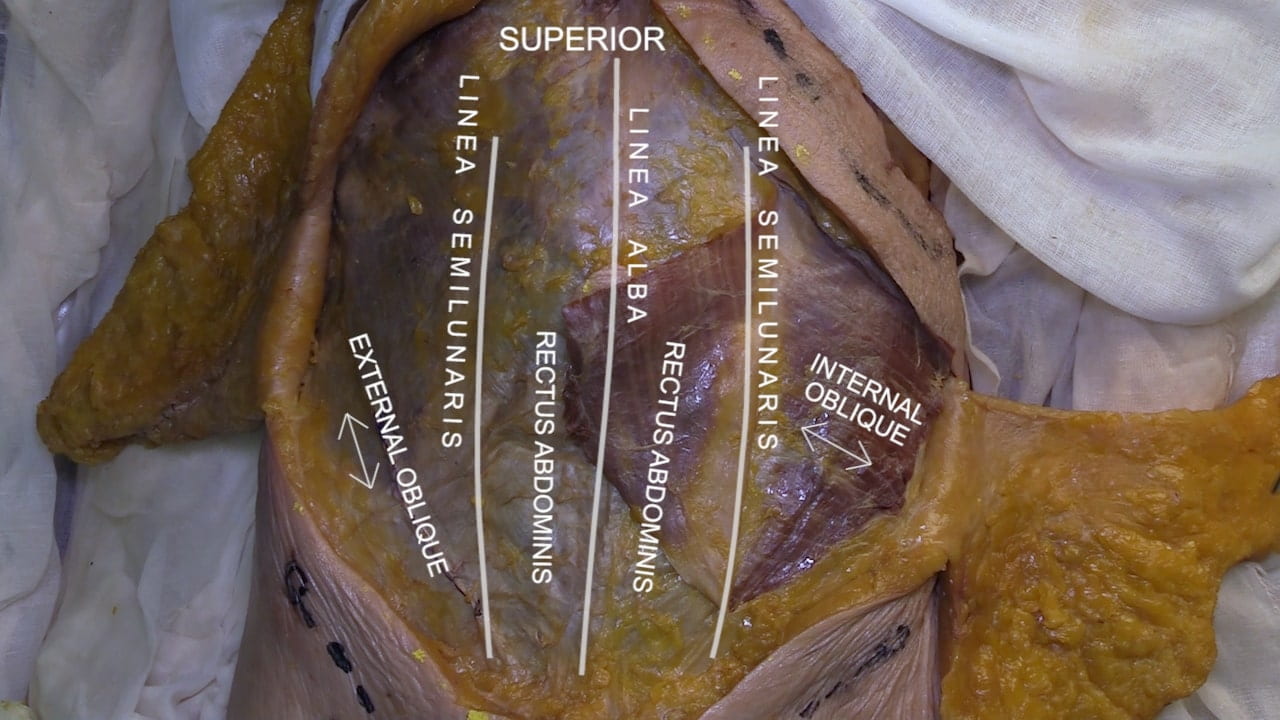
- For a McBurney’s incision, describe the orientation of the muscle fibers as the abdominal layers are encountered.
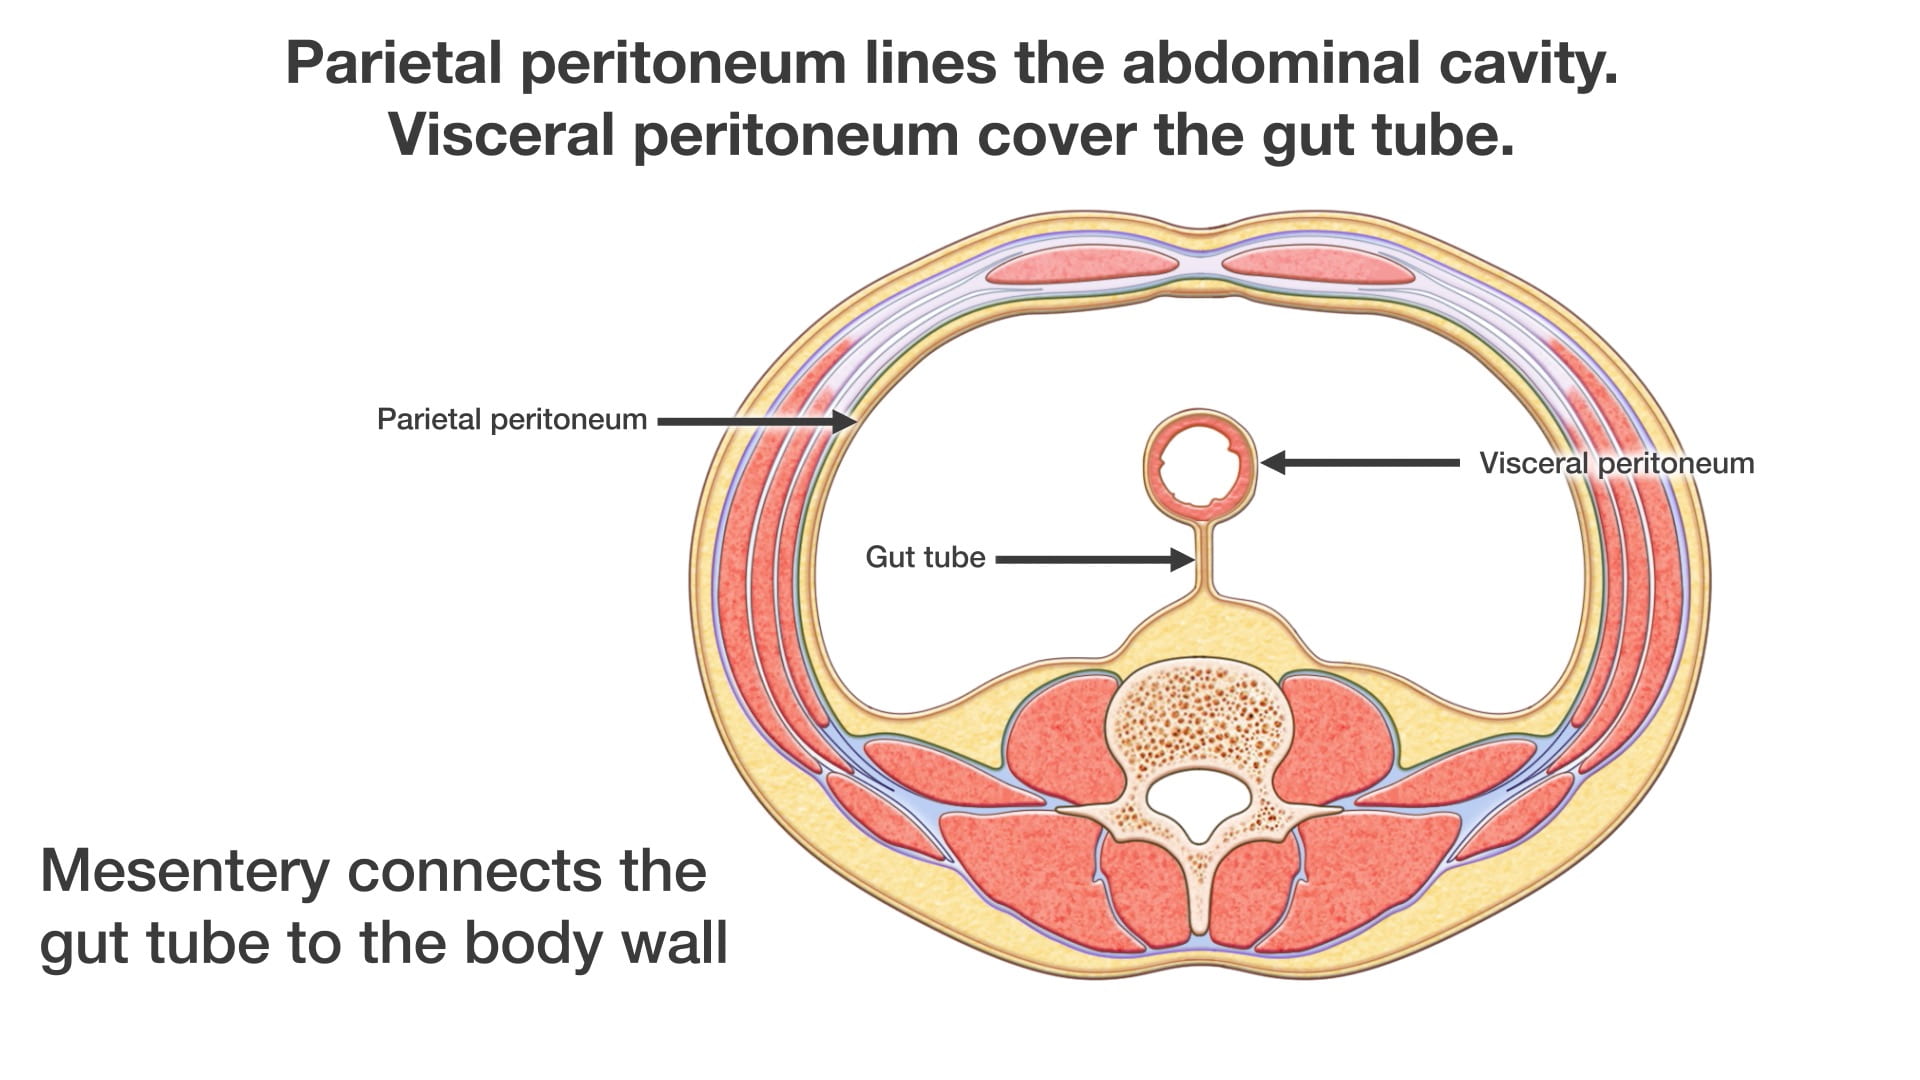
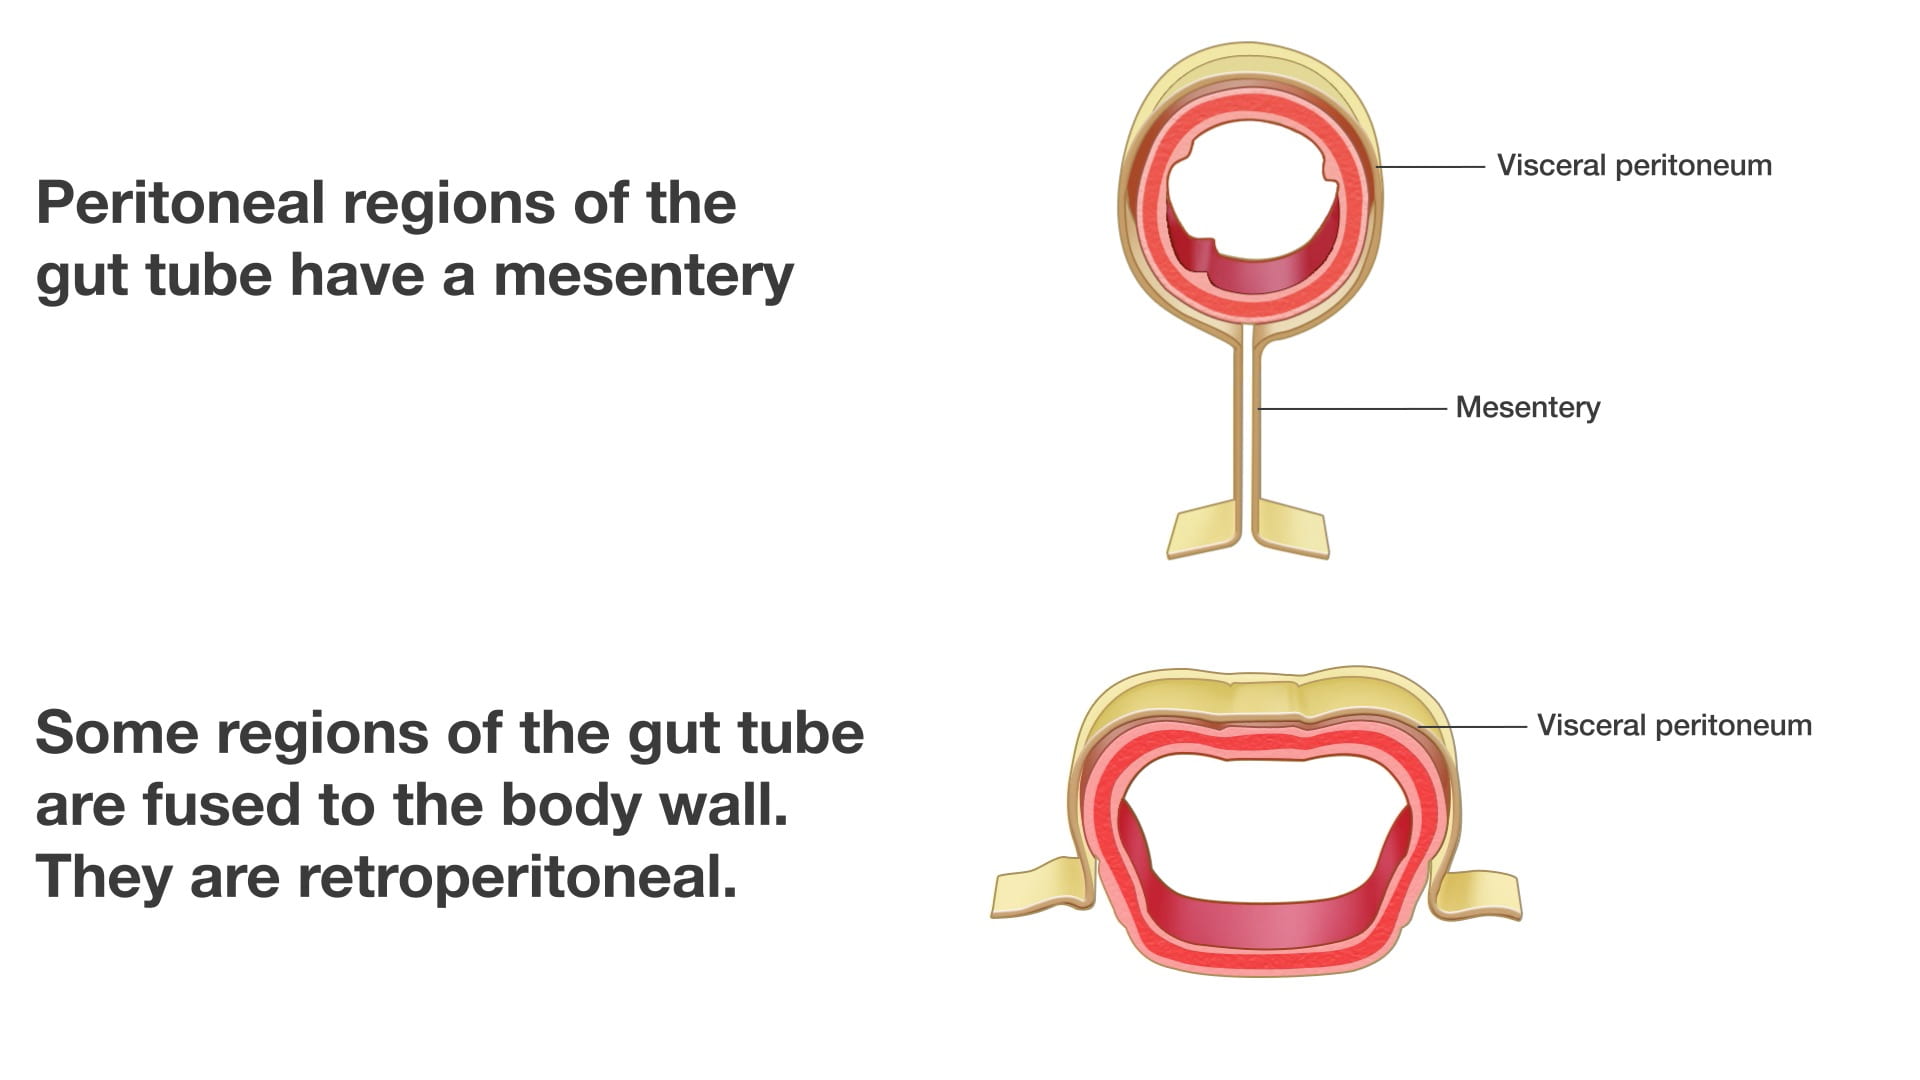
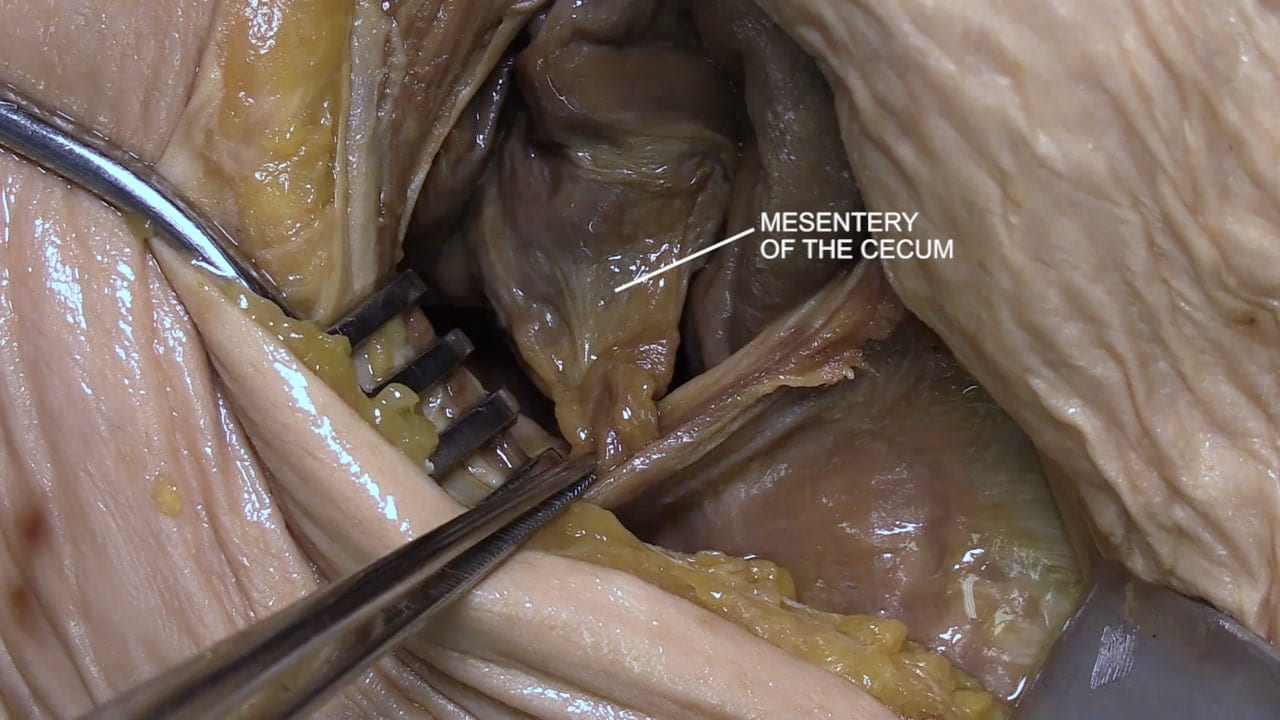
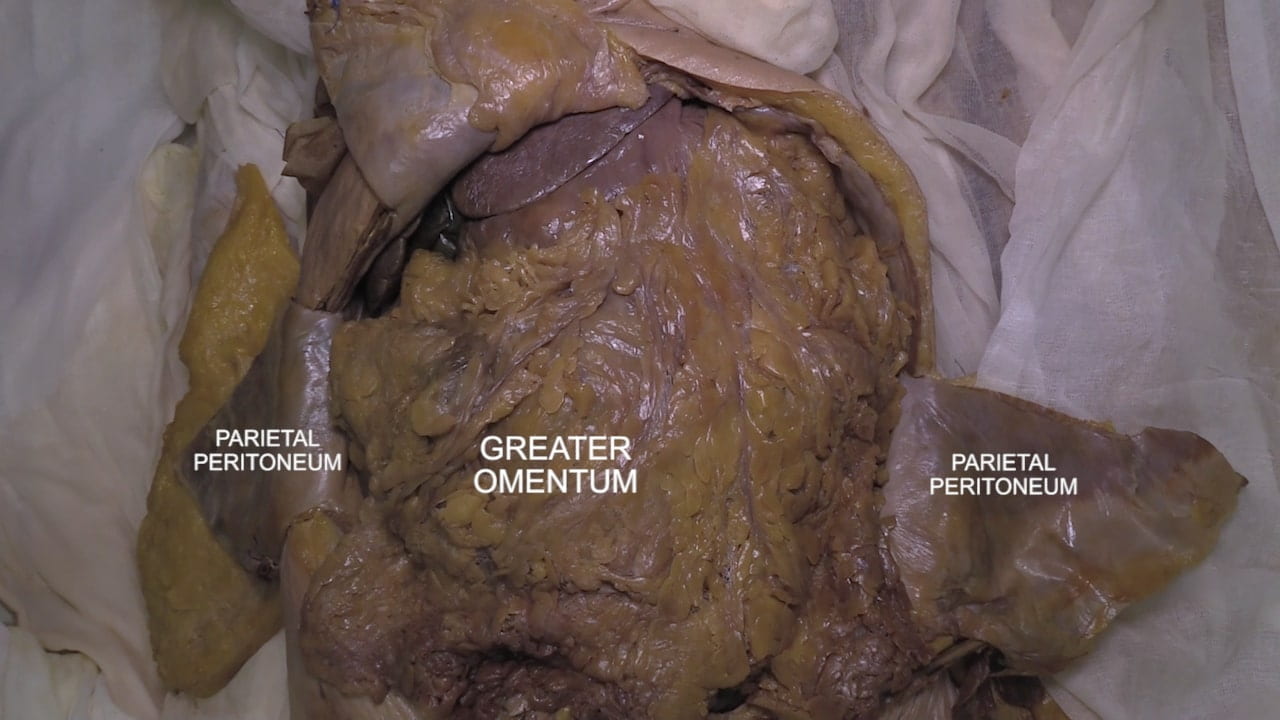
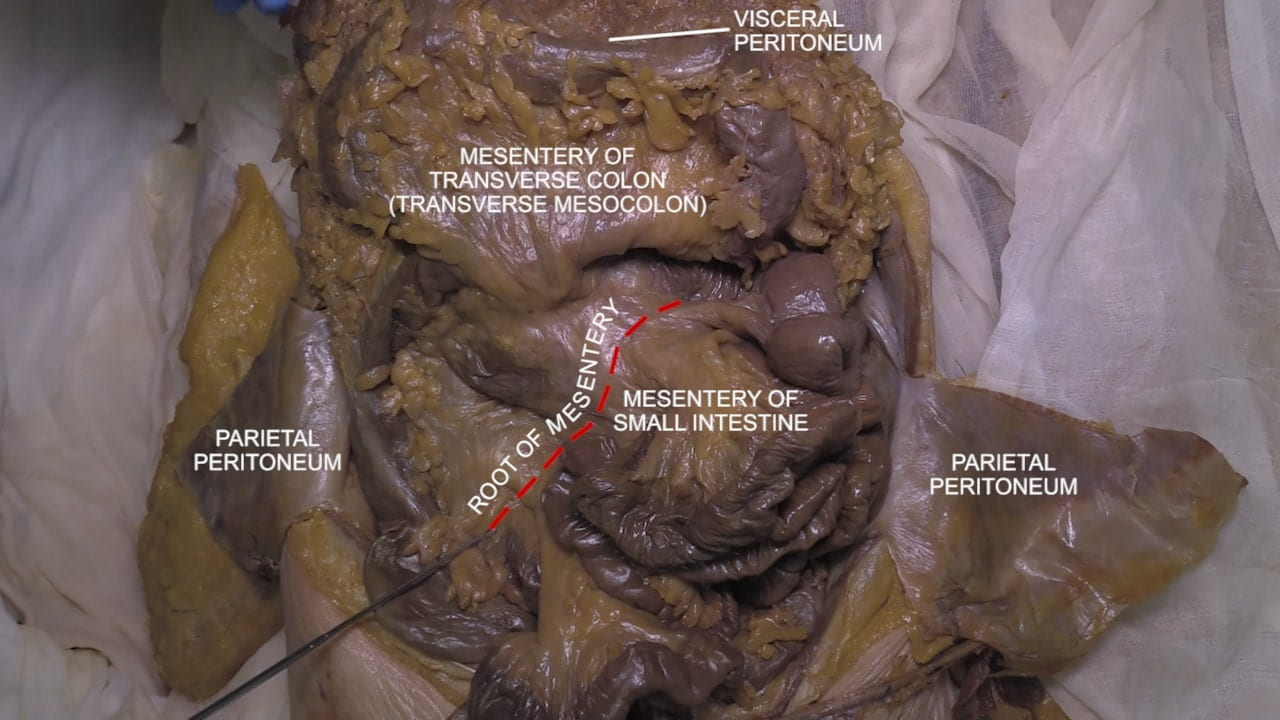
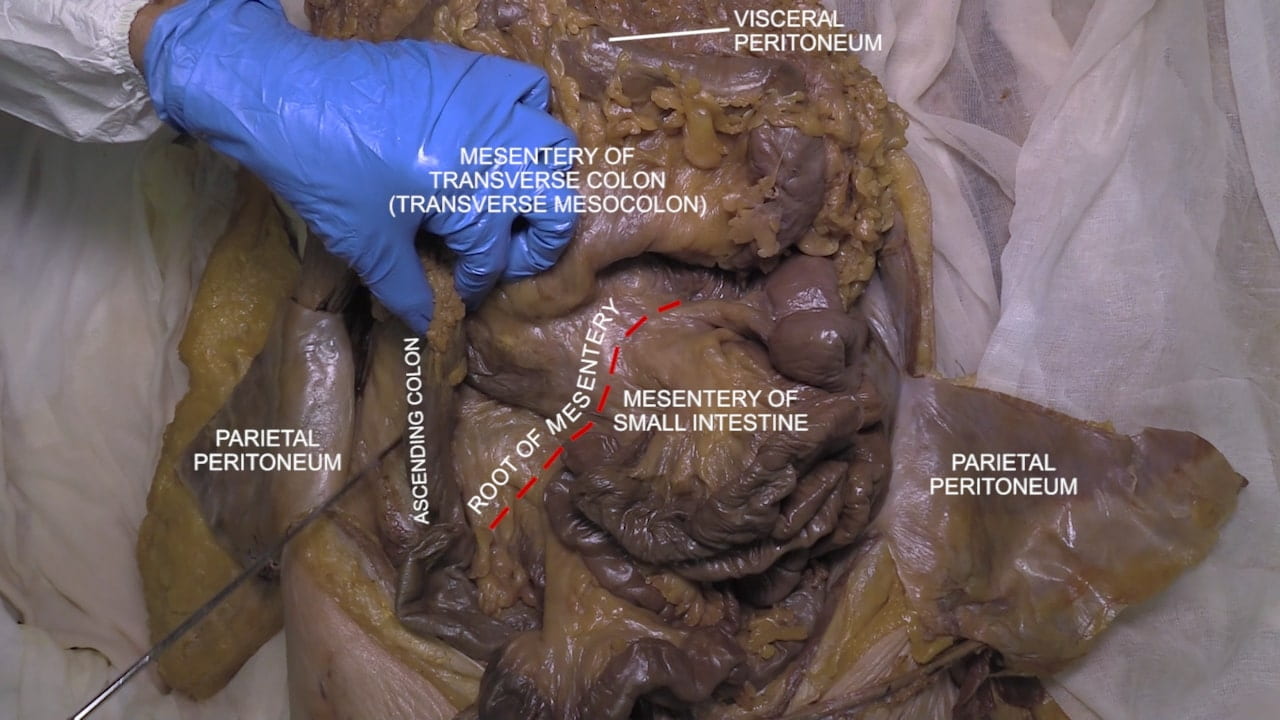
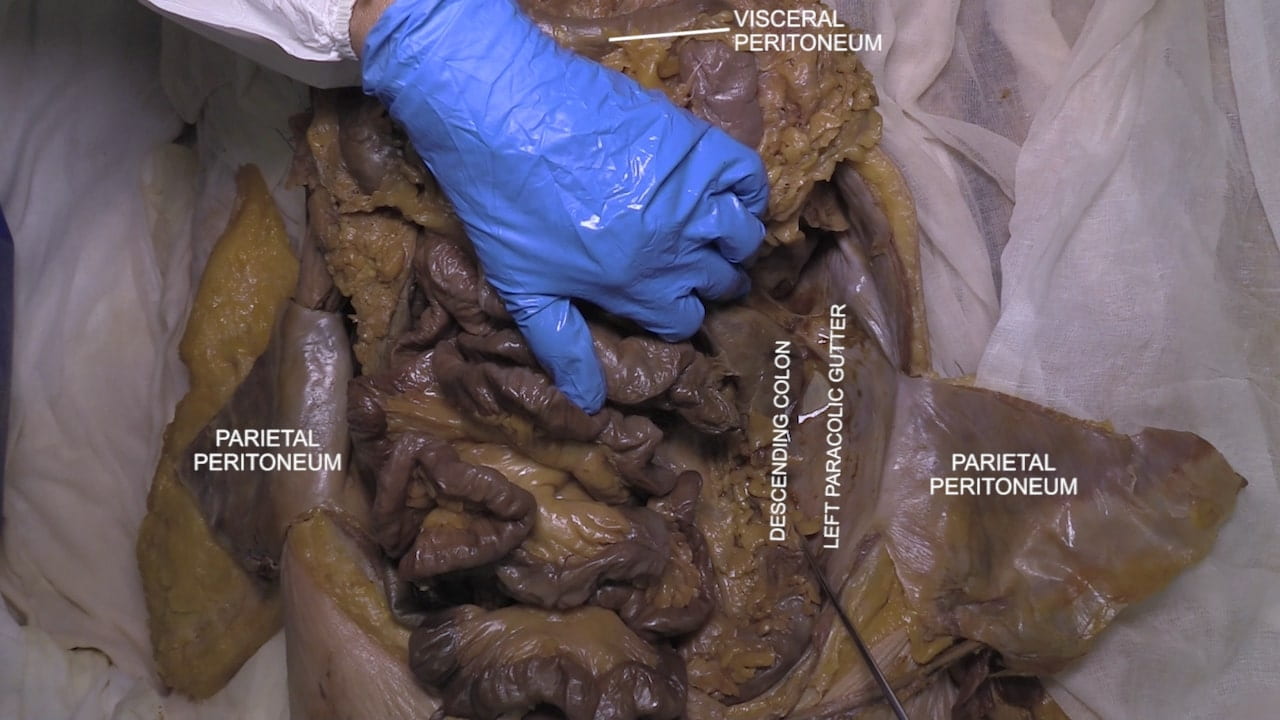
- Describe and differentiate visceral peritoneum, parietal peritoneum and mesentery.
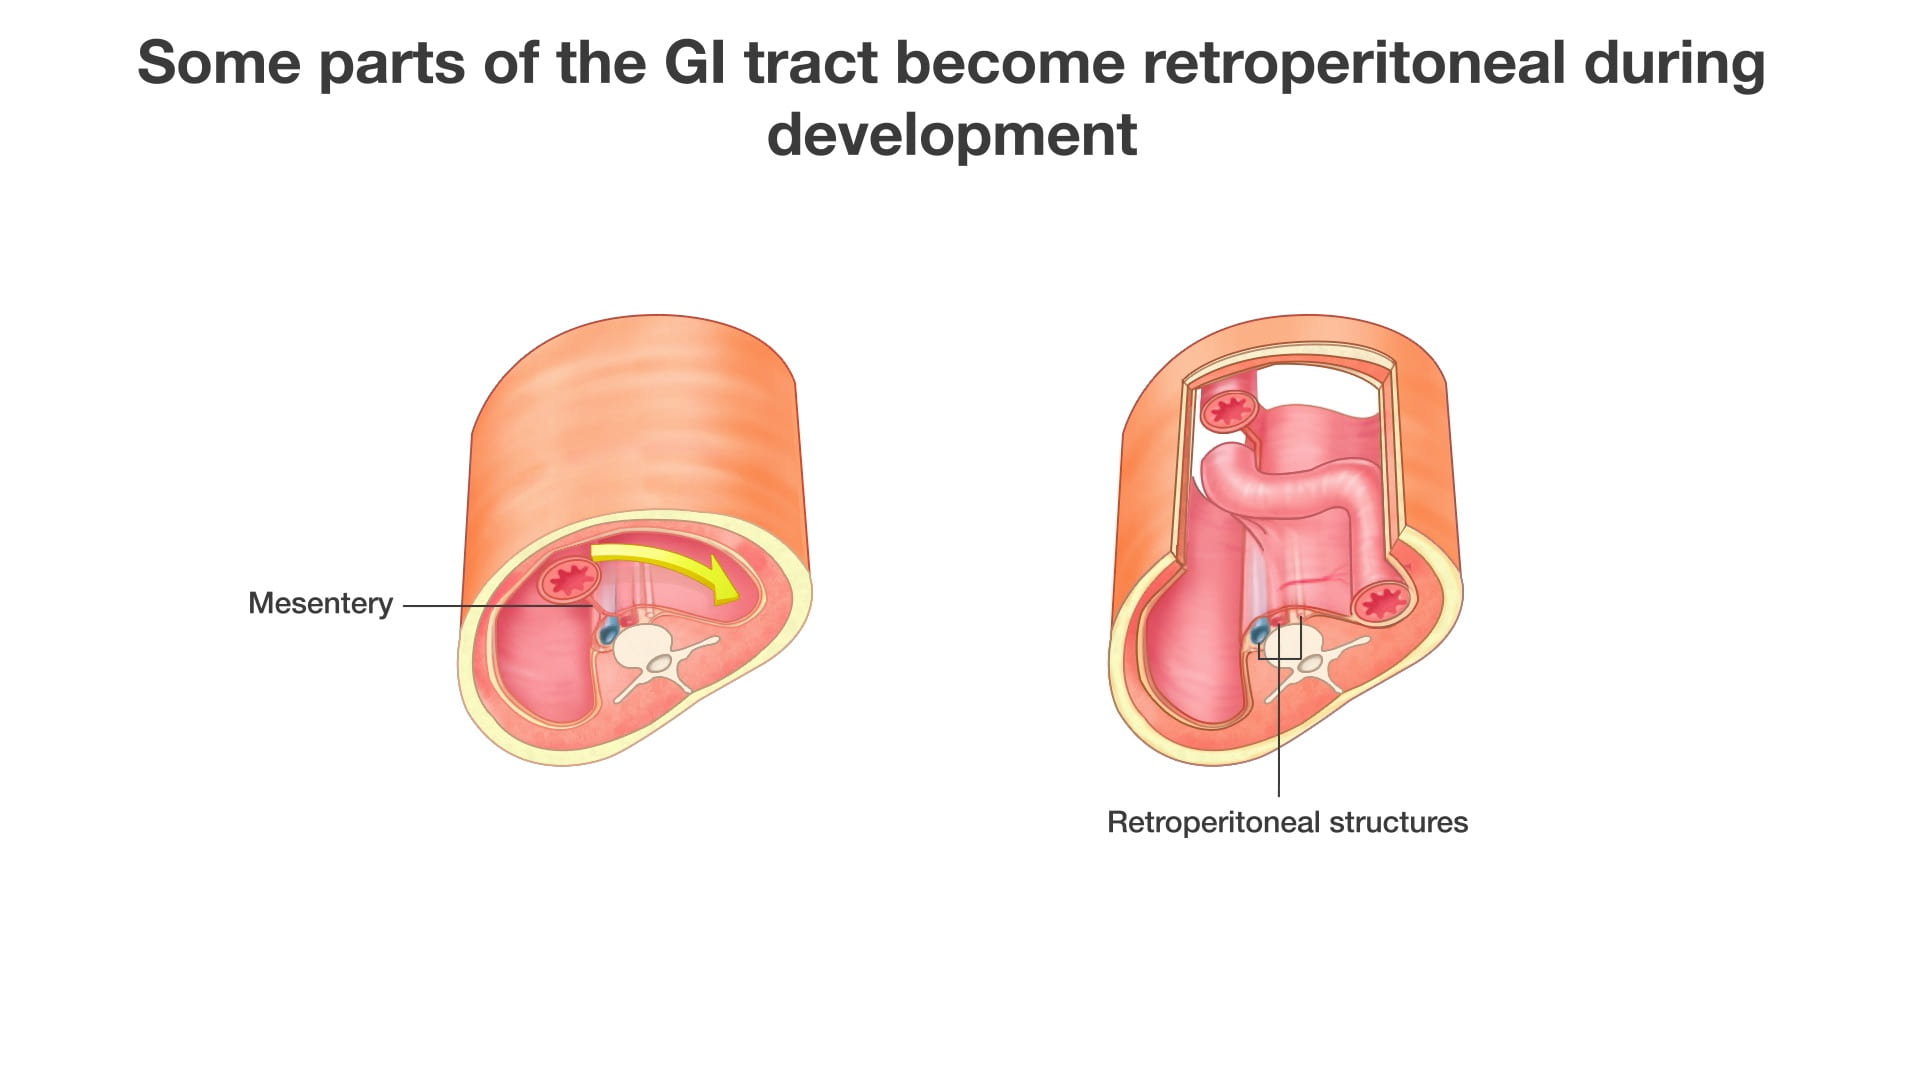
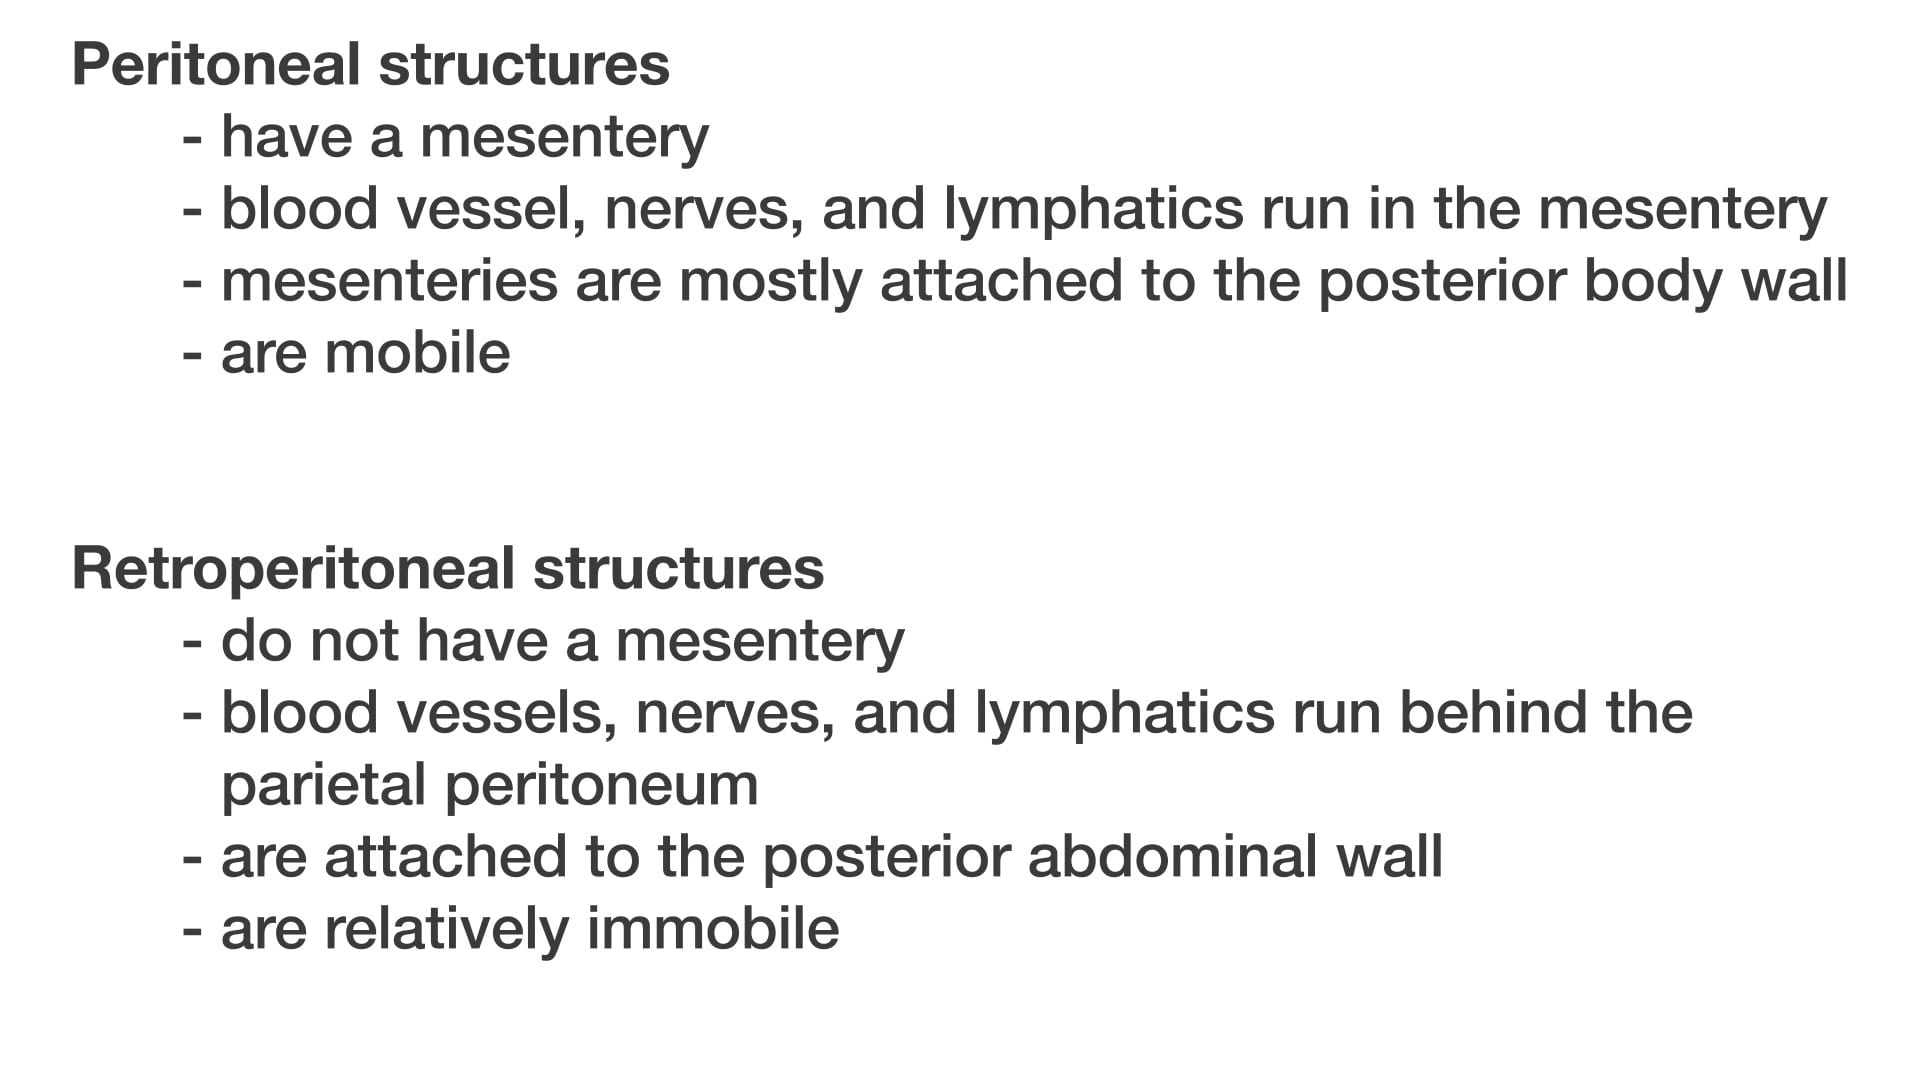
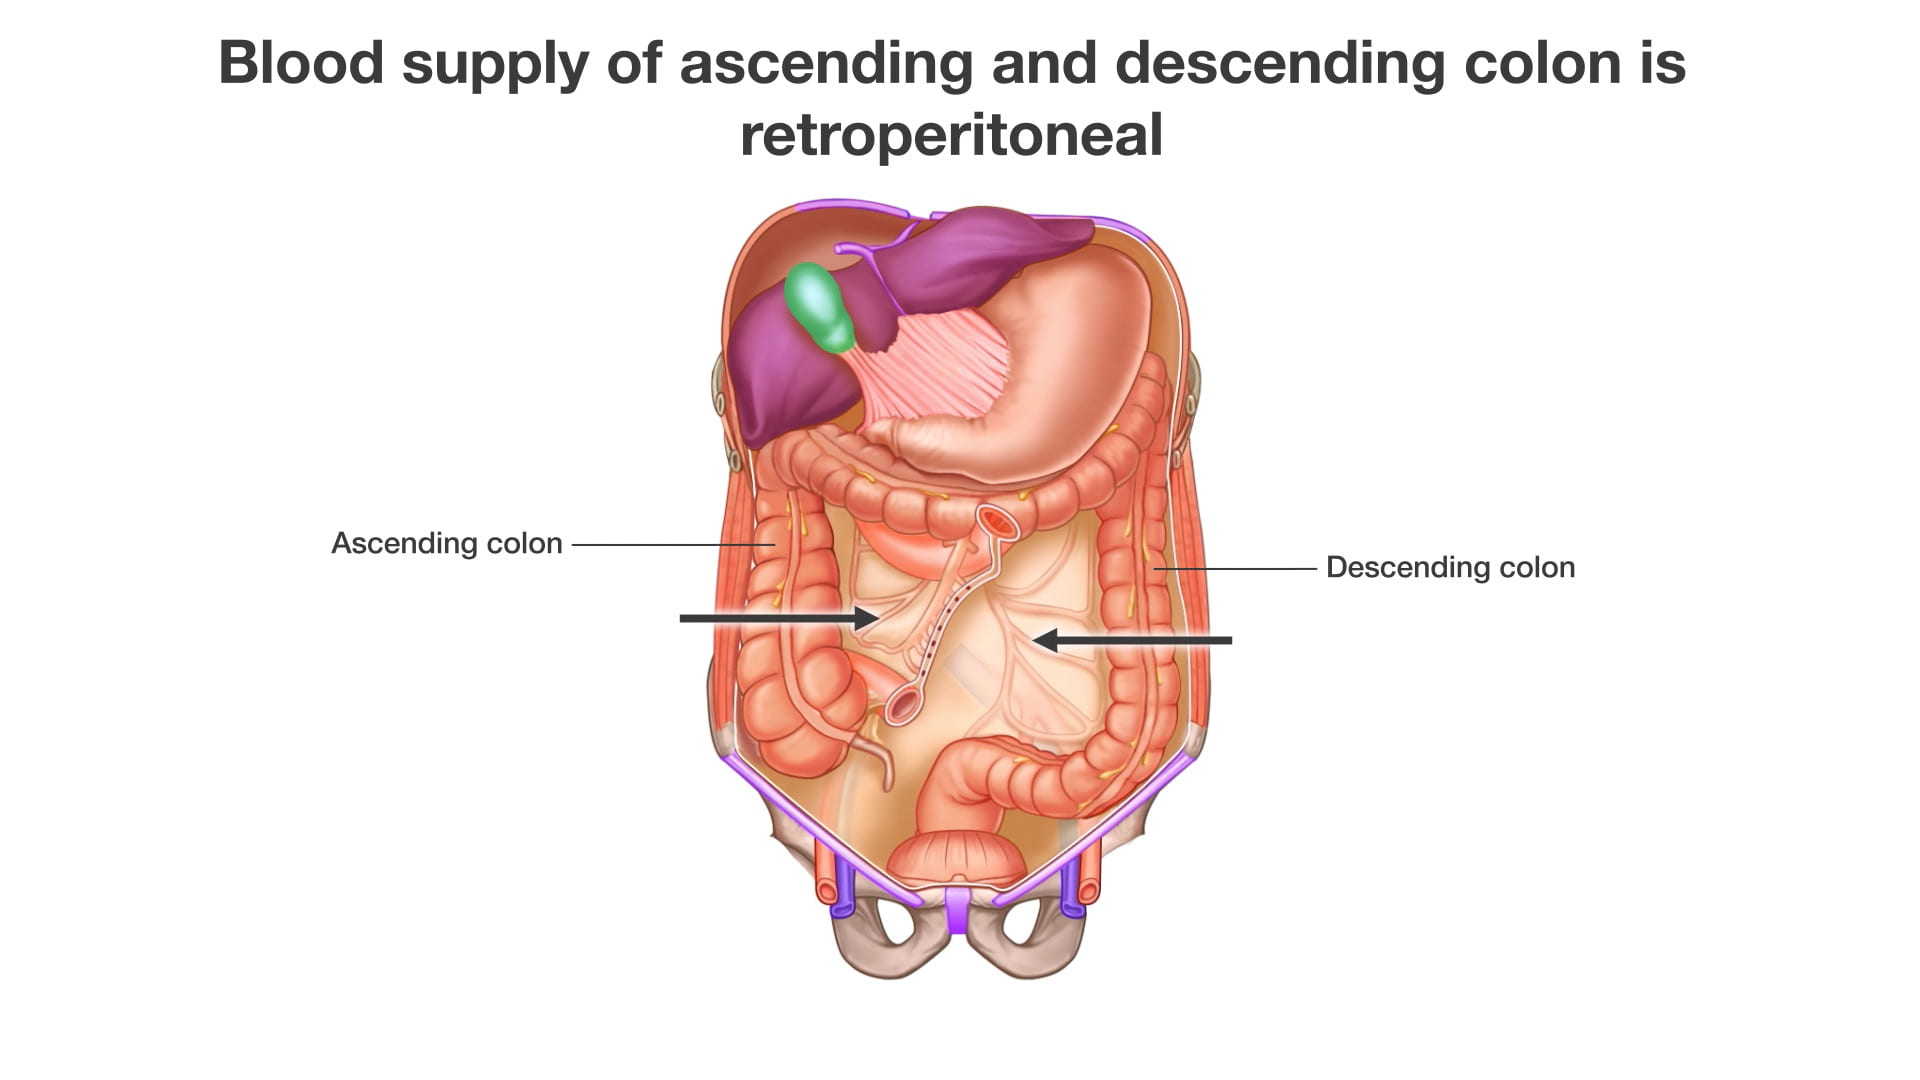
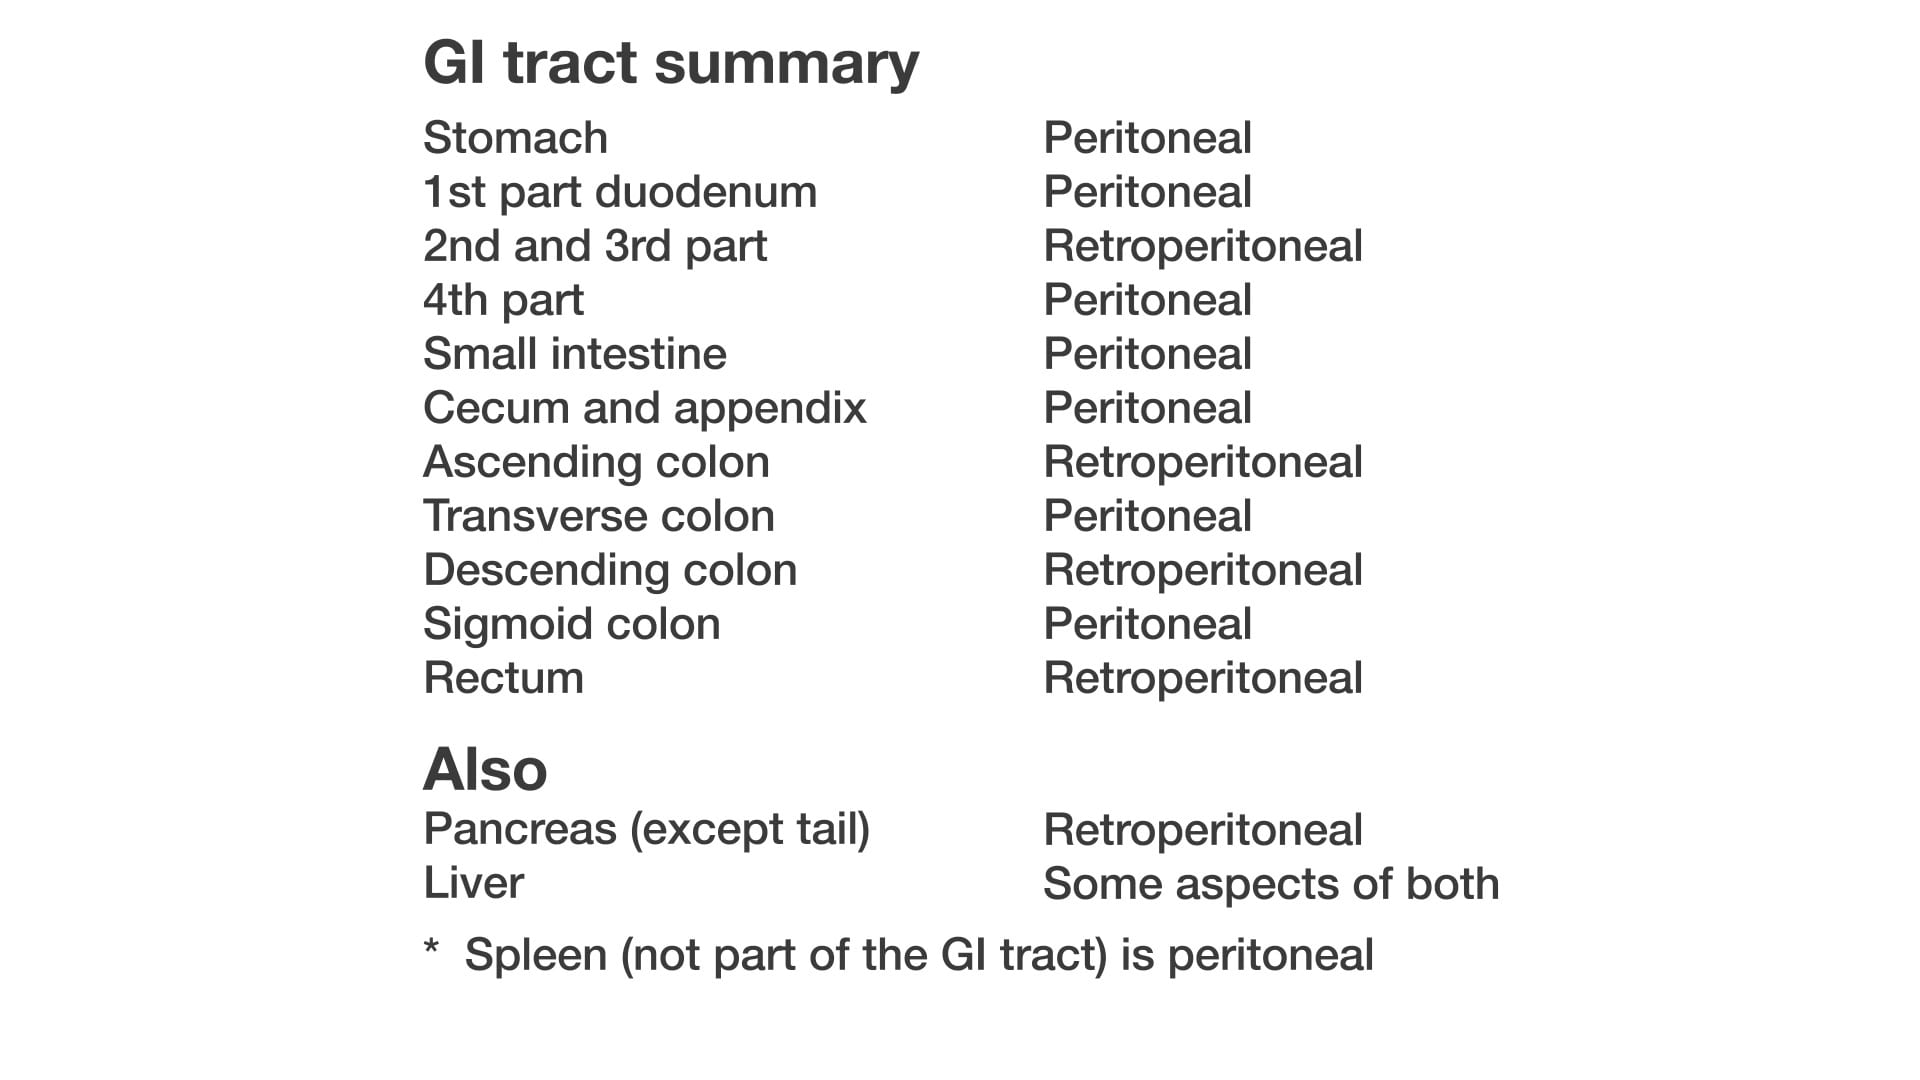
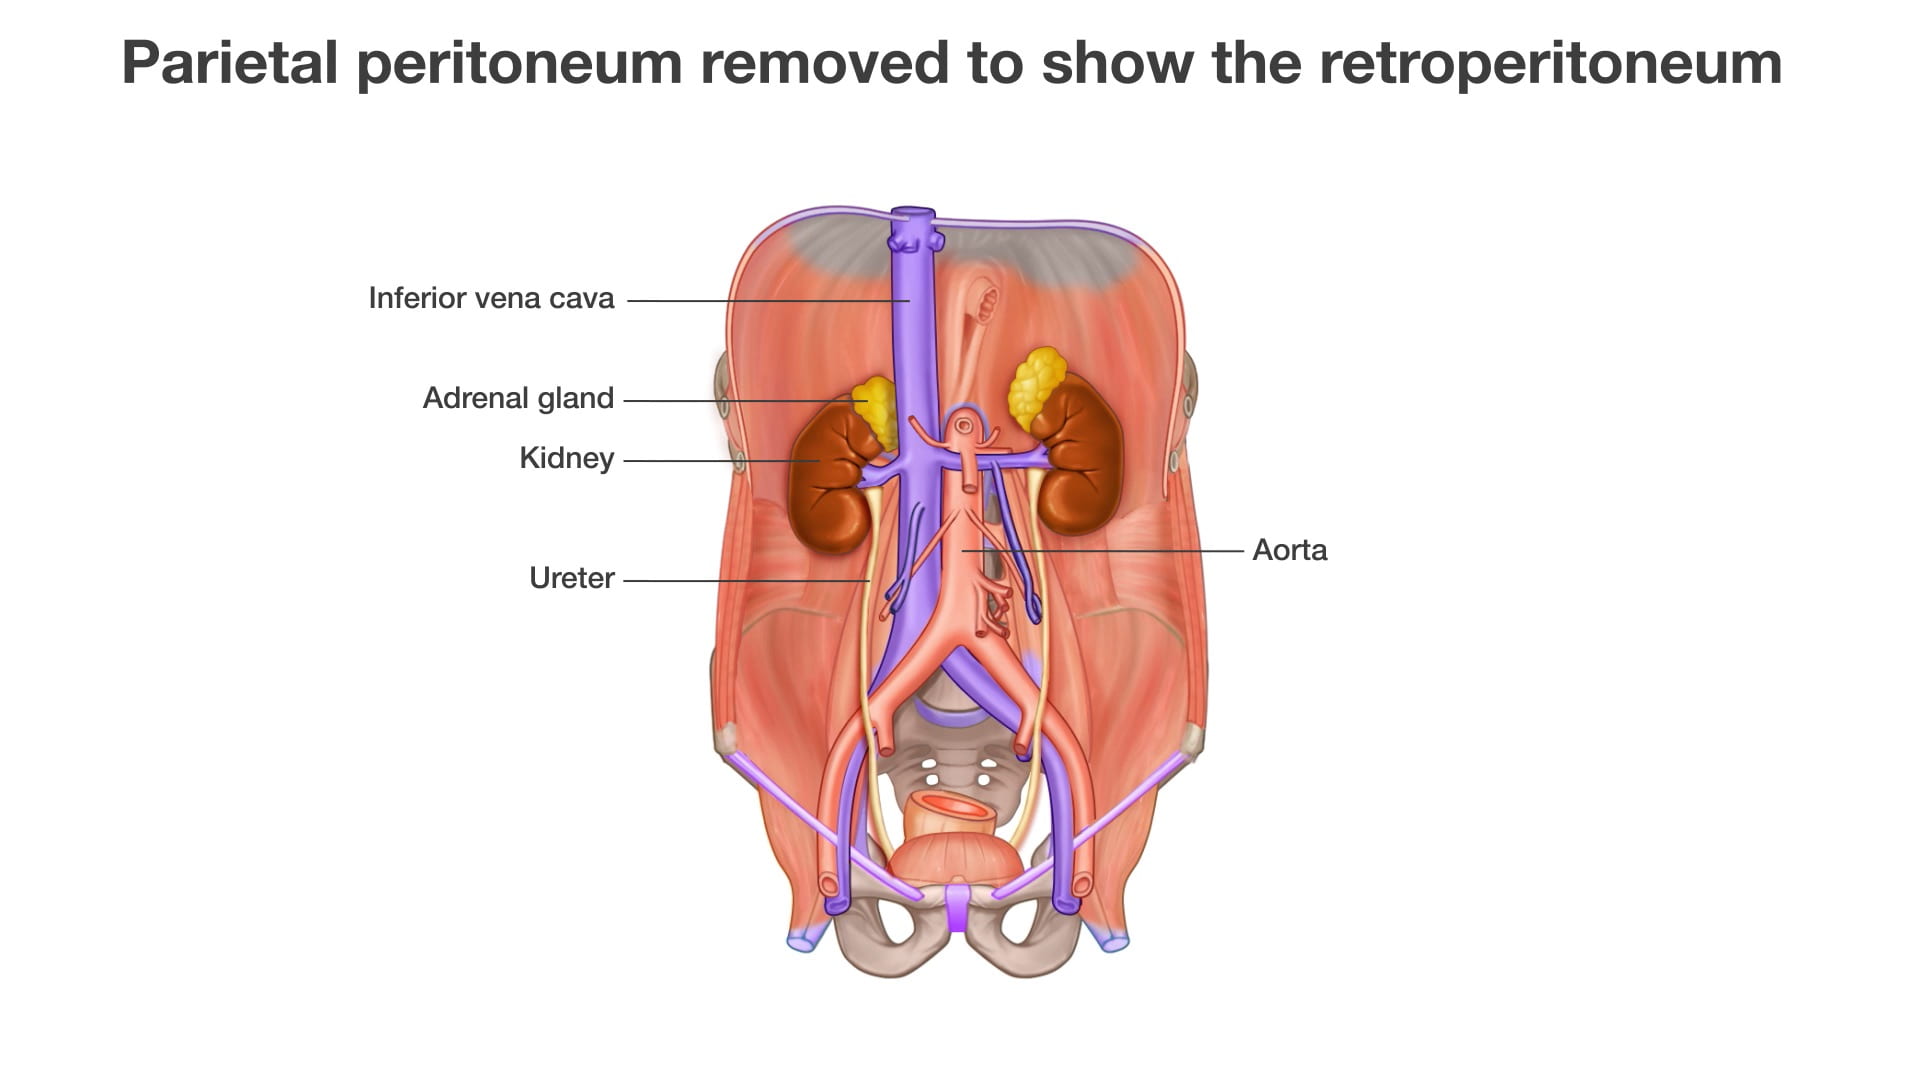
- Explain peritoneal and retroperitoneal.
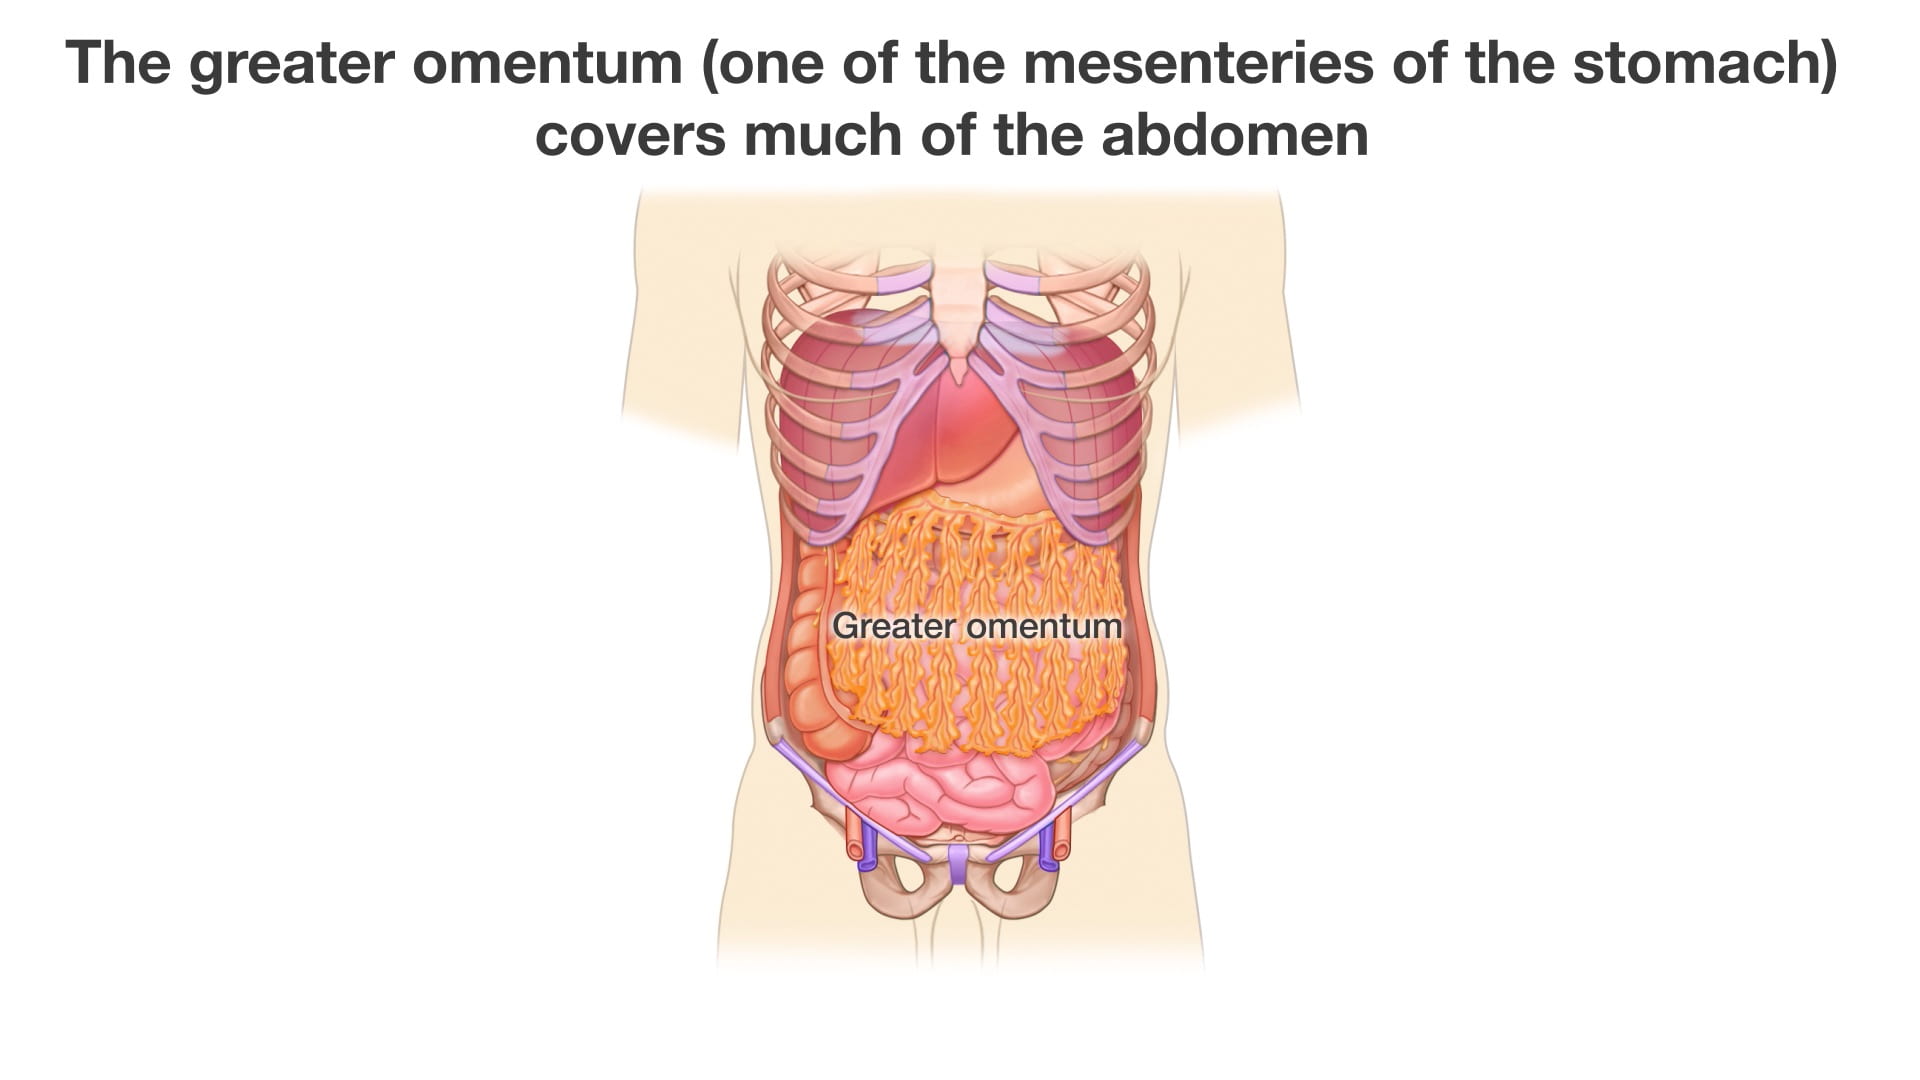
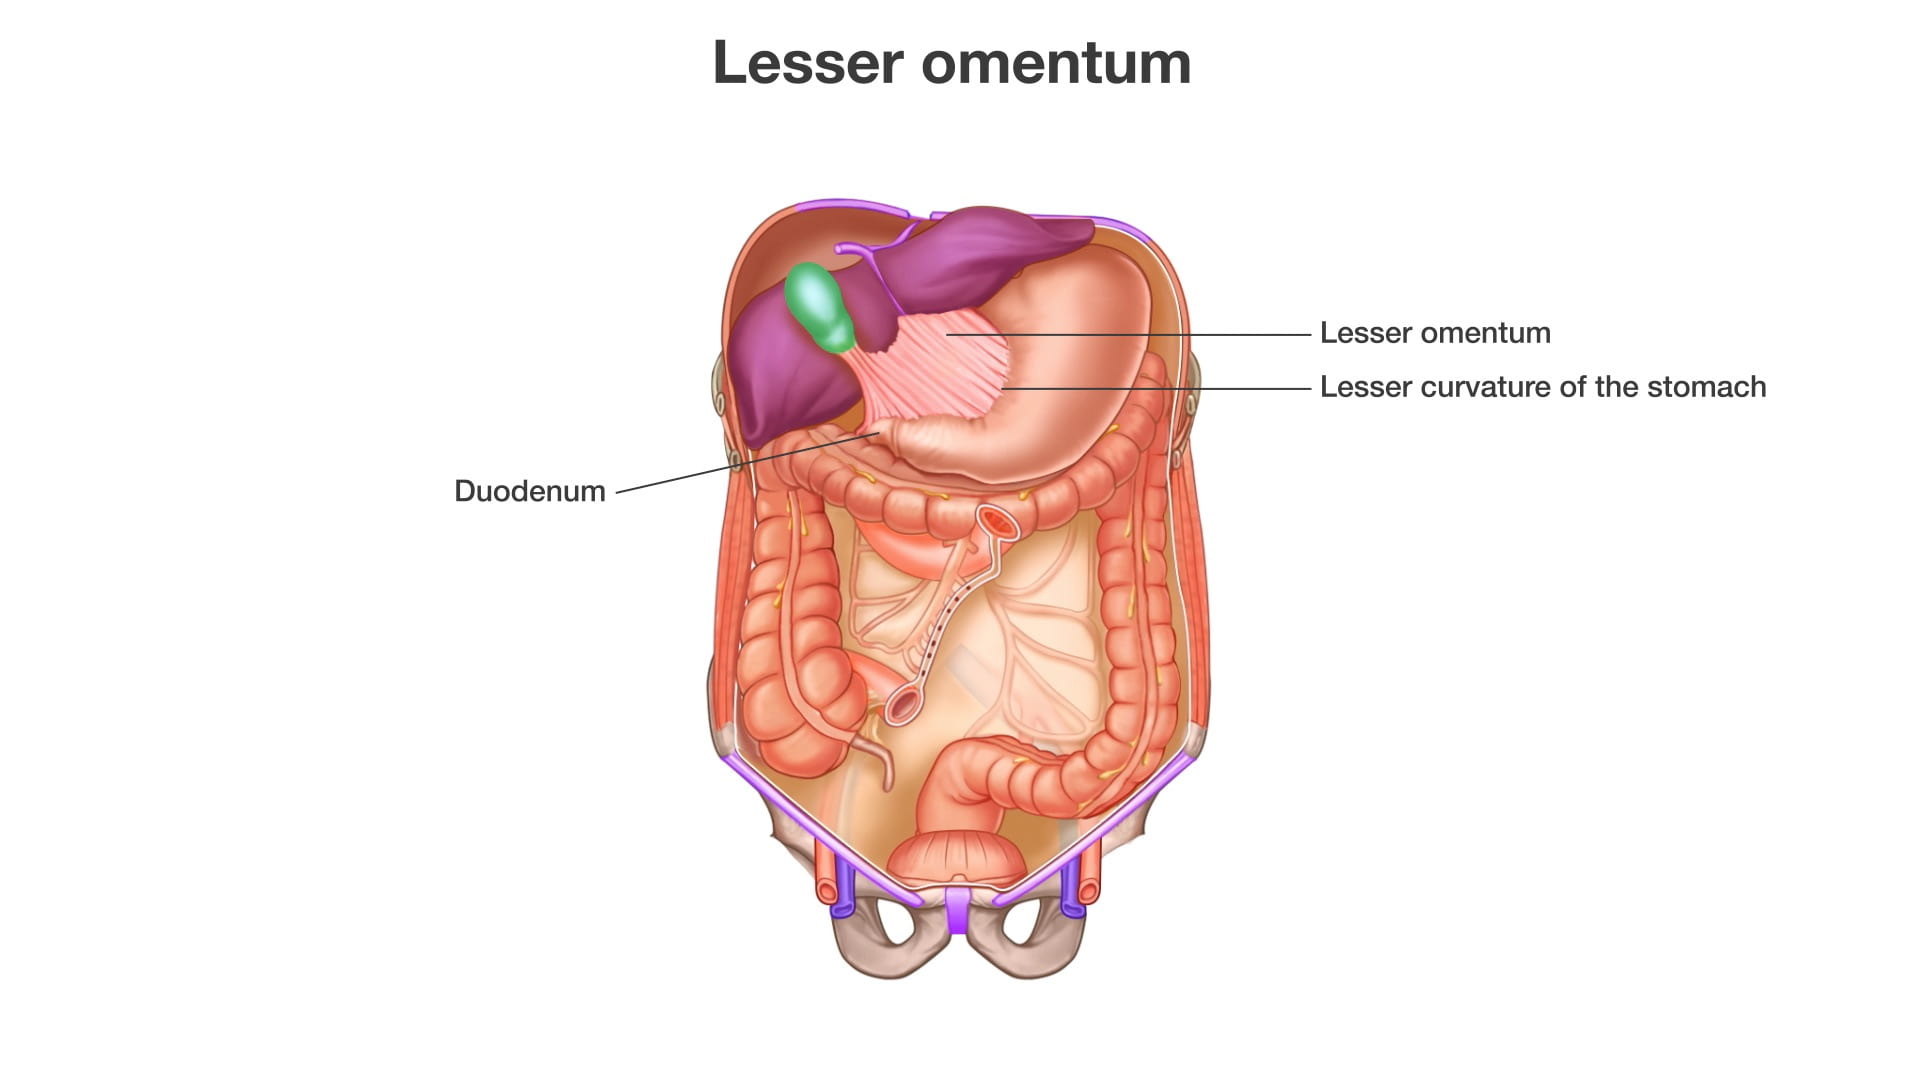
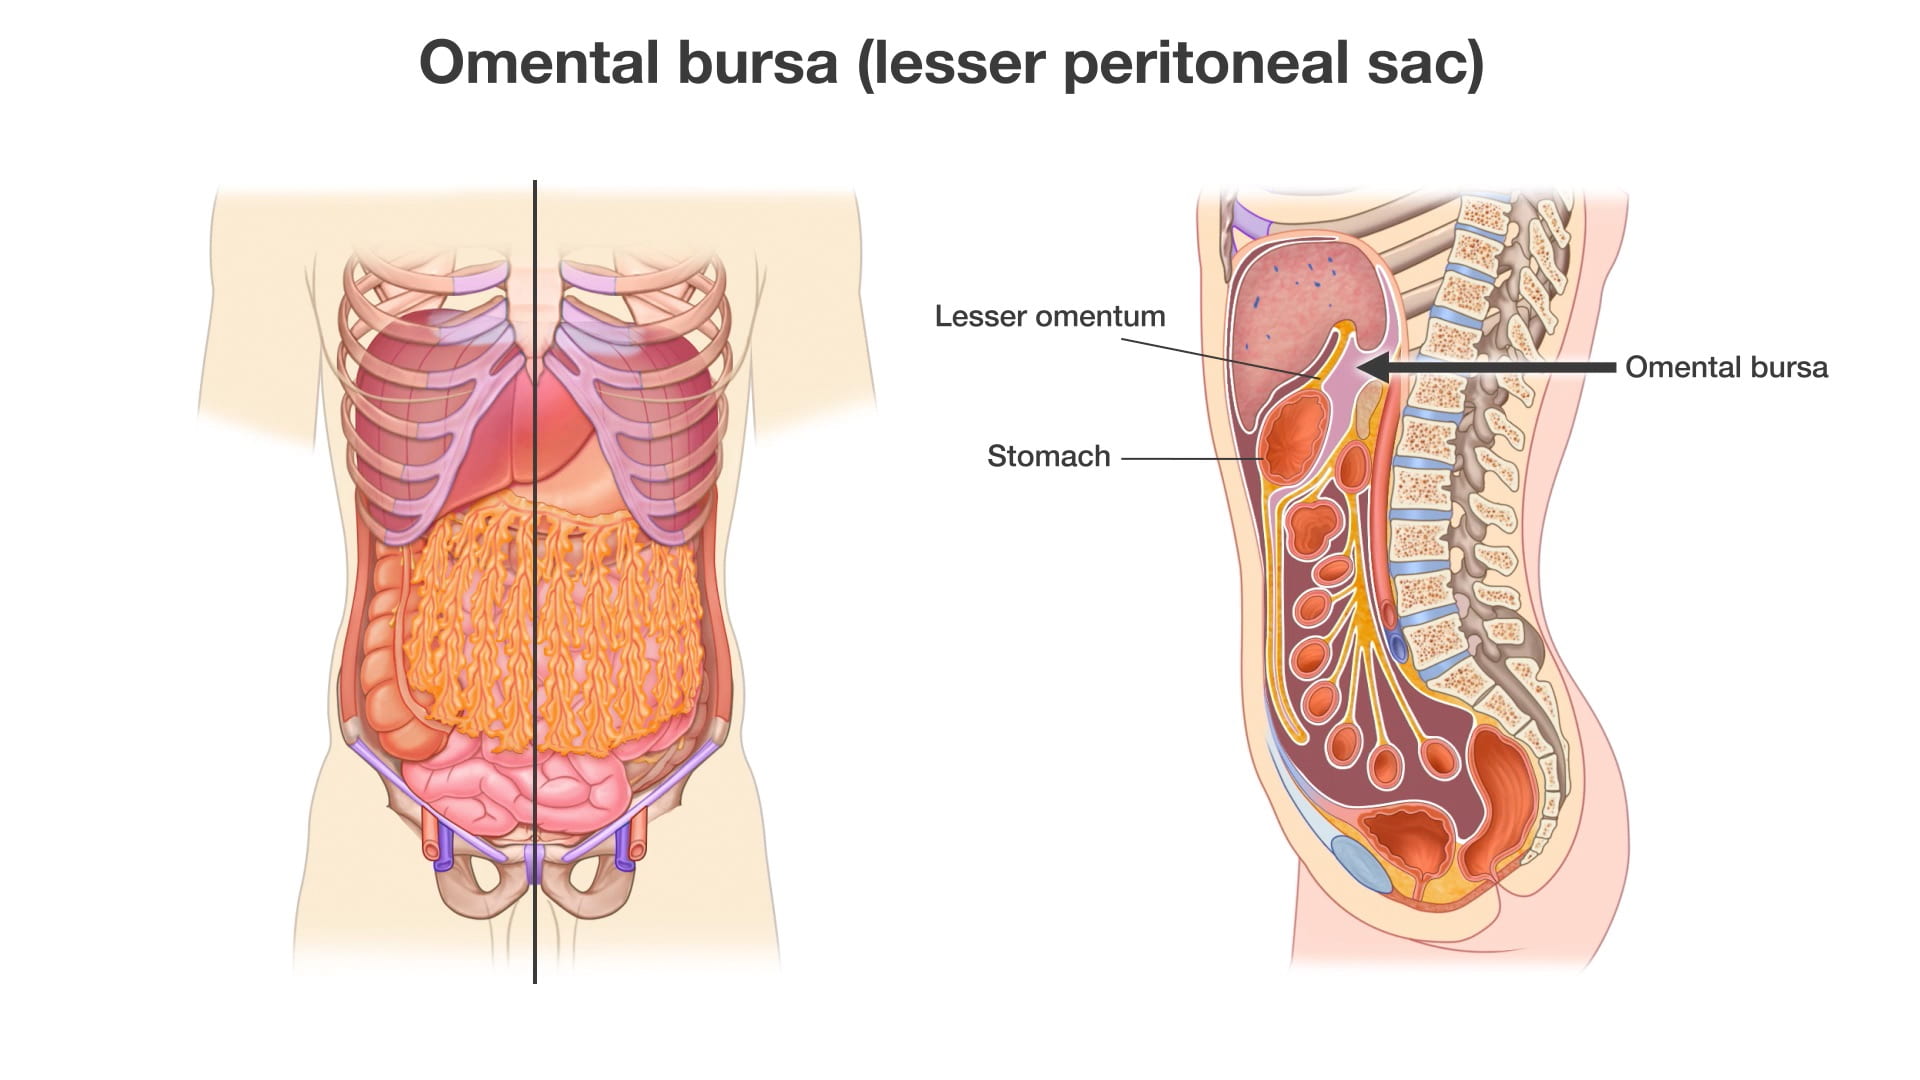
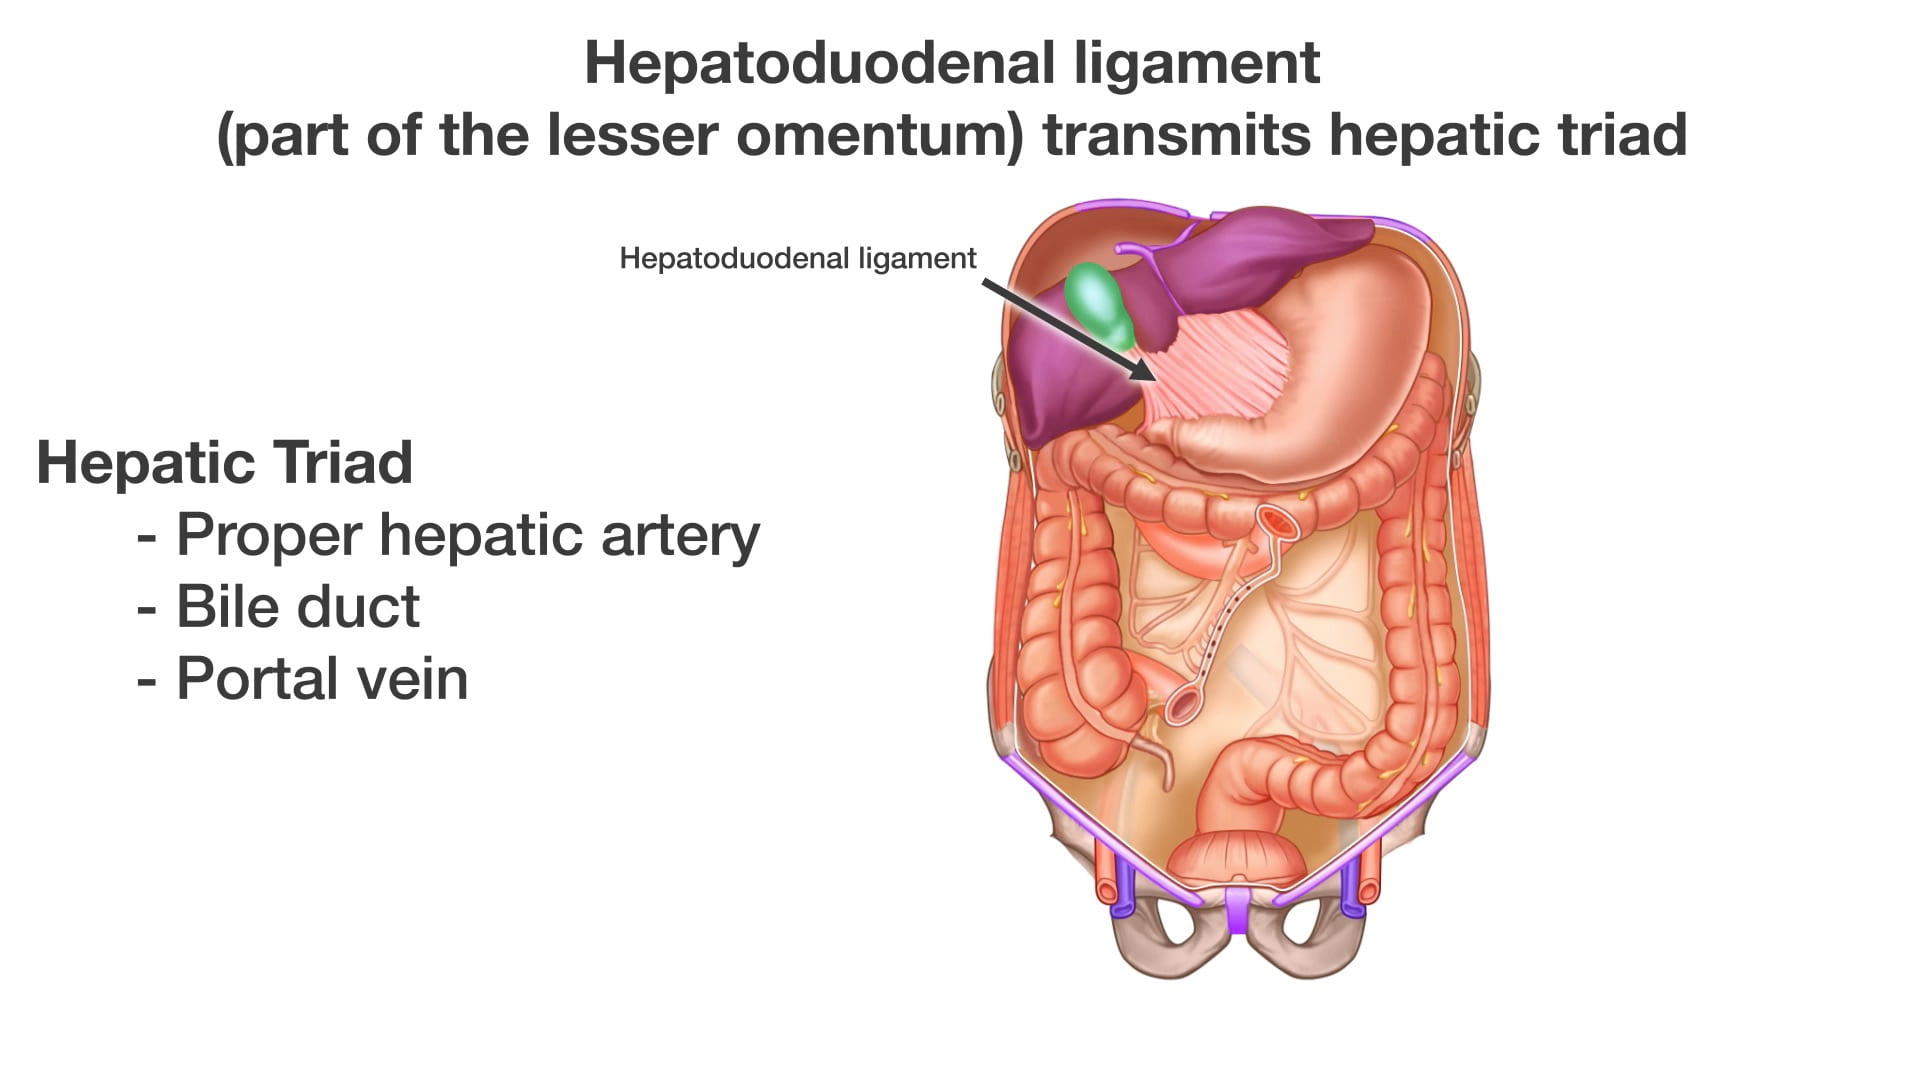
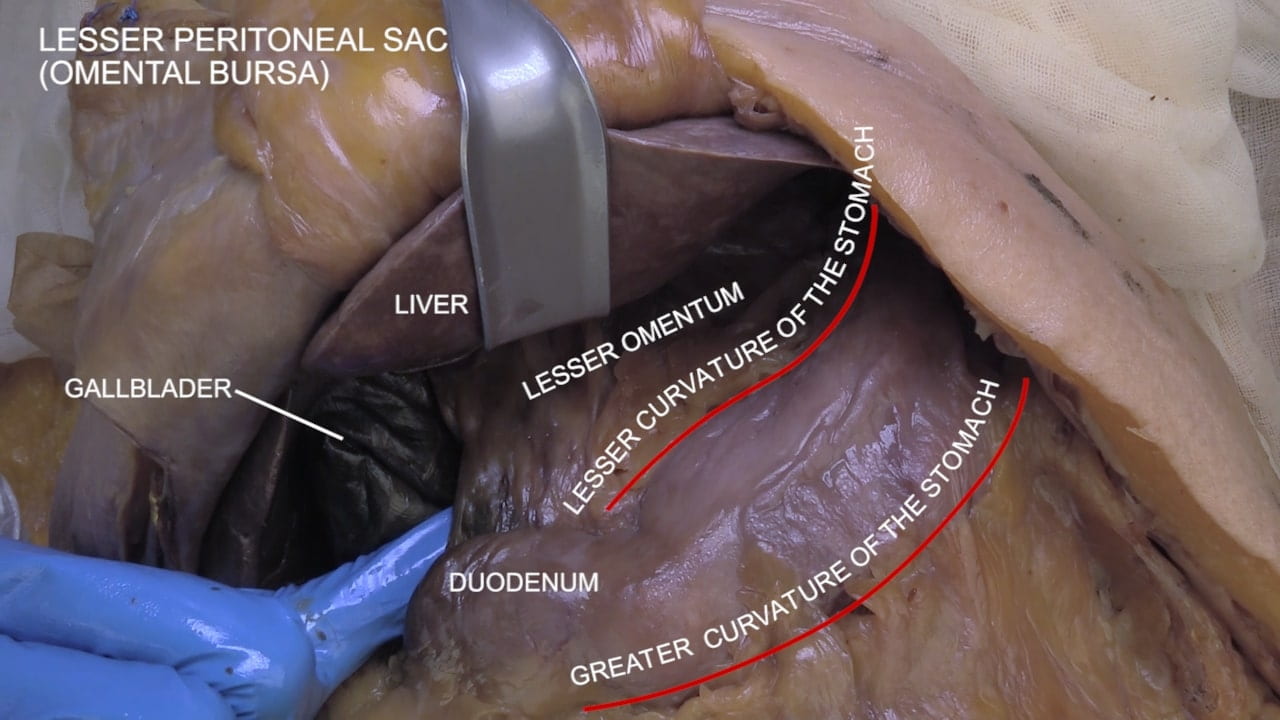
- Describe the greater and lesser omentum.
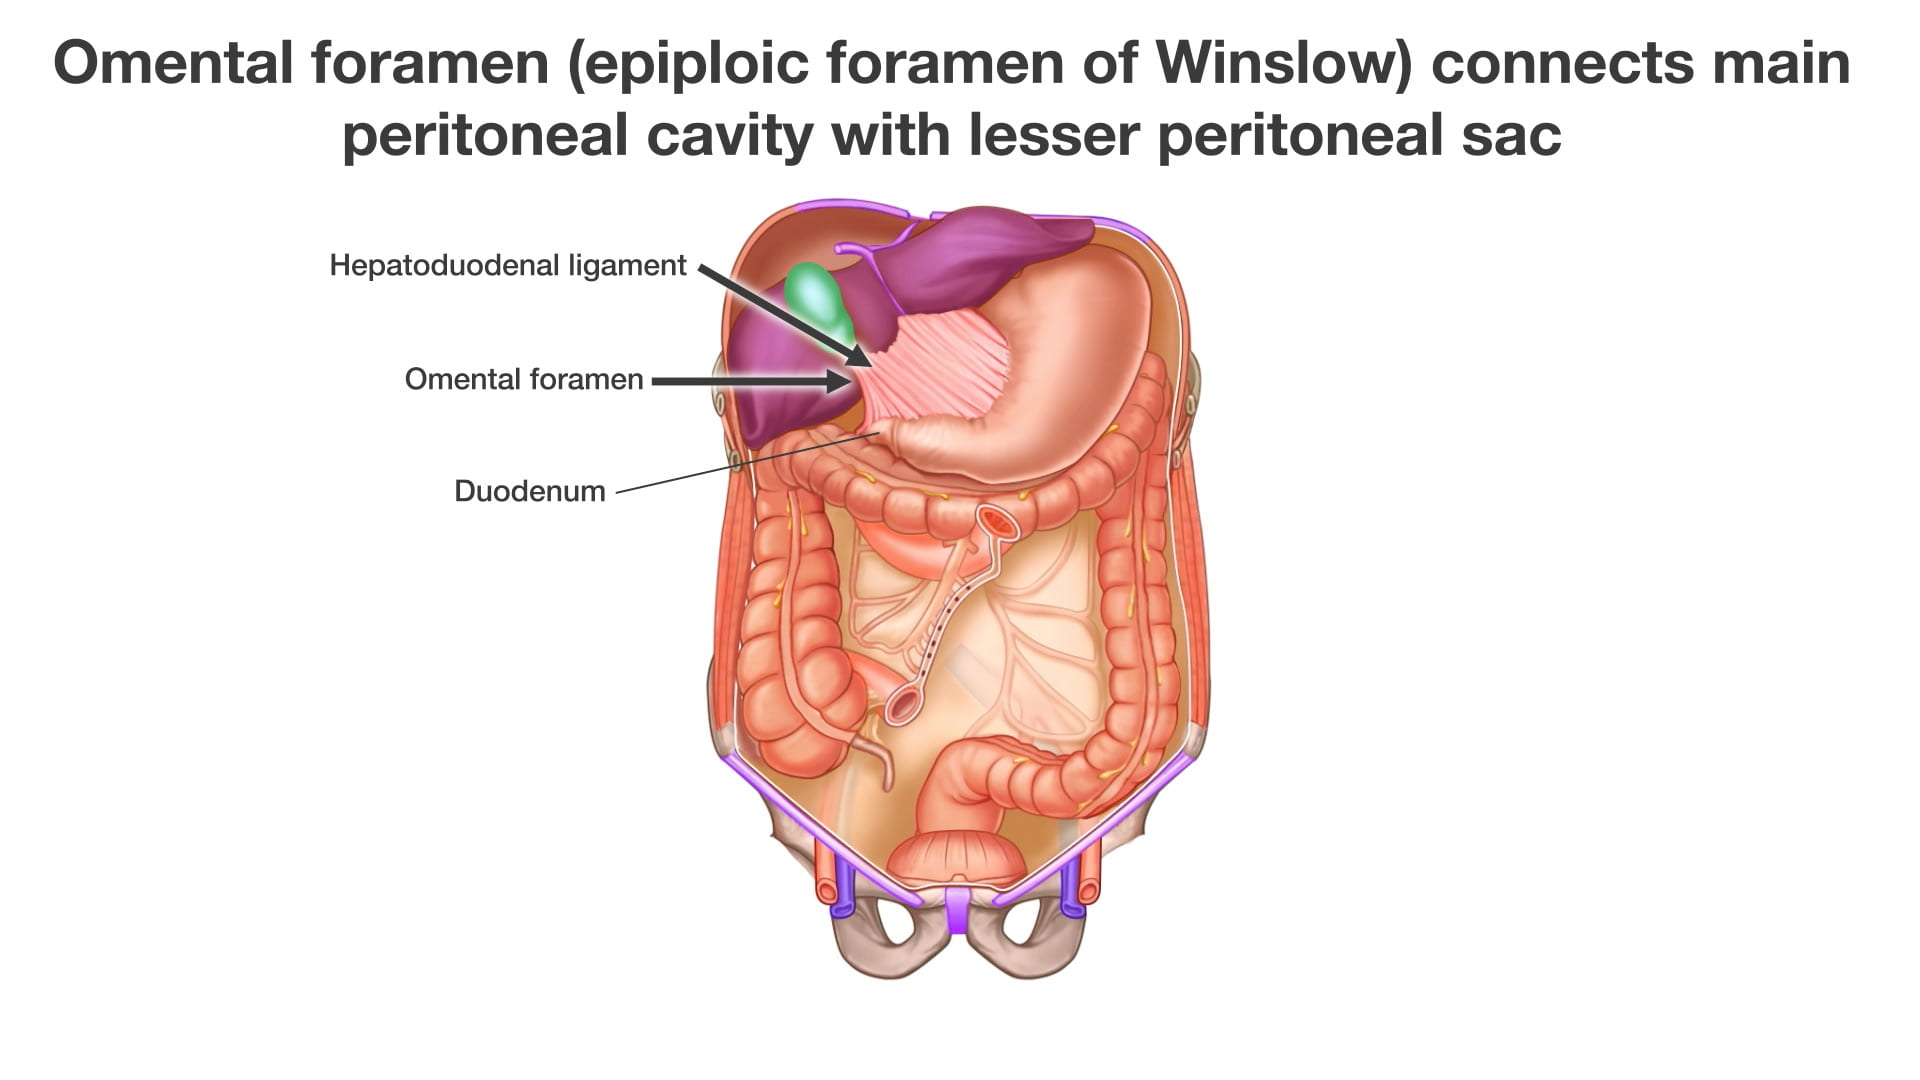
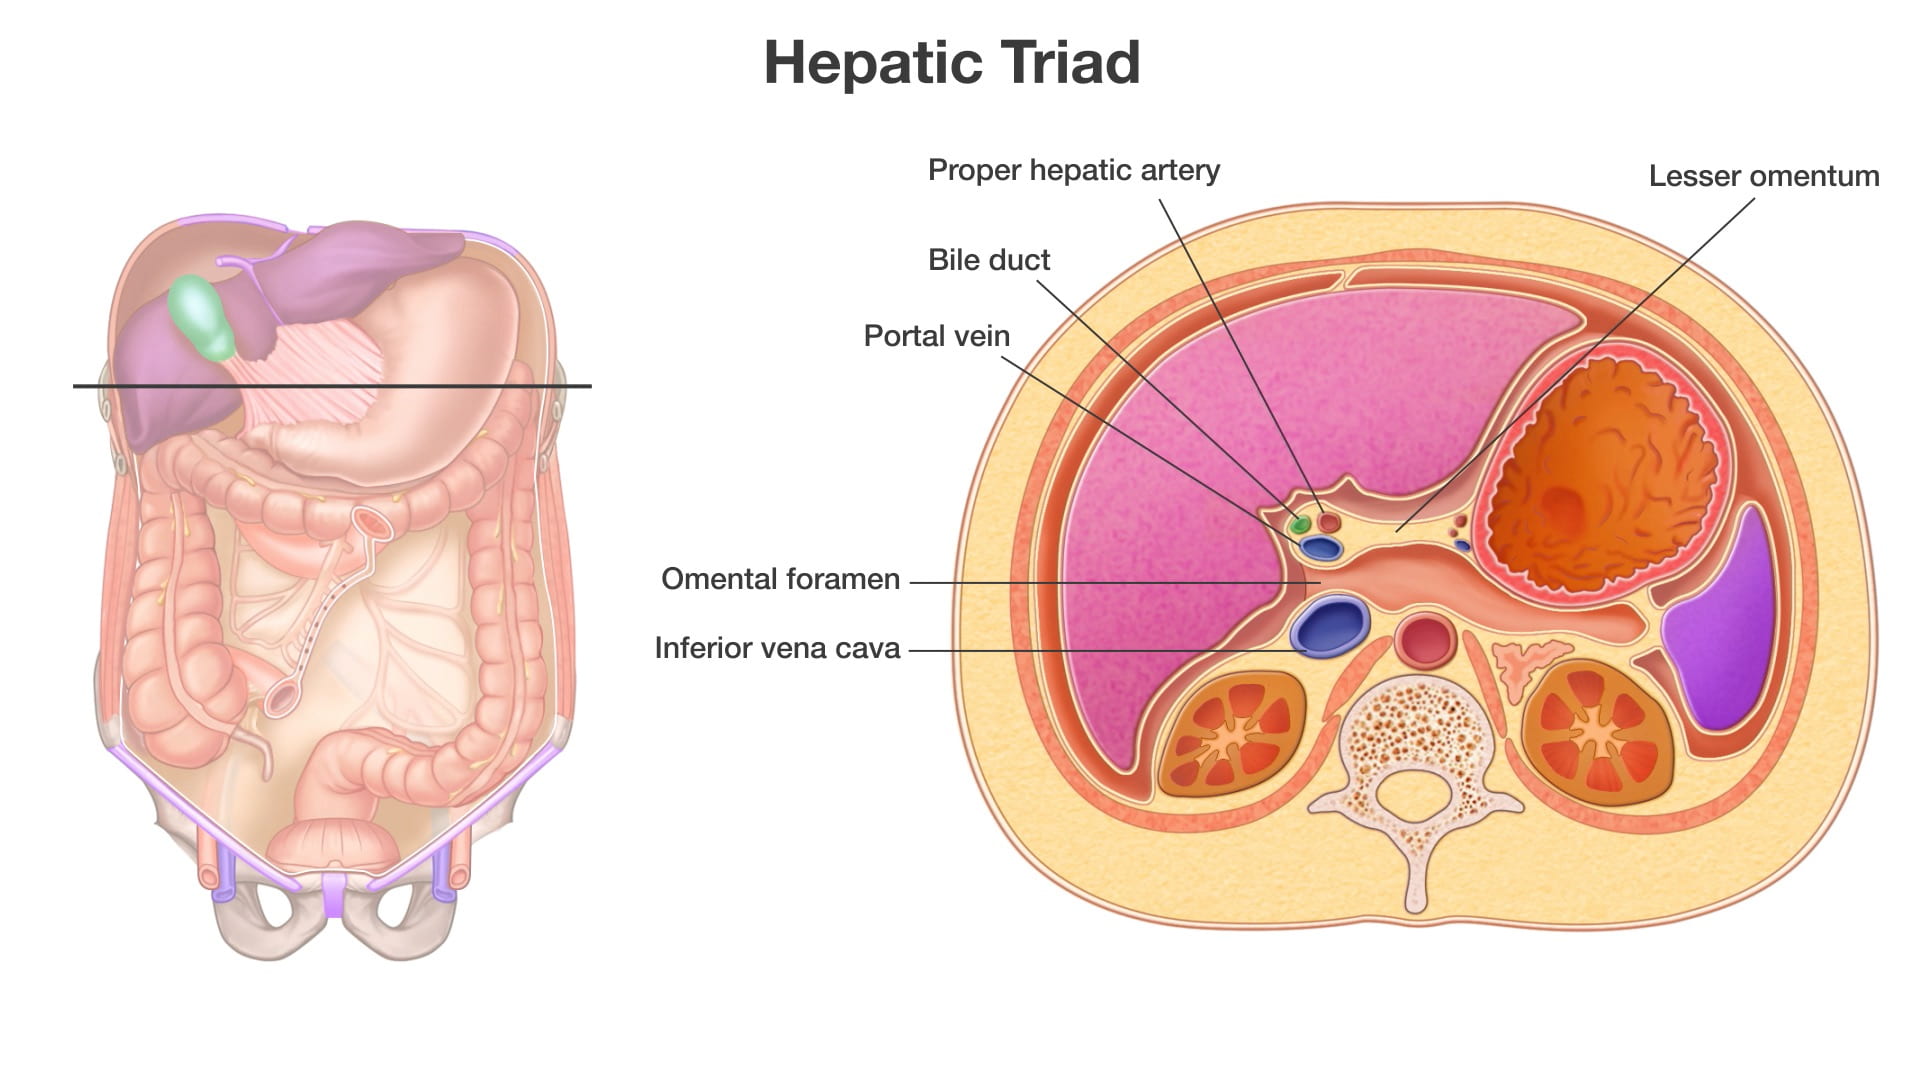
- Describe the position and importance of the omental foramen.
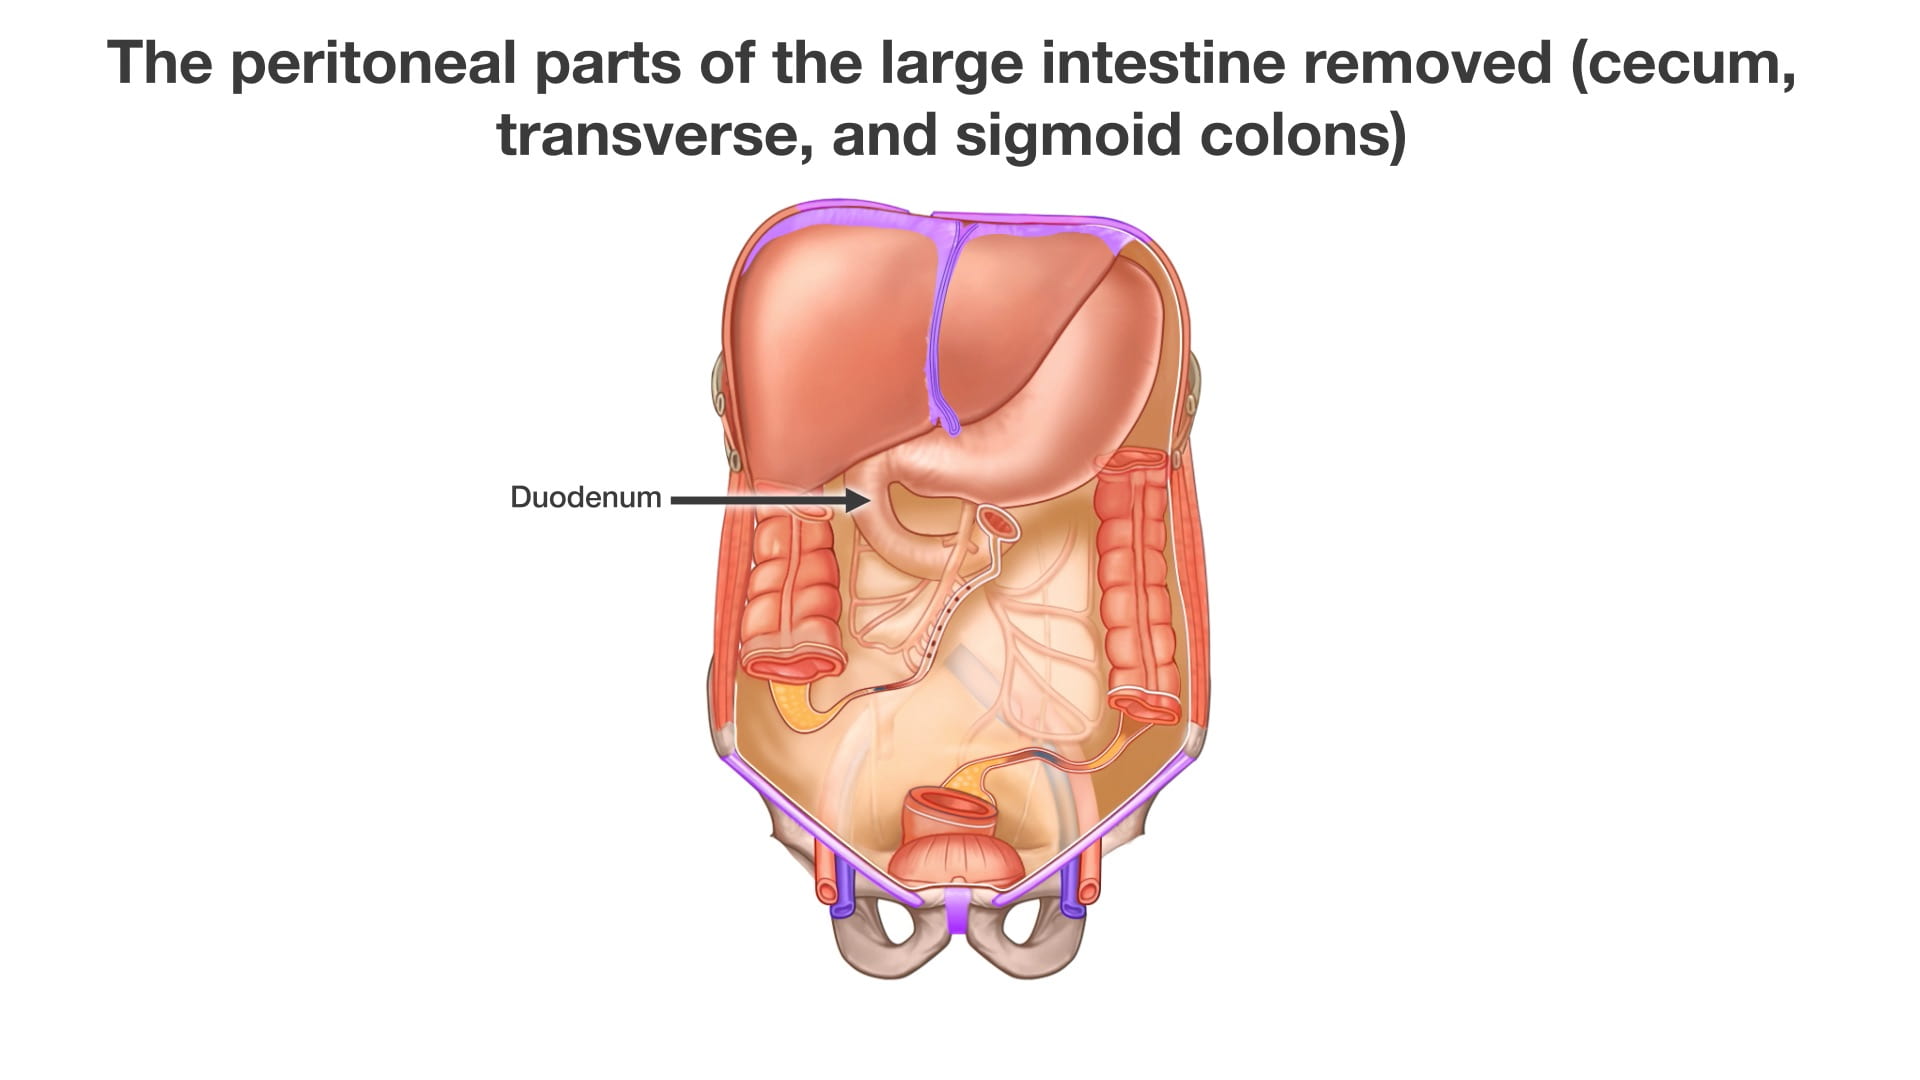
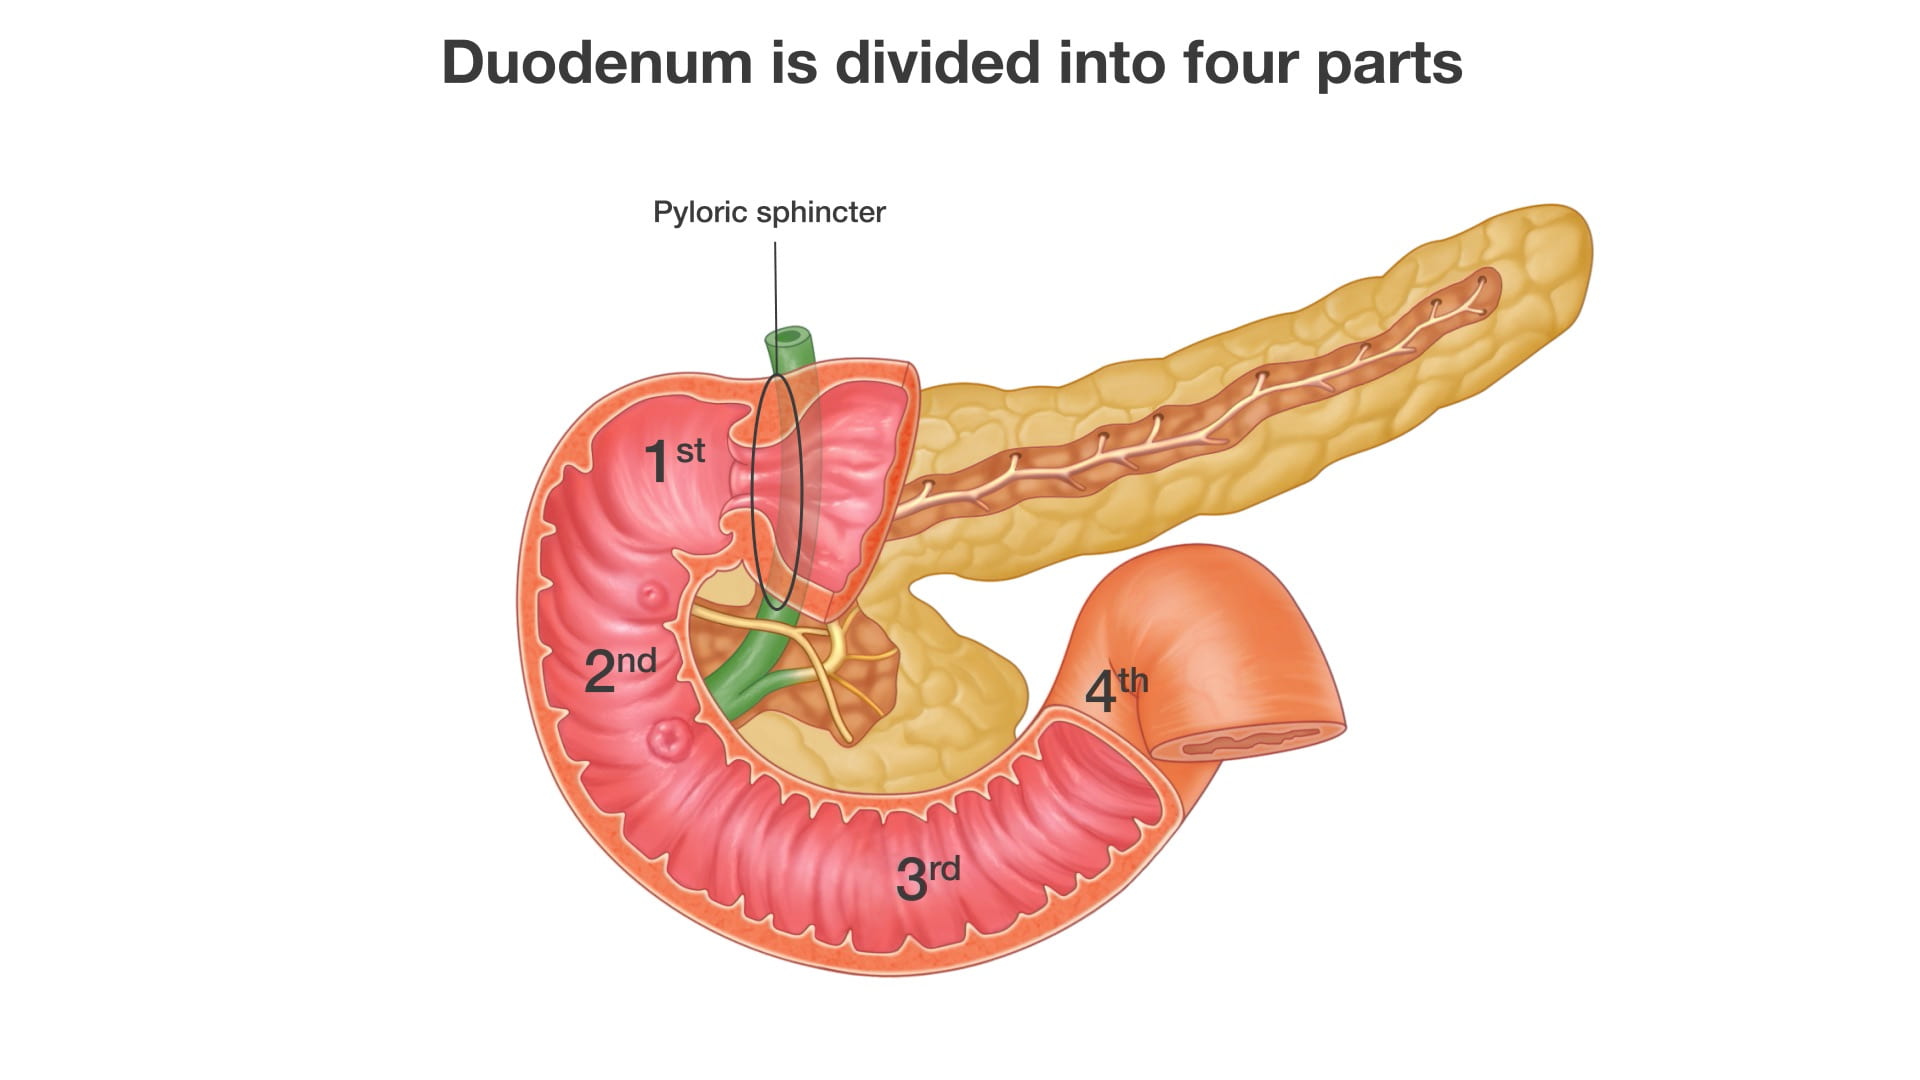
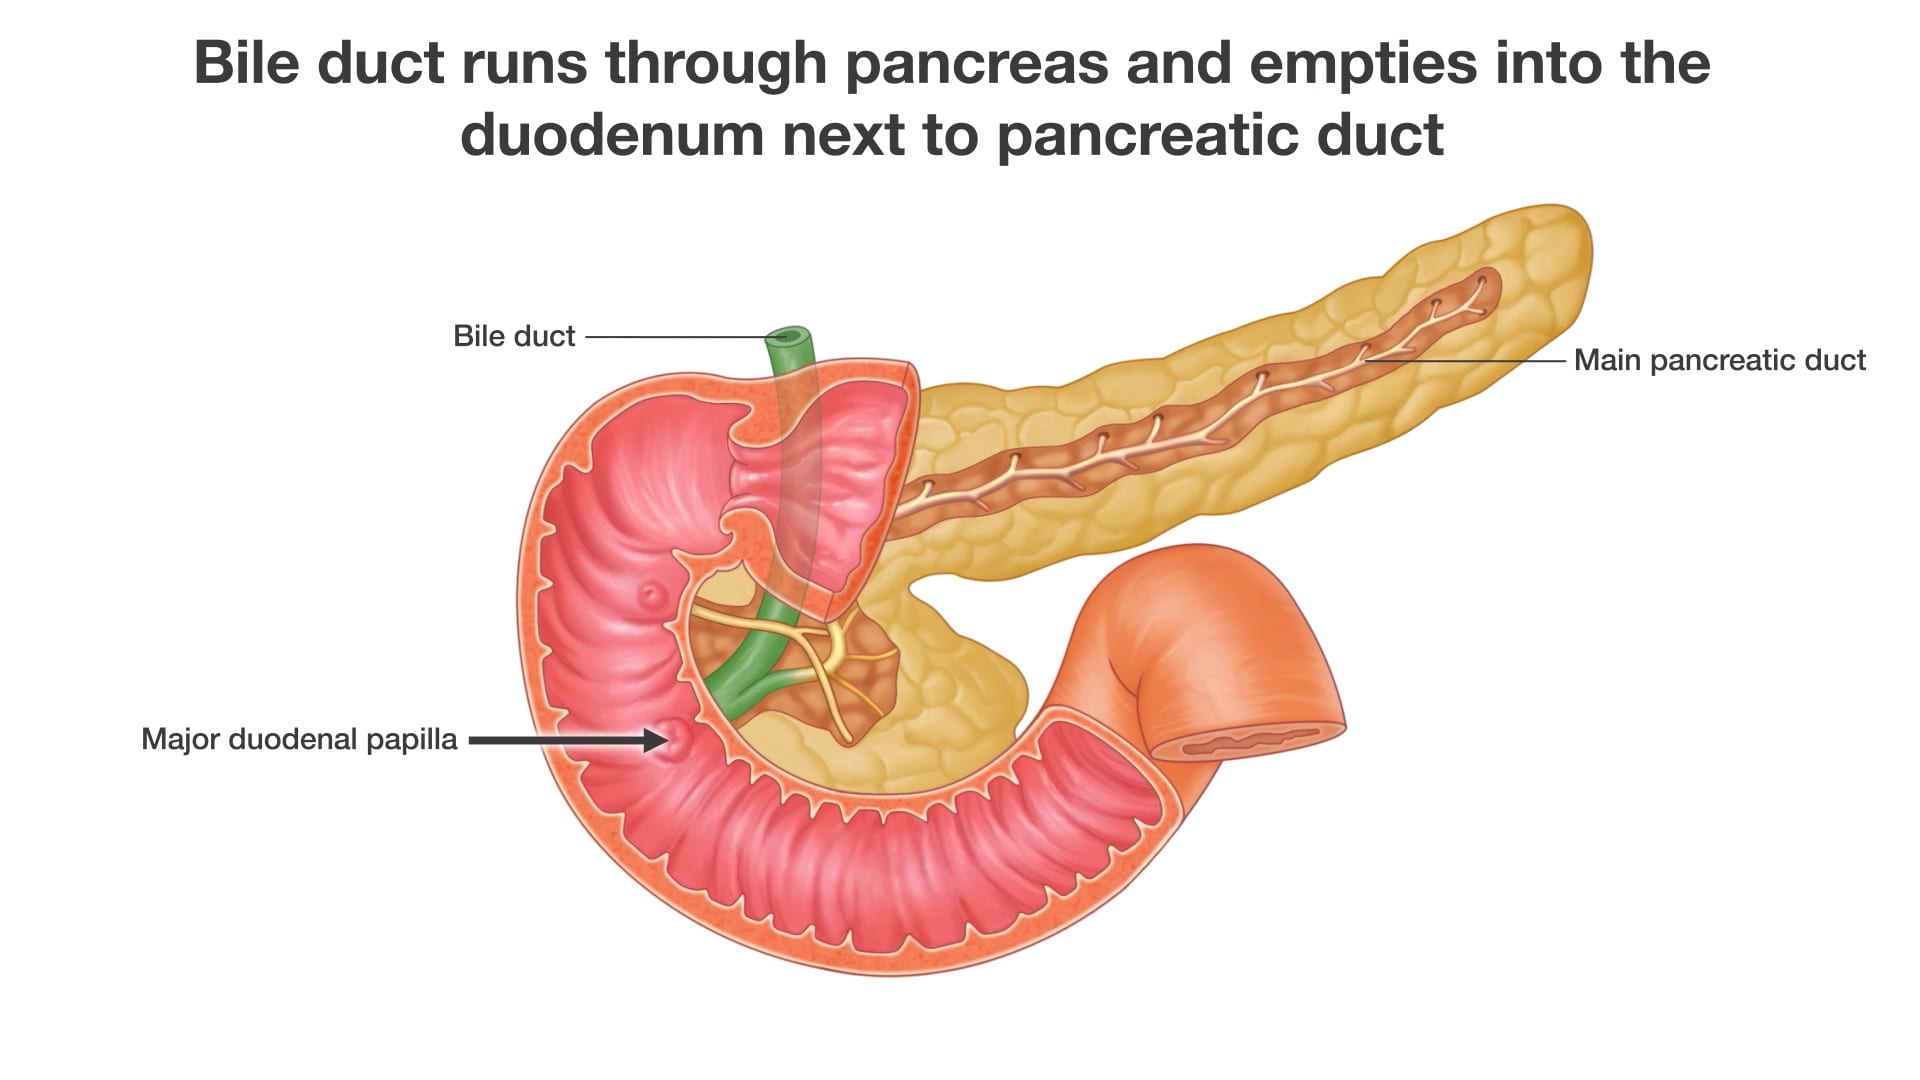
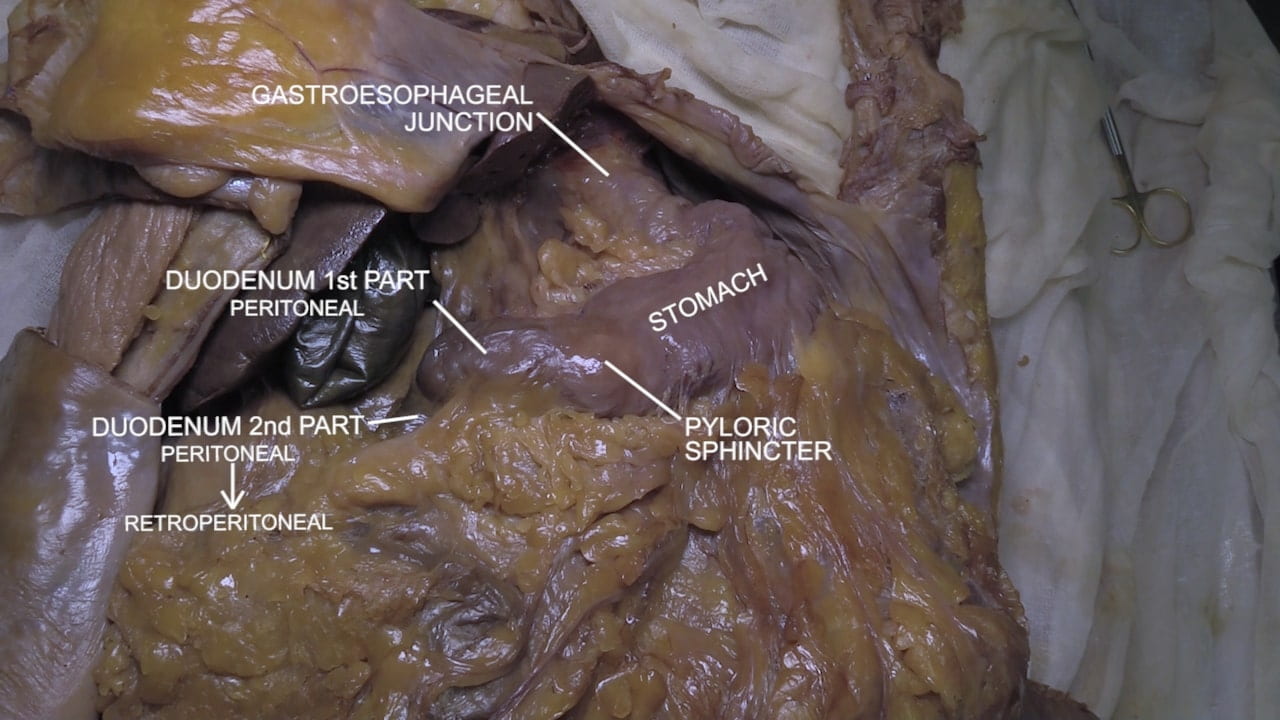
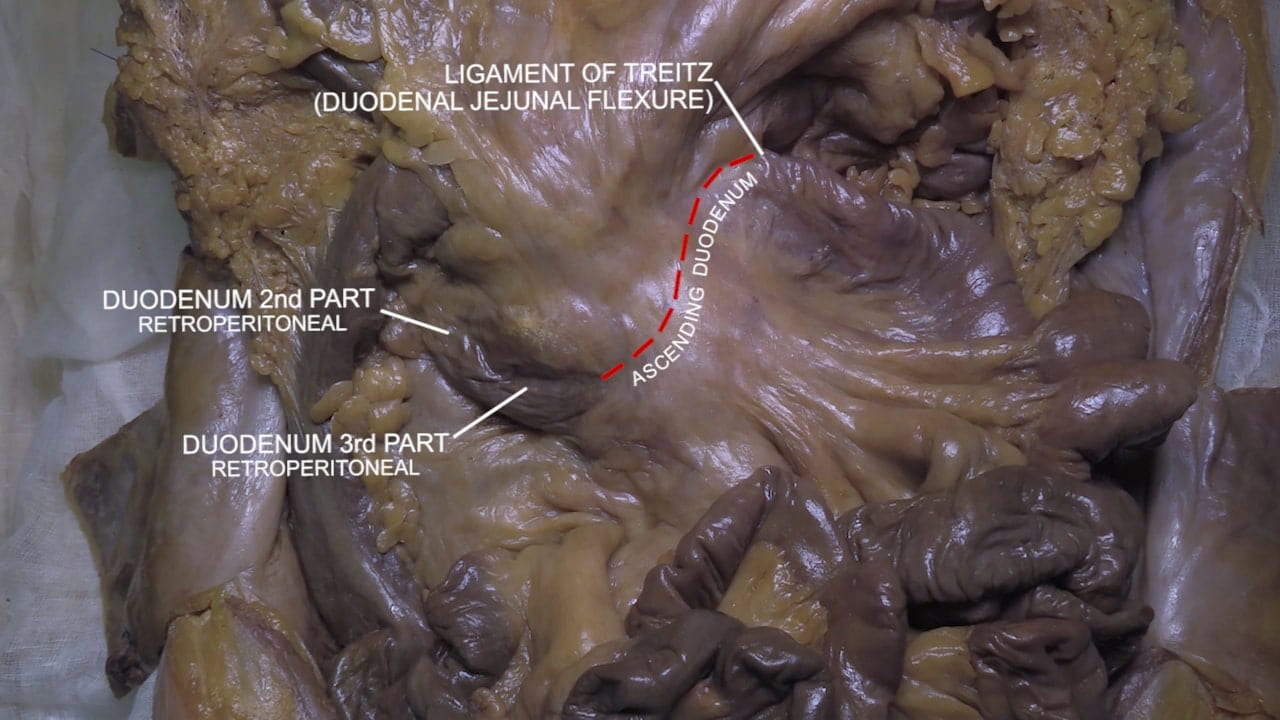
- Describe the portions of the duodenum.
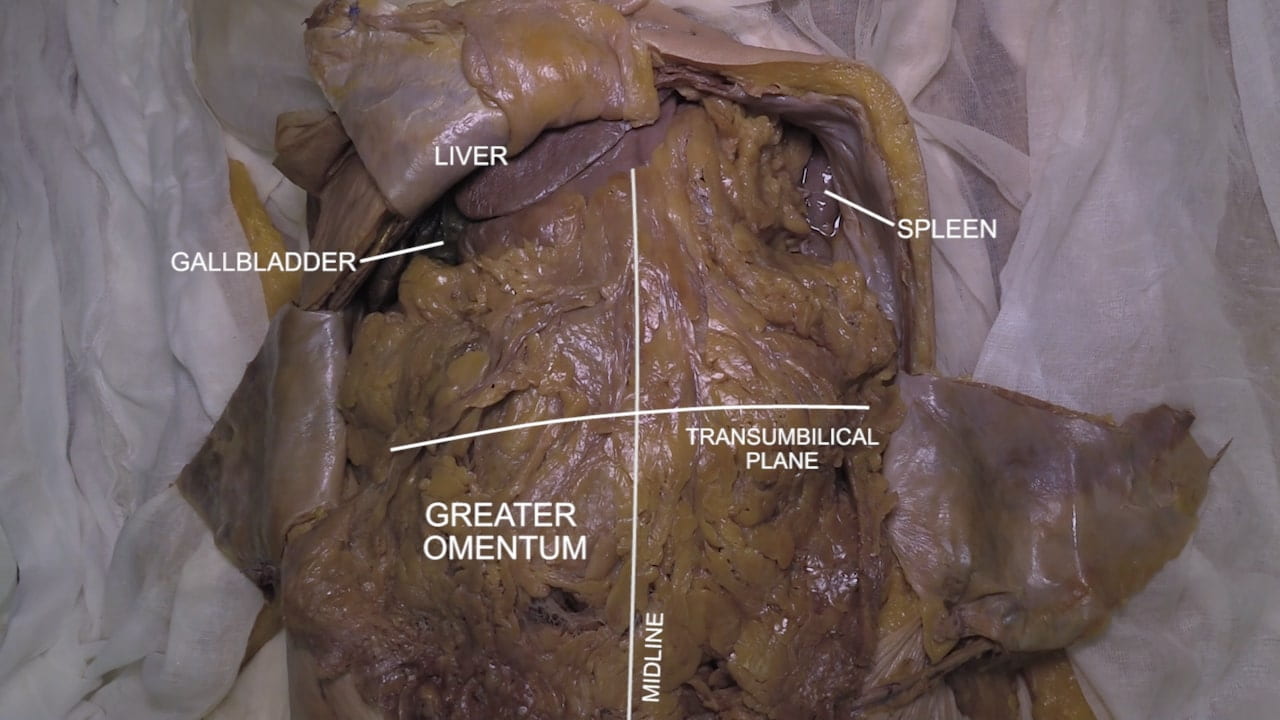
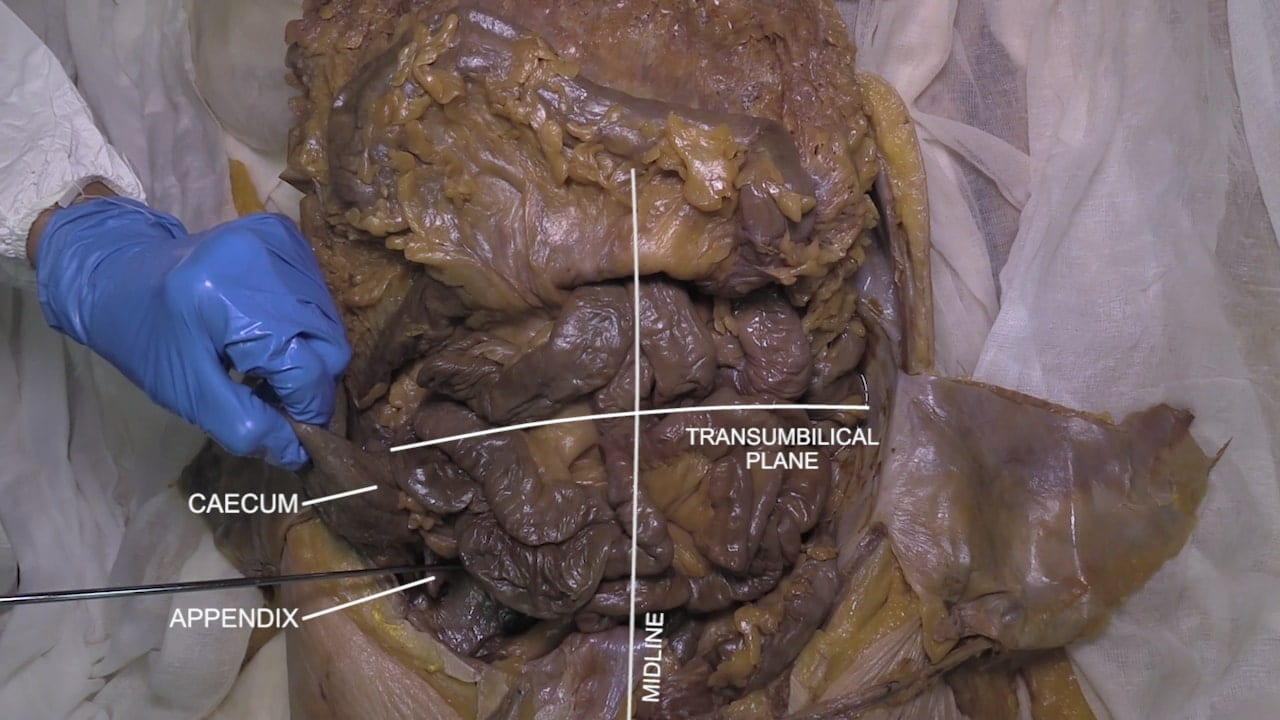
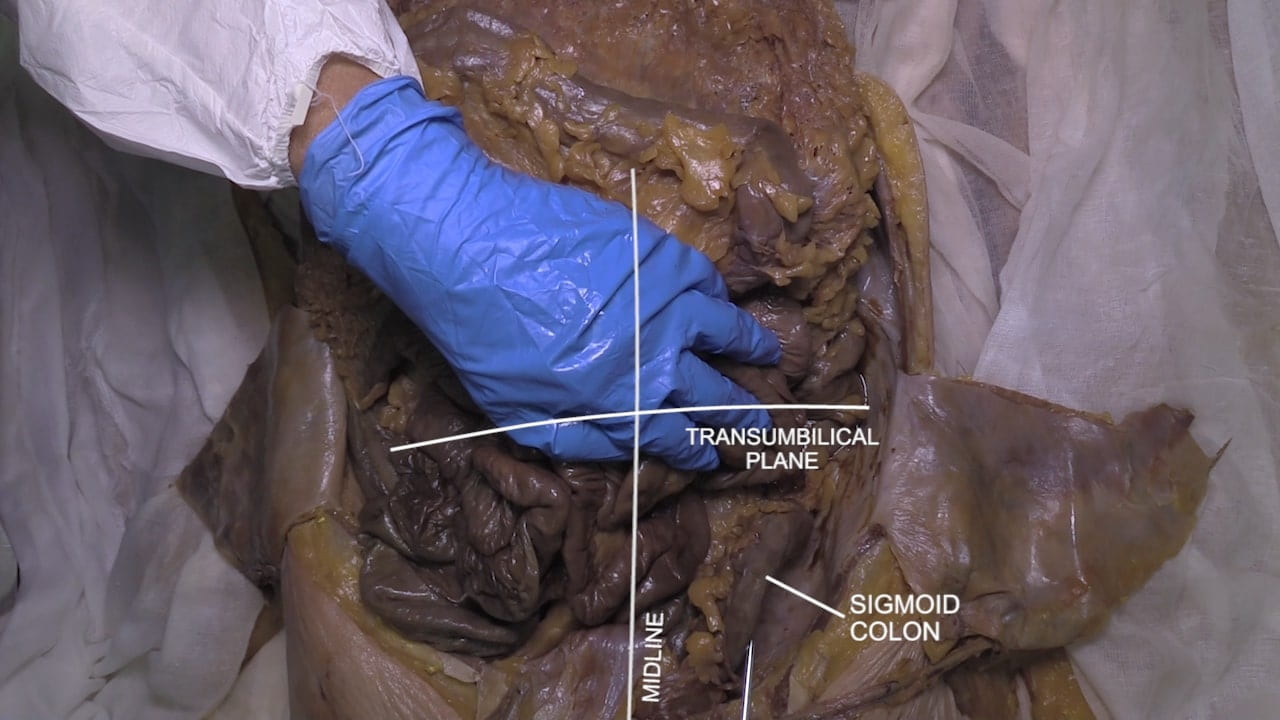
- Describe the major structures in the 4 abdominal quadrants.
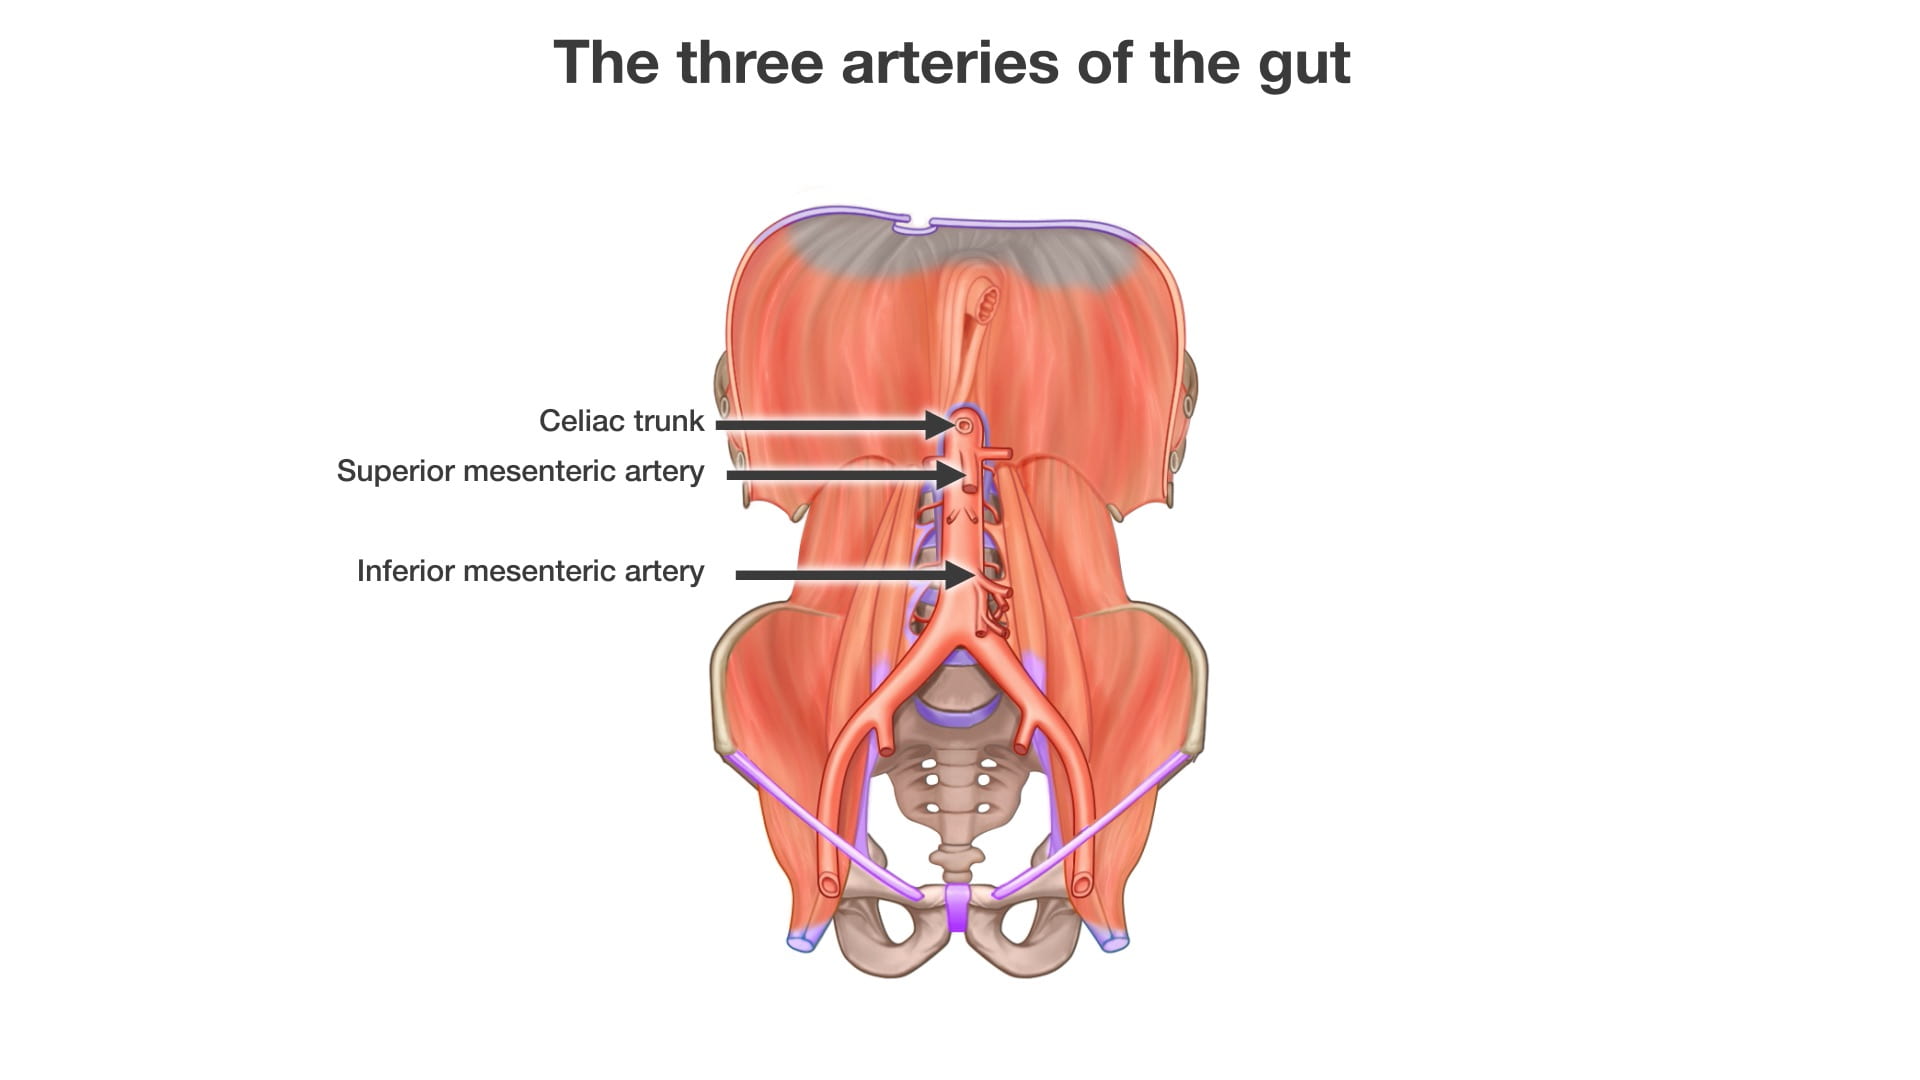
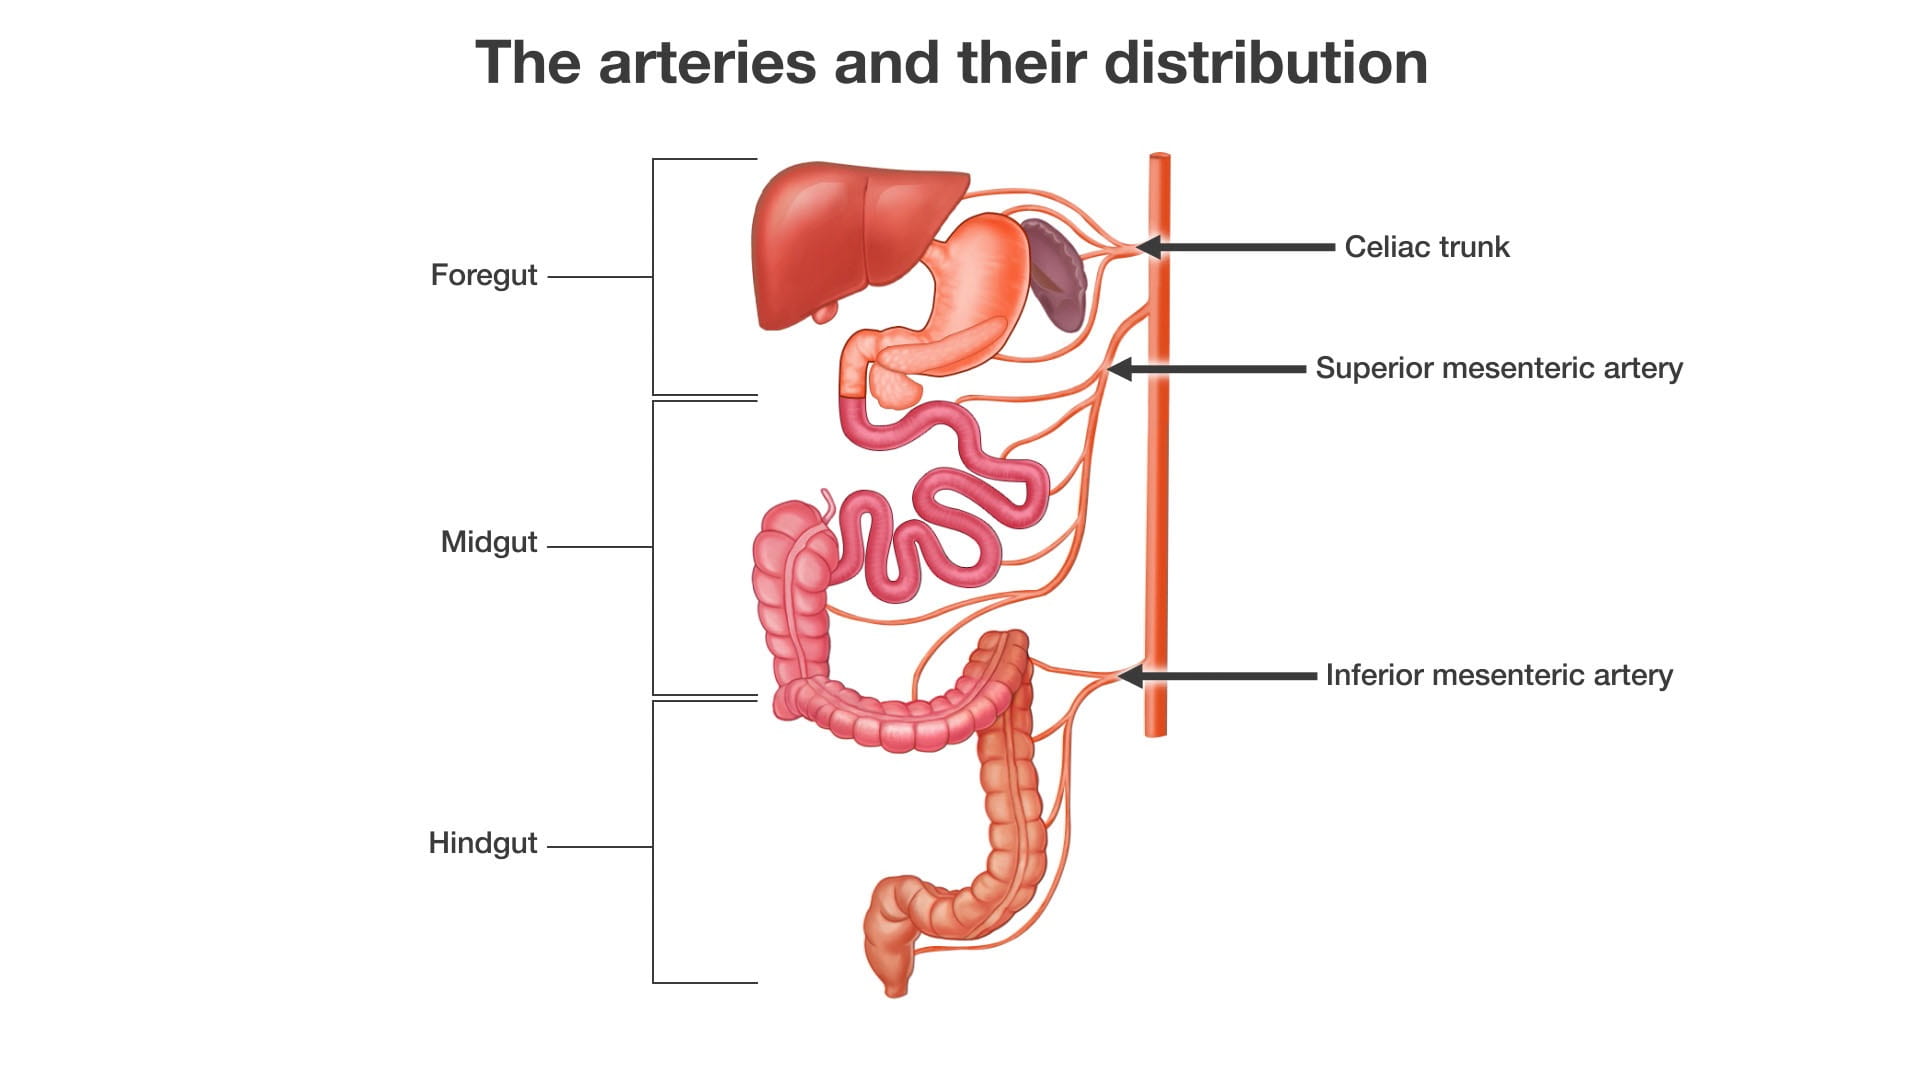
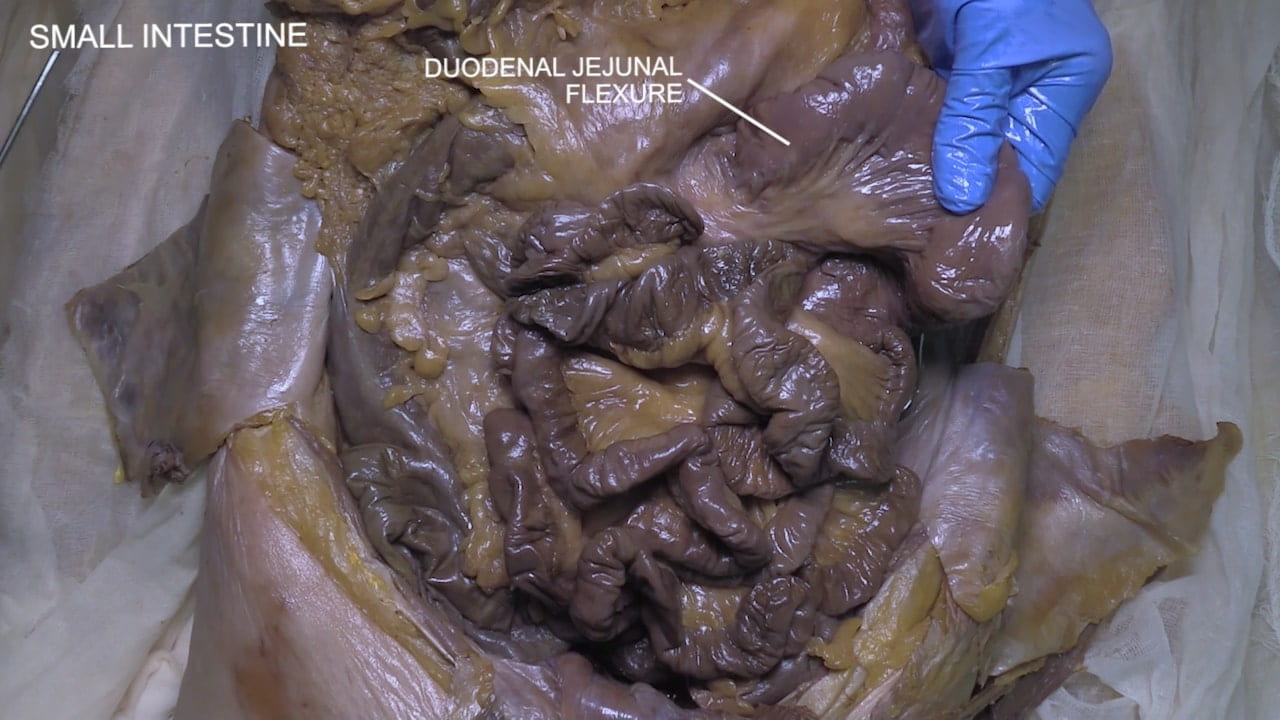
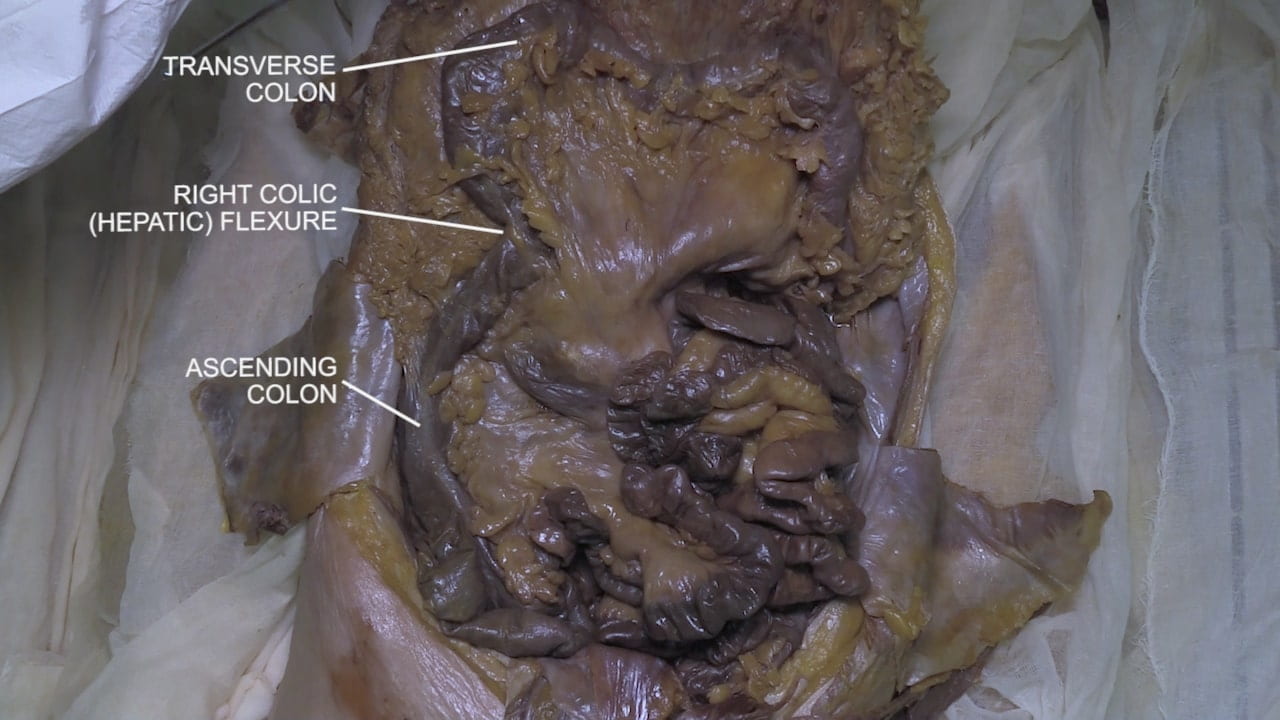
- Describe the passage of food from the esophagus to the anal canal.
Lecture List
McBurney’s Incision, Abdominal Wall, Abdomen Basics
Anatomy of the Abdomen
The Abdomen Gallery
McBurney’s Incisions
McBurney’s Point
McBurney’s Incision
Abdomen Wall
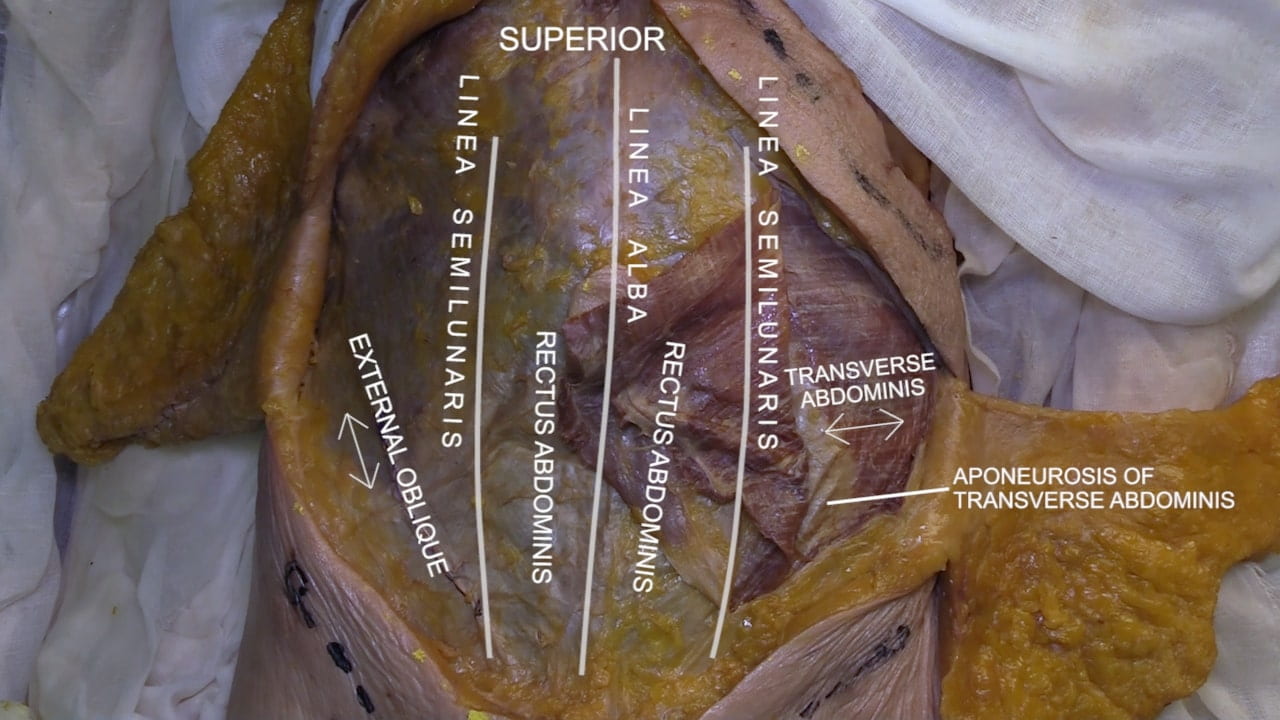
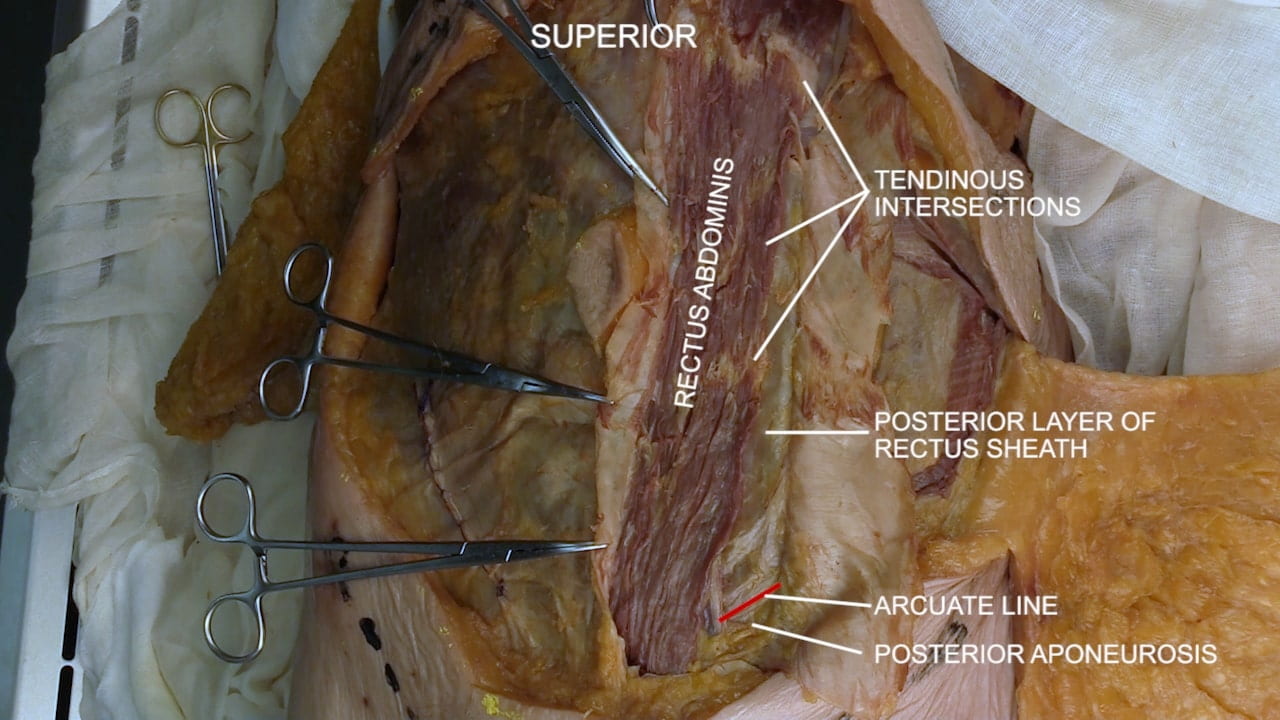
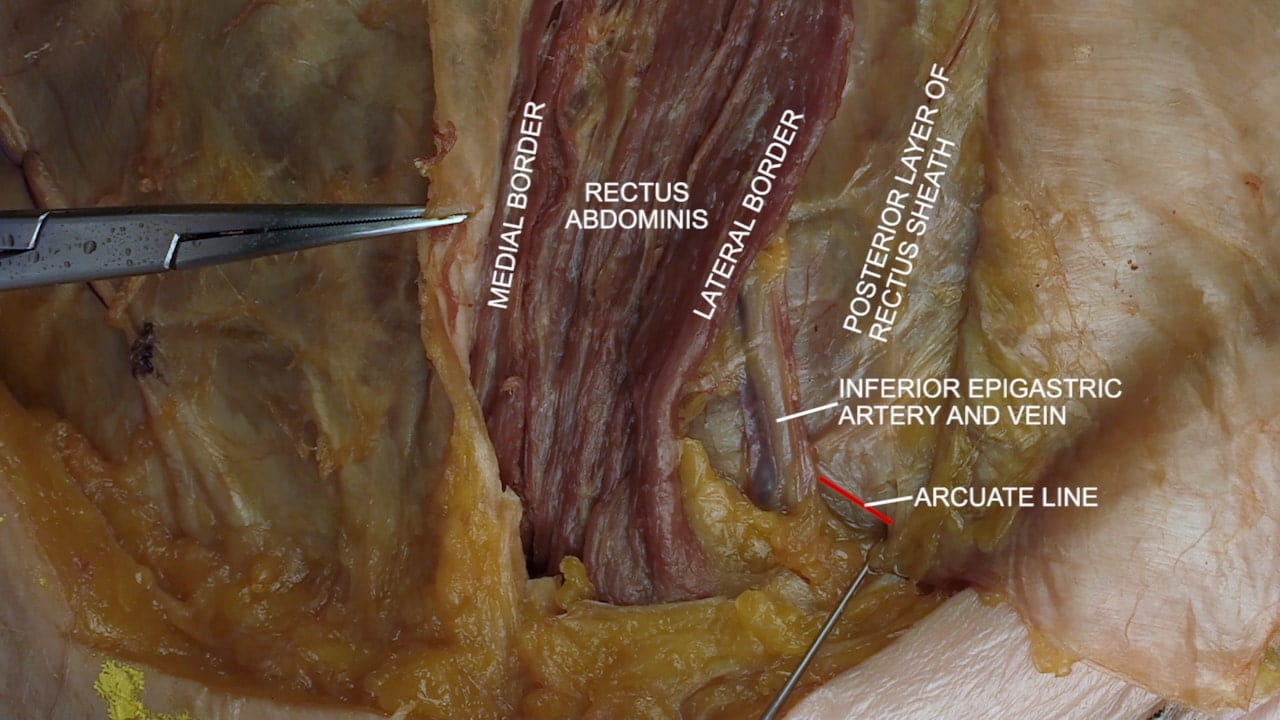
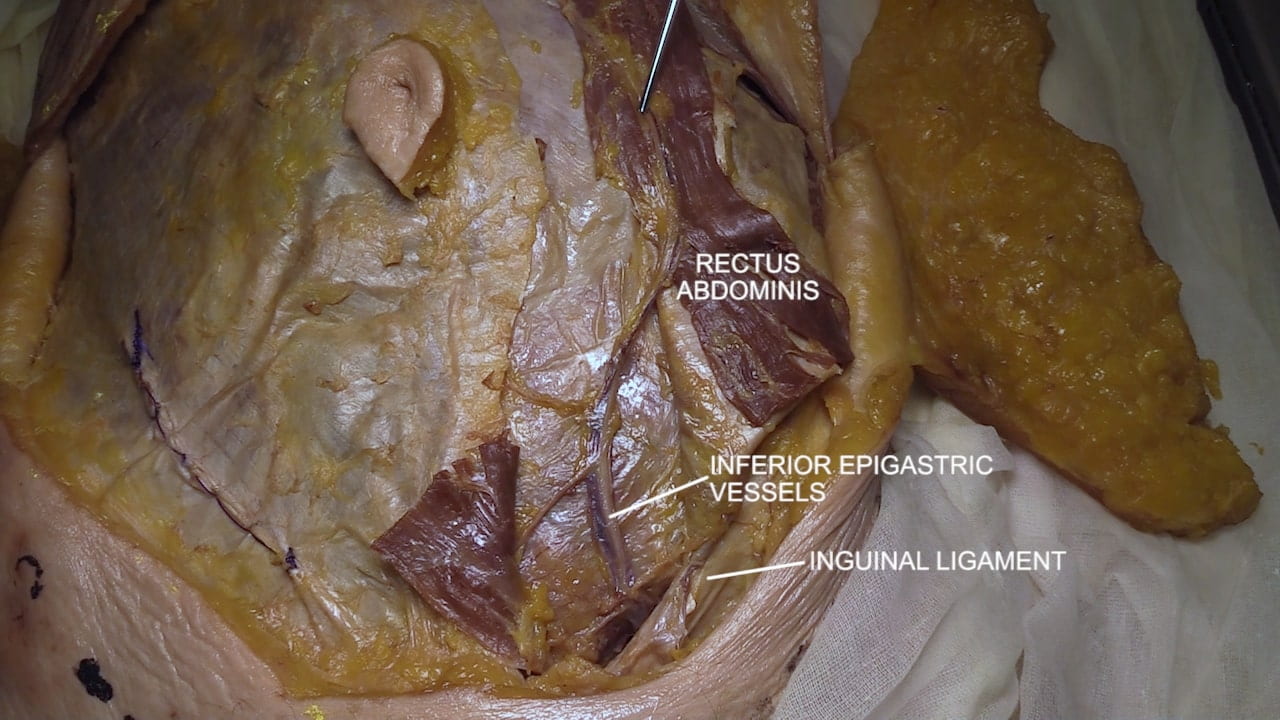
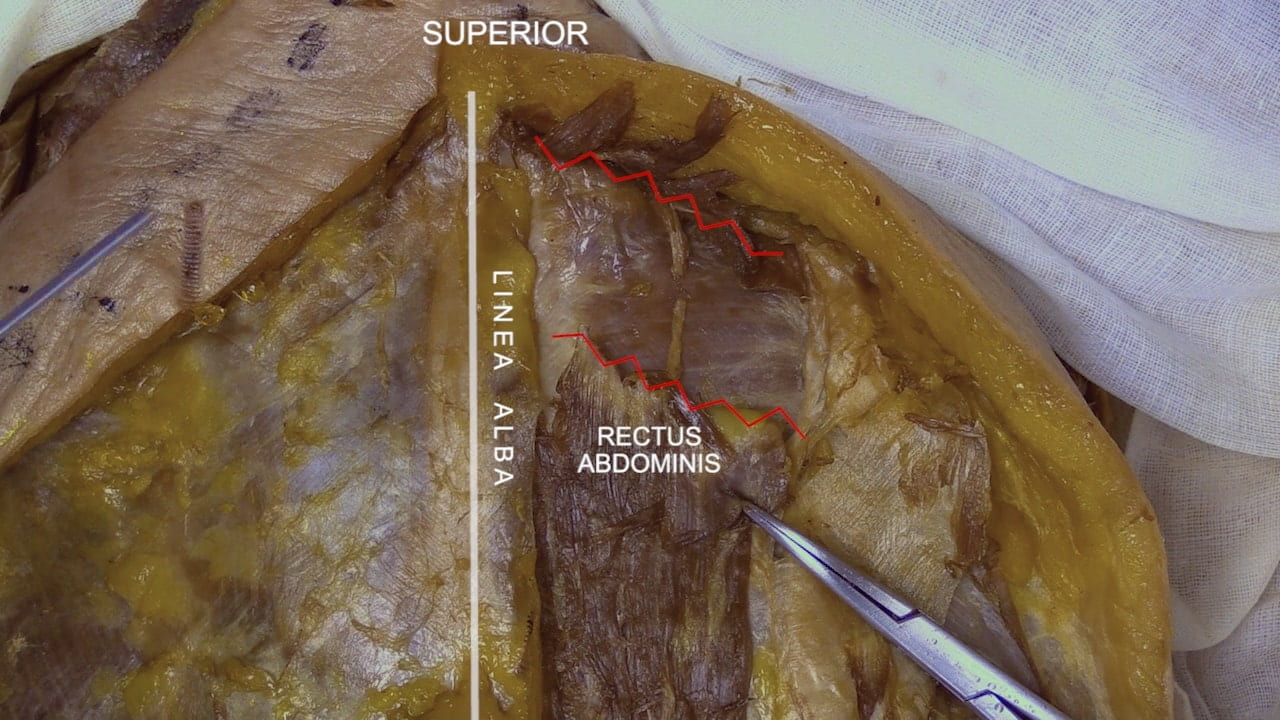
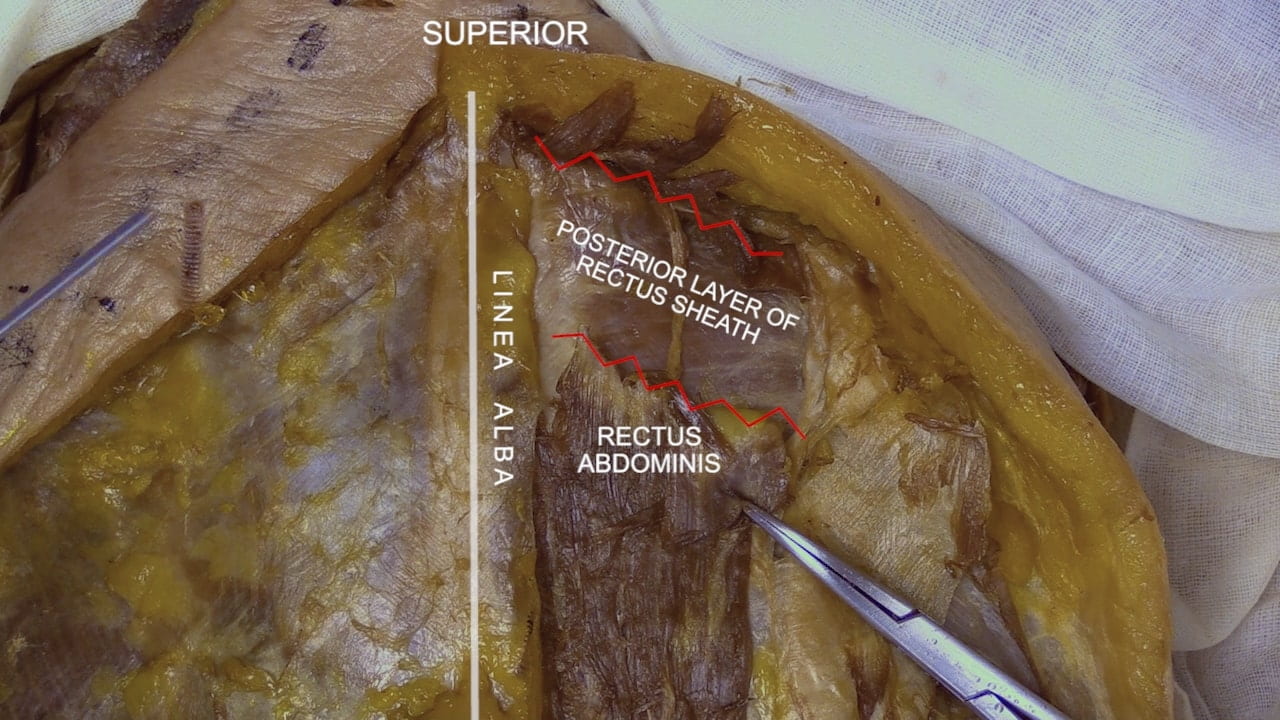
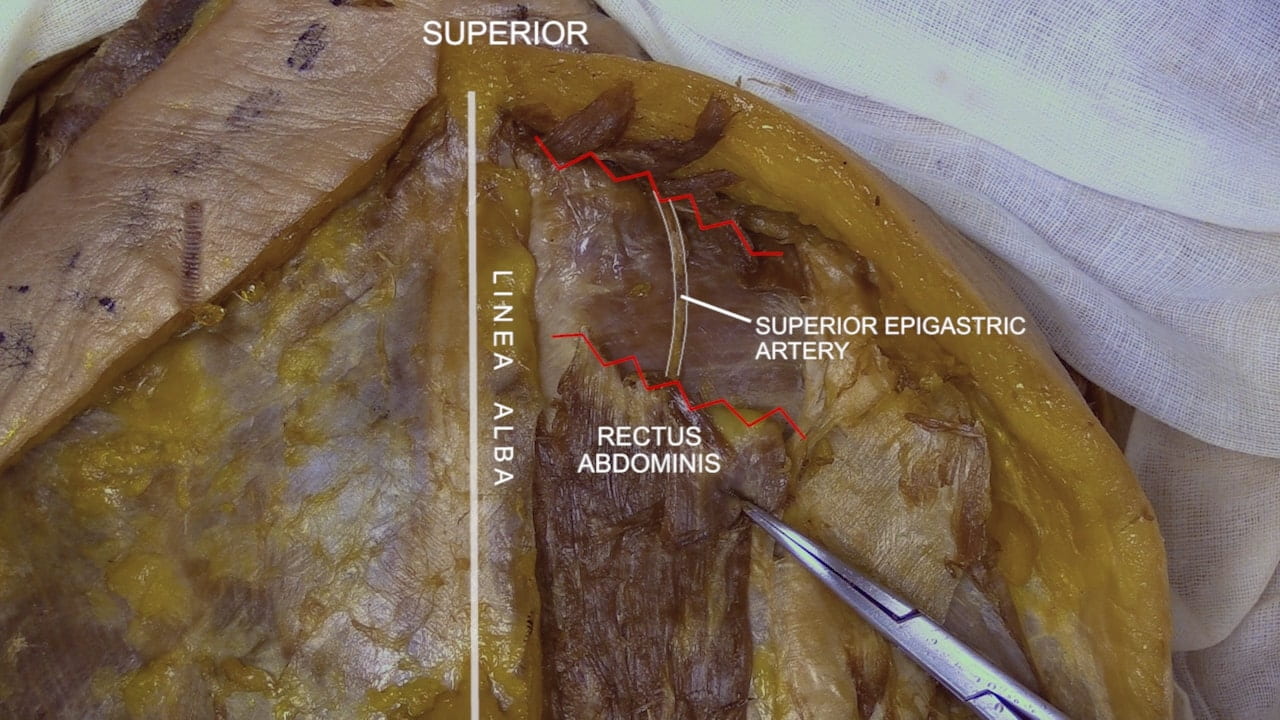
Abdominal Wall Musculature
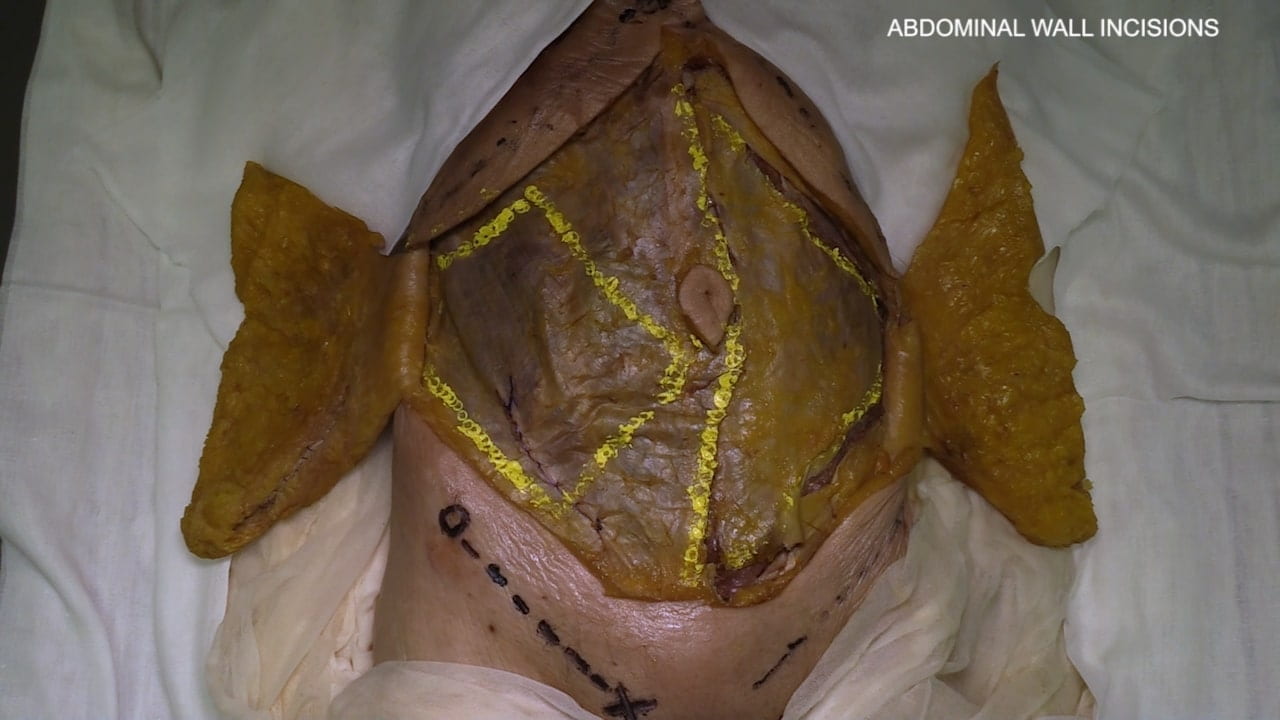
Abdominal Wall Incisions
Abdomen Basics
Abdominal Quadrants
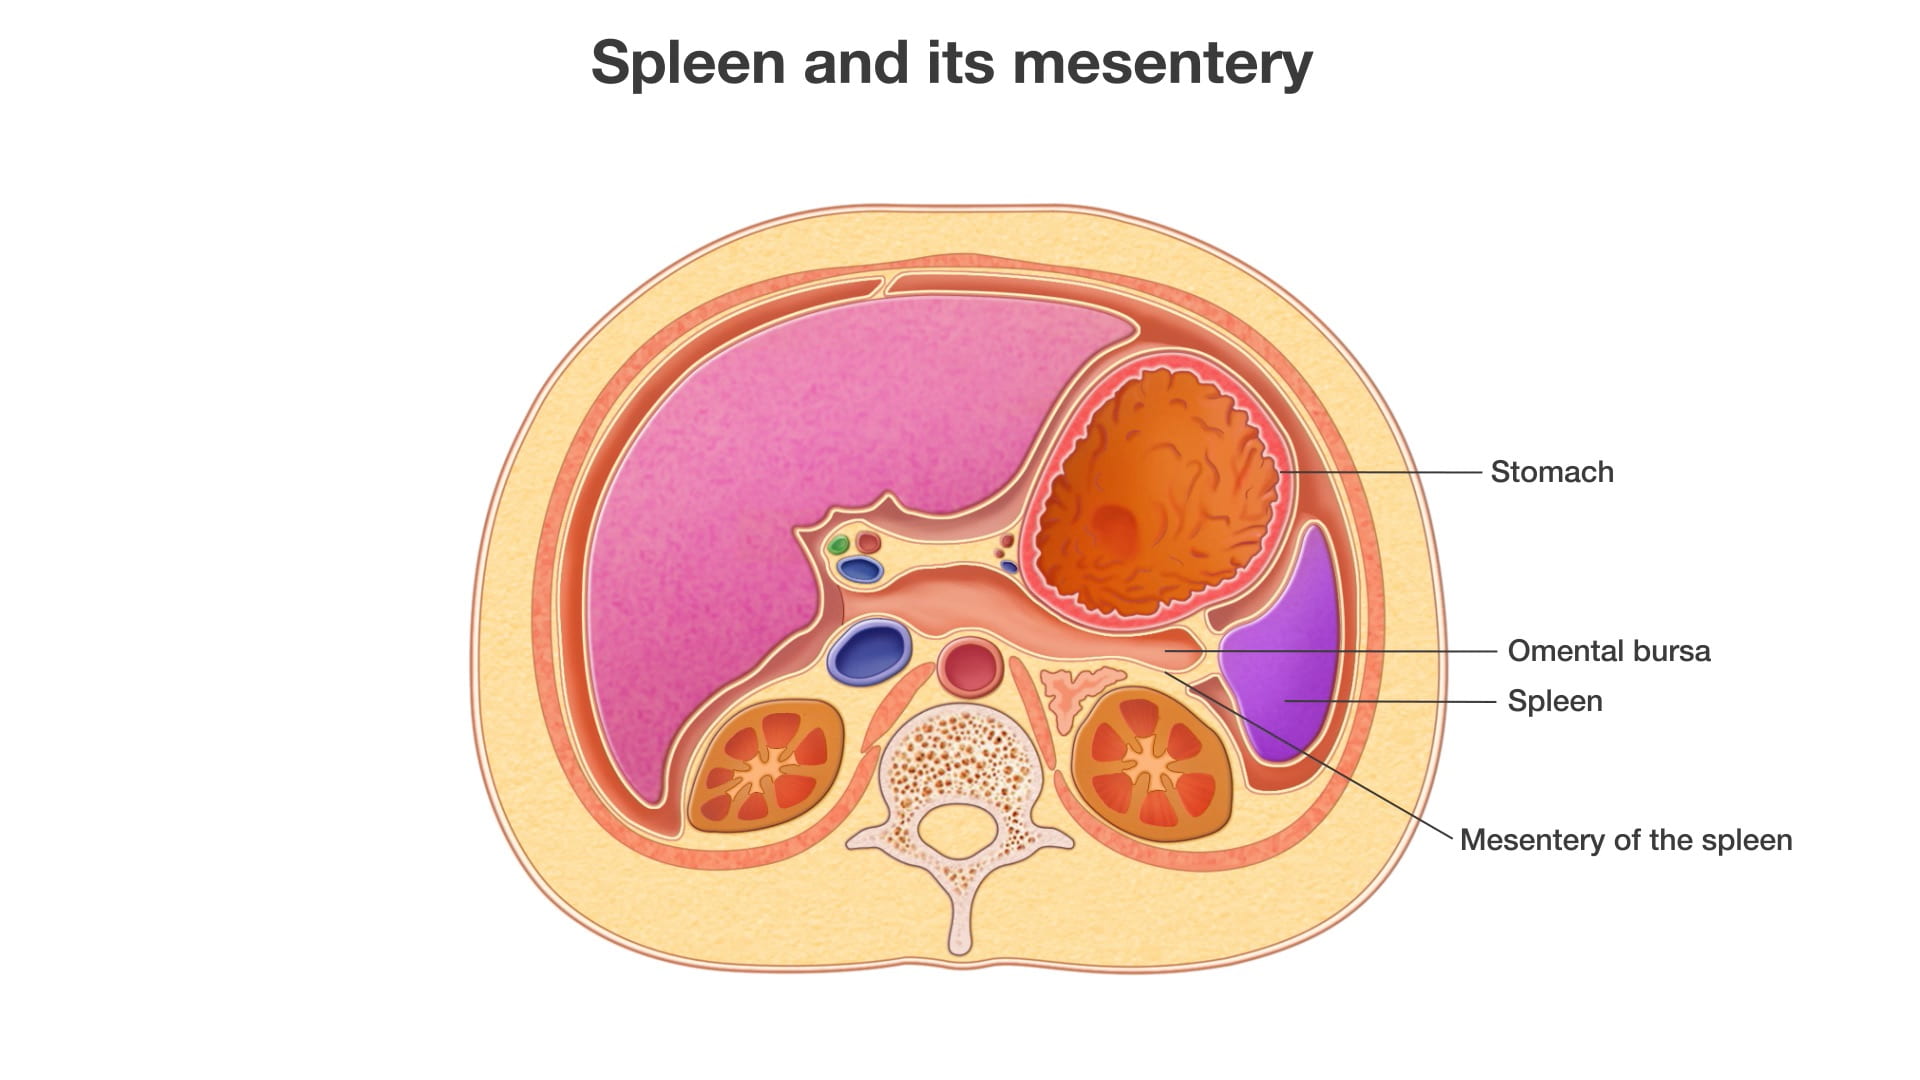
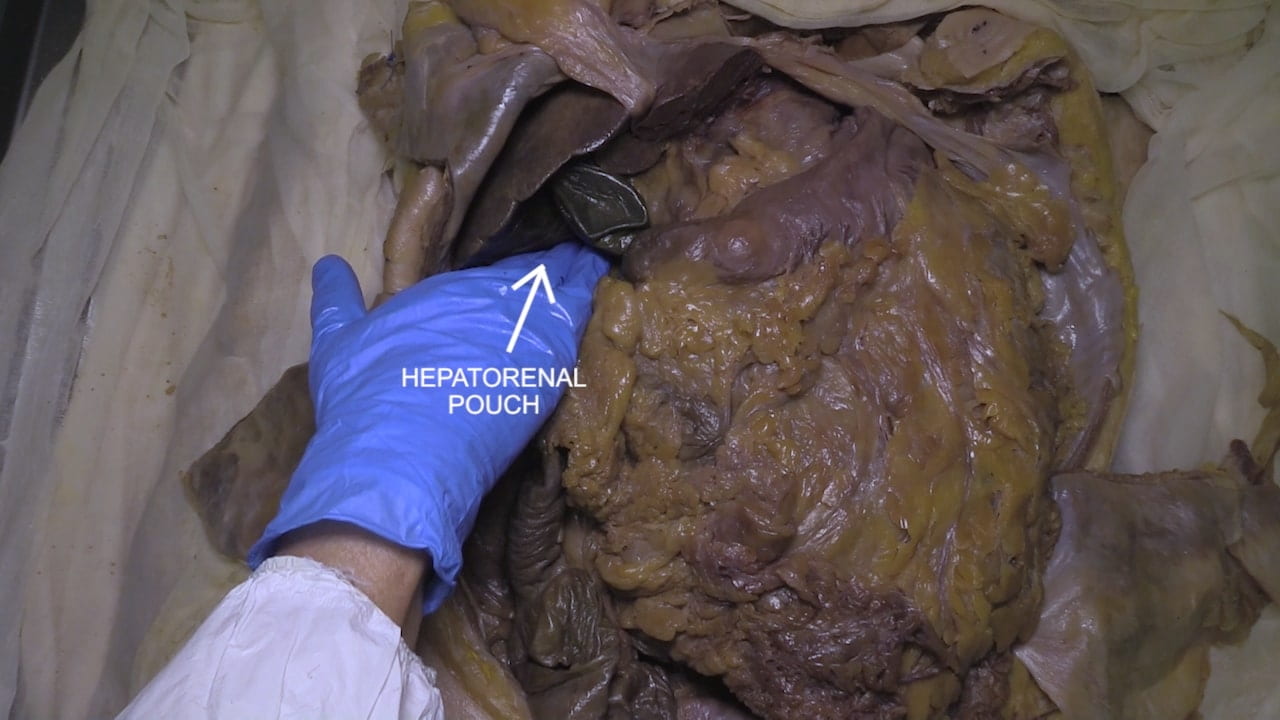
Peritoneum and Mesenteries
Lesser Peritoneal Sac
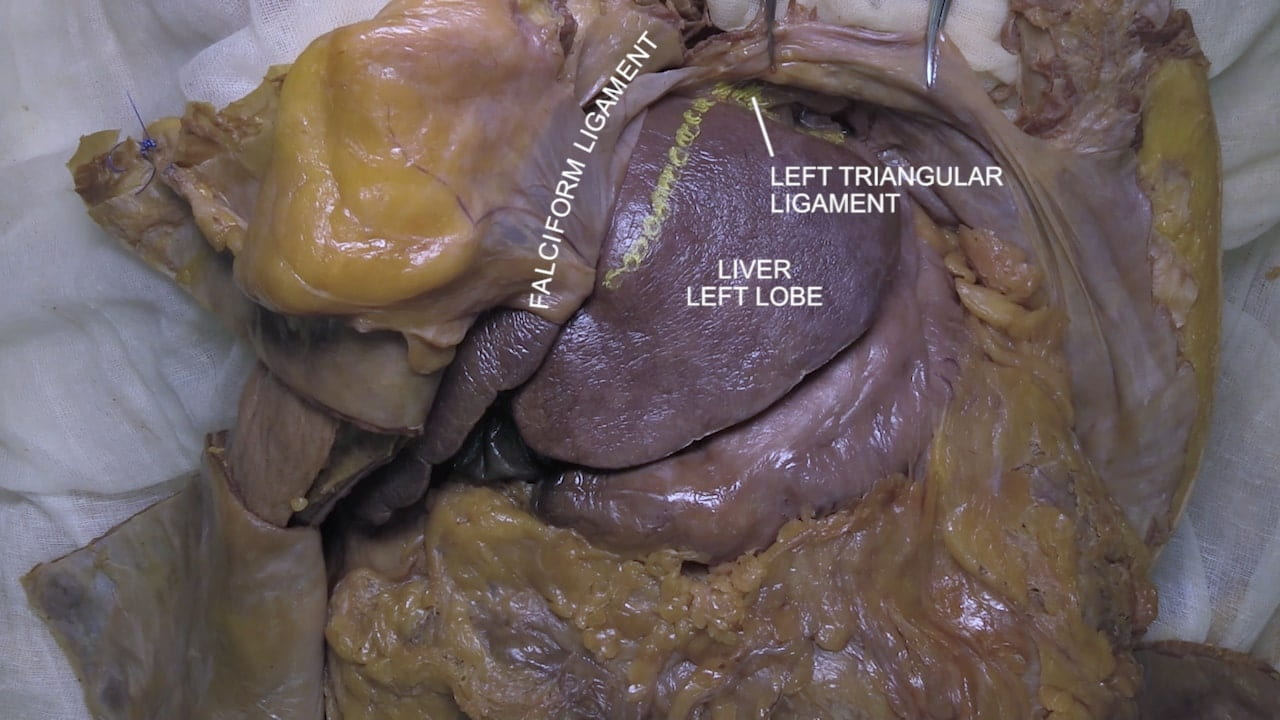
Liver Dissection
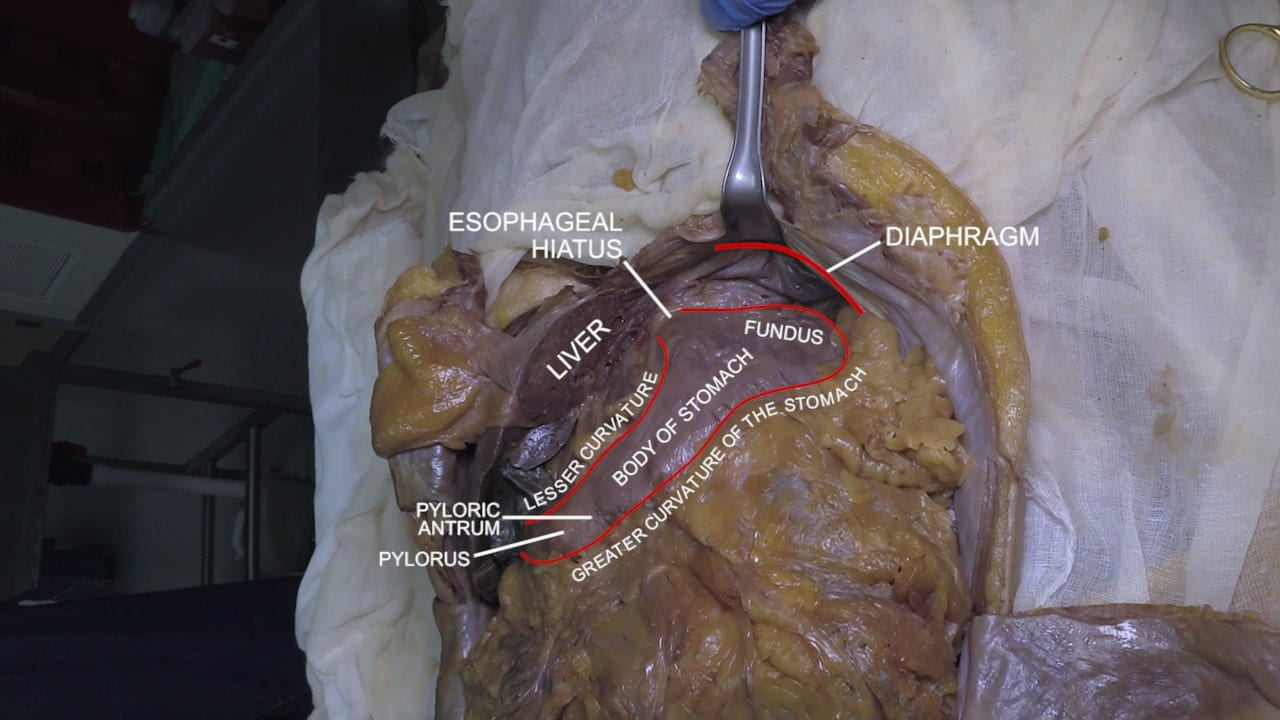
Stomach, Duodenum, and Jejunum
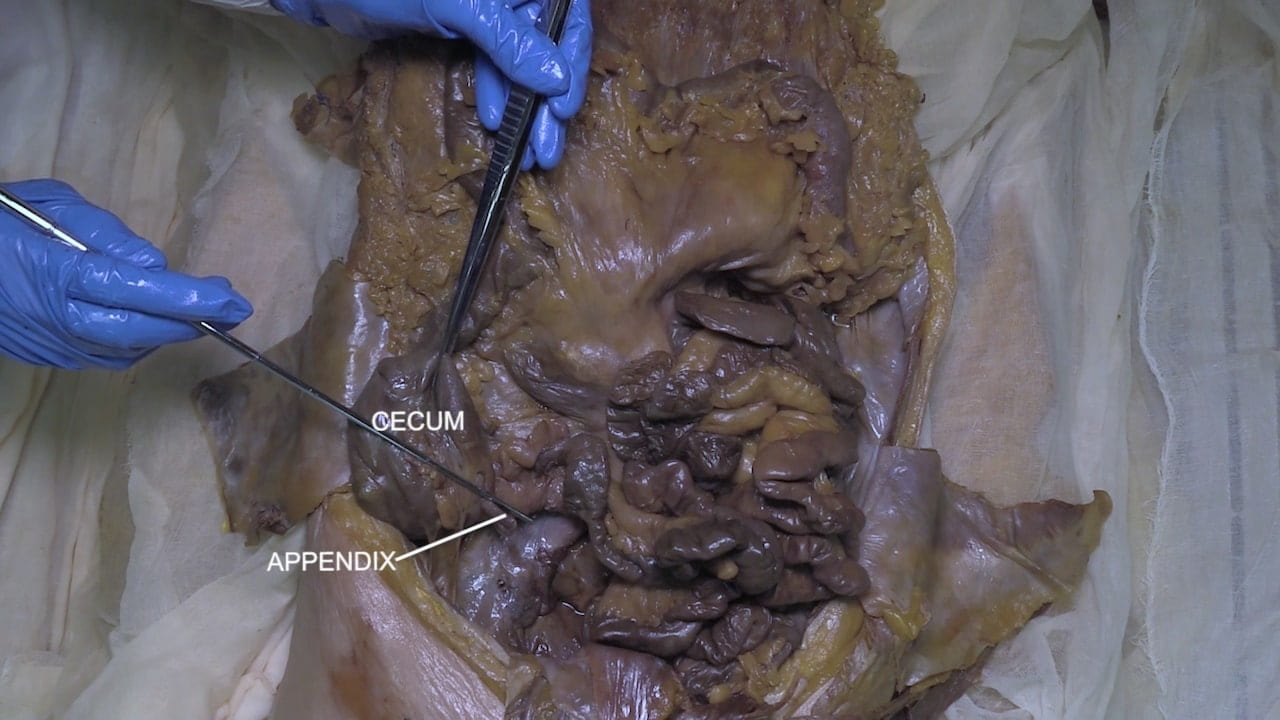
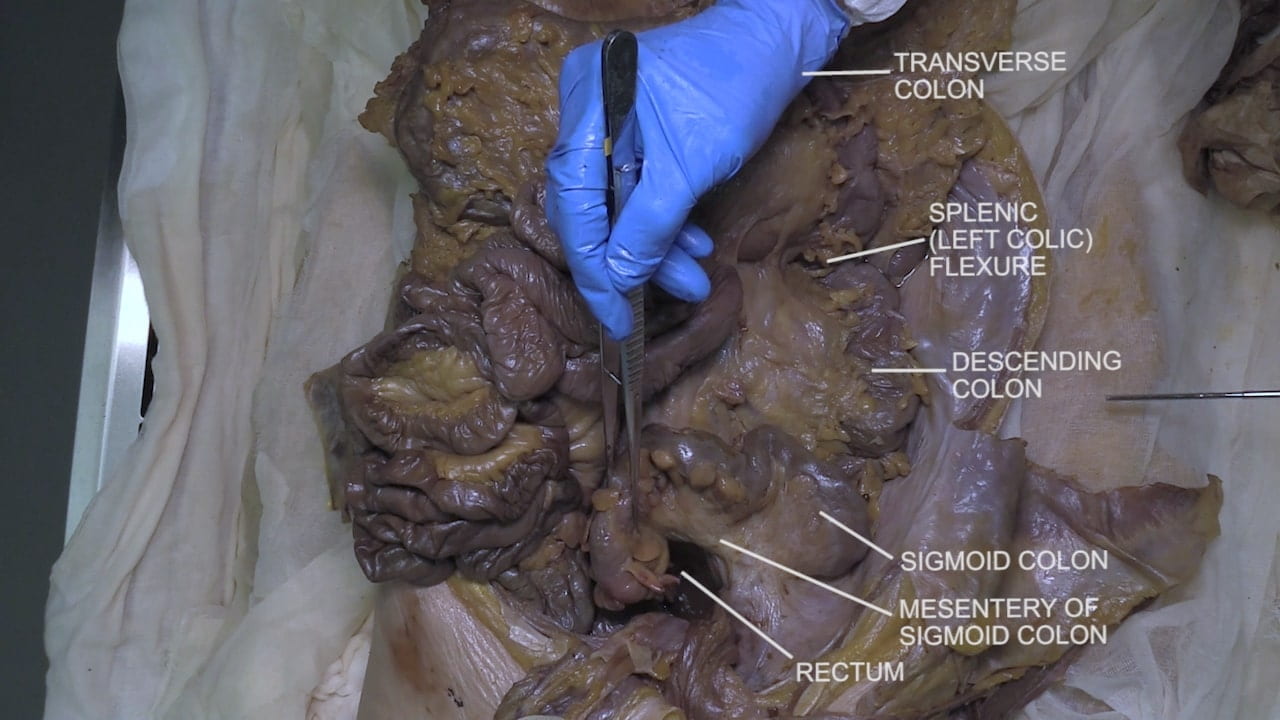
Colon
Anatomy of Trunk
Abdomen Surface Anatomy
Physical Examination of Abdomen
GI Tract Clinical Correlations
Trauma/EM: Volvulus: The intestines and its associated mesentery can twist about itself causing volvulus. In addition to bowel obstruction, recall that the mesentery contains the blood vessels feeding the intestines, so intestinal ischemia may also occur. Volvulus may present as abdominal distention, pain, fever, constipation, bloody stools, and emesis (vomiting); onset of symptoms may be acute or insidious. This presentation overlaps with other GI emergencies therefore imaging is generally indicated. Plain radiography (+/- contrast enema) may reveal signs of volvulus (e.g., “coffee bean” sign). Volvulus can affect any part of the intestines however the sigmoid colon is most affected in adults; small intestines are most affected in children. First-line treatment is endoscopic decompression whereby an endoscope is placed intraorally or rectally and used to untwist the affected section of the GI tract. The risk of recurrence is very high therefore resection of the affected area is generally undertaken after decompression. Patients with peritonitis and other alarming presentation will undergo surgery immediately.
Procedure: Peritoneal Dialysis (PD): In patients whose kidney are no longer working effectively, dialysis can be performed through hemodialysis or peritoneal dialysis. Hemodialysis uses an artificial kidney machine to filter blood. Peritoneal dialysis uses the abdominal peritoneum as a filter in lieu of a filter machine. This is accomplished through introduction of a dialysate solution into the peritoneal cavity (recall that this is a discrete, isolated cavity). This fluid is left in the peritoneal cavity for a specified amount of time during which excess fluids and solutes, toxins, and waste products can diffuse from the blood stream into the dialysate. To enable exchange of this fluid multiple times per day, a permanent PD port is placed into the abdominal wall. Risk for intra-abdominal infection and inflammation (peritonitis) should be considered in this population. Also, the introduction of dialysate increases intra-abdominal pressure so beware “mechanical” complications such as hernias and PD leak (i.e., fluid movement into inappropriate region such as abdominal wall or thorax).
Embryology: Jejunoileal Atresia: One of the most common forms of intestinal obstruction/underdevelopment in neonates is jejunoileal atresia (JIA). JIA arises most commonly due to a vascular accident occurring in utero that impairs perfusion of an intestinal region. Ischemic necrosis subsequently takes place causing resorption of the intestinal region. The location and degree of perfusion impairment determine the location and degree of JIA: may affect the jejunum, ileum, or both and may manifest as a narrowing (stenosis) or complete absence of an intestinal region. Diagnosis can generally be made during prenatal screening; ultrasound will show polyhydramnios (too much fluid in amniotic fluid; see future clinical correlations for more information) or dilated bowel. Neonates may have eating difficulties, emesis, abdominal distention, and failure to pass stool. JIA is surgically treated through resection of the proximal and distal aspects of affected bowel and end-to-end anastomosis (perhaps you can give this technique a try in lab!)
Surgery/Autopsy: Bariatric Surgery: Bariatric surgery refers to a class of procedures that alter GI anatomy with the intention of limiting food intake and/or nutrient absorption. A common form of bariatric surgery is Roux-en-Y gastric bypass. In the Roux-en-Y variation, several divisions and anastomoses are created (also see image below):
- The stomach is divided such that a small portion is left connected to the esophagus; this is the gastric pouch (i.e., patient’s “new stomach”)
- The duodenum and the jejunum are divided (What landmark is used here? Ask in lab!)
- The jejunum is connected directly to the gastric pouch, while the duodenum is connected to a distal portion of the jejunum (creates the Y-shape which is represented in name; see below image)
Realize that the bypassed portion of the stomach remains connected to the duodenum. Through these manipulations, several things are achieved: 1) the “new stomach” is significantly smaller thus limiting food intake, 2) the duodenum, a primary site for digestion, is bypassed thus limiting the amount of fat/calories that can be absorbed, 3) the hepatobiliarypancreatic axis remains connected to the overall system.
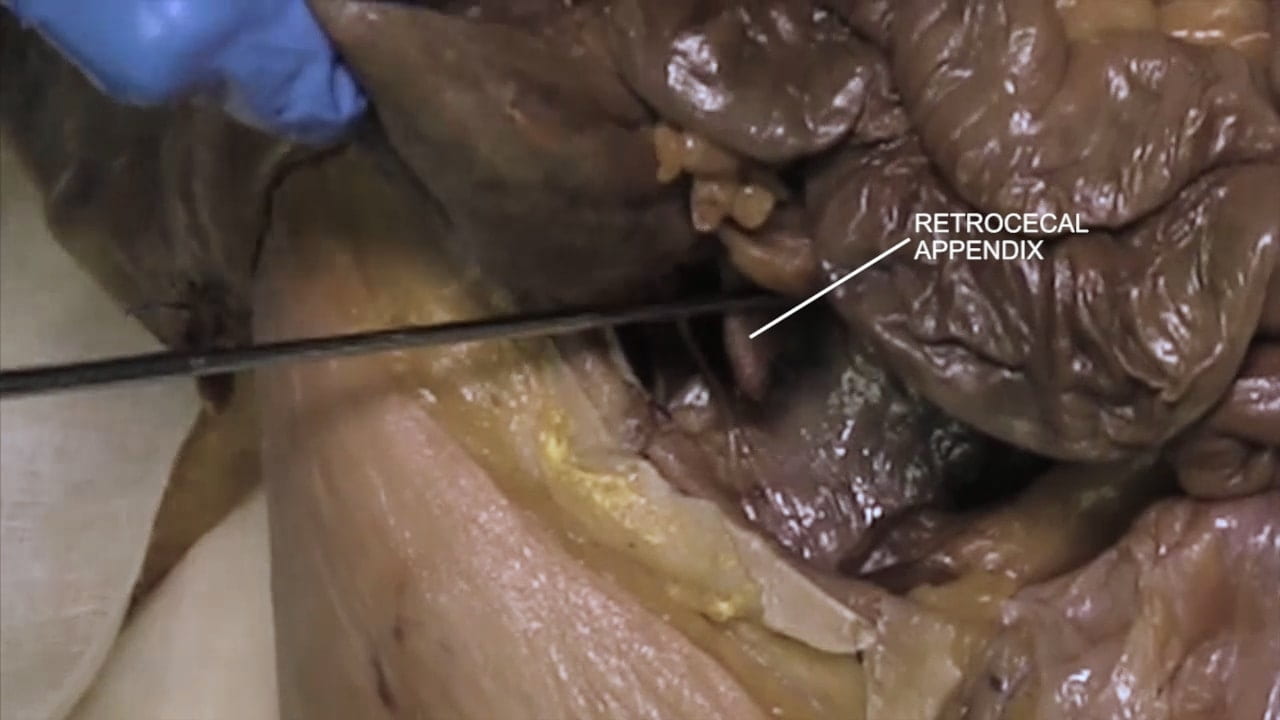
Anatomical Variations: Variations in Appendix: ~7% of the population will develop appendicitis so unsurprisingly appendectomy is amongst the most common general surgery operations. Accordingly, knowledge of a patient’s appendix anatomy is critical. Retrocecal positioning (i.e., posterior to the cecum) is the most common variant (~25-71% of patients). However, the appendix can be prececal (anterior to the cecum) or prececal (lateral to the cecum) as well. The appendix may also be non-cecal (e.g., ileal).
Imaging: All imaging modalities can be utilized for the abdomen. Plain x-ray is a good start to look at overall bowel gas pattern. Ultrasound can look for abnormalities of the viscera but can be limited due to artifact, and cannot evaluate the bowel well due to bowel gas (although has some special utilization for bowel in the pediatric population). CT is the go-to for evaluating the viscera and bowel in patients with expected pathology…everything from acute appendicitis to following malignancy. MRI is usually used to “problem solve” findings, such as to better characterize a visceral tumor compared to CT, with some other special uses such as visualizing the biliary tree.
Imaging Correlate: We will be working on the Guided Anatomy Abdomen radiology exercise. See imaging from Table 7 to look at a large liver cyst or Table 25 for a gallbladder mass.
Images (Click to Enlarge)


Left: two unopened segments of large bowel from a patient with volvulus (larger segment proximal to the smaller); Right: Same segments of bowel opened. Note the flattened mucosa in the dilated portion of bowel.

(10.1007/978-3-030-81488-5_64)

(Tri State Bariatrics)

